

This document describes standards for configuring multimodal instructions and enabling device interaction. It covers instruction design, time formats, interaction flows, and developer support. The goal is to seamlessly connect intent models with device control, establishing a standardized and reliable interaction process.
Introduction to instructions
The multimodal interaction cloud sends instructions to terminals to translate user intents into specific actions. Use instructions to extend features and control device hardware, media playback, and applications. Examples include turning devices on or off, adjusting settings, managing playback progress, or navigating within an application. Instructions are highly extensible. A set of common preset instructions is provided, and you can also create custom instructions as needed.
For more information about how to configure instructions in the console, see Application configuration.
Instruction configuration tips
To ensure the intent model accurately understands and invokes the correct tool, follow strict tool definition standards. The following key points and examples help you define tools effectively.
Write clear and accurate tool descriptions
- Goal: Help the intent model understand what the tool does.
- Note: Avoid vague language. Ensure the description matches the tool’s actual function.
- Good:
"Query the weather for a specific date" - Bad:
"Check weather"(Too broad. It might be mistaken for other weather-related operations.)
Define parameters without ambiguity
- Goal: Clearly define the purpose and value range for each parameter.
- Recommendation: Use enumerations to limit parameter options whenever possible. Enumeration definition is not yet available, so define them in the description. For open-ended inputs, provide a detailed description.
Be concise but comprehensive
- Goal: Keep tool definitions simple but complete.
- Note: Do not list too many examples. Include only necessary explanations.
Merge similar parameters logically
When designing tool calling interfaces, merging similar parameters means combining multiple parameters that have similar functions or can be processed together into a single parameter. This simplifies the interface definition, reduces redundancy, and makes tool calls more intuitive. The following examples show how to merge parameters logically:
Example 1: Control a media player
Suppose you have two separate tool functions to control a media player’s state: play_media to start playback and pause_media to pause it. Both tools control the playback state. You can merge them into a single tool, control_playback, and use an action parameter to specify the command.
Original definition
-
play_media
- Parameters: None
-
pause_media
- Parameters: None
Merged definition
-
control_playback
-
Parameters:
- action: {"type": "string", "description": "Specifies the action to perform (for example, 'play' or 'pause')", "enum": ["play", "pause"]}
-
Parameters:
Example 2: Set a reminder
Consider an application scenario for setting alarms with two different tools: set_alarm for a one-time alarm and set_repeating_alarm for a recurring alarm. Both tools configure alarms but have different trigger conditions. You can merge them by adding a new parameter for the repeat pattern.
Original definition
-
set_alarm
-
Parameters:
- time: Human-readable time
-
Parameters:
-
set_repeating_alarm
-
Parameters:
- repeat_pattern: Human-readable recurring date
- time: Human-readable time
-
Parameters:
Merged definition
-
set_alarm
-
Parameters:
- time: Human-readable time
- repeat_pattern: {"type": ["string", "null"], "description": "If set, this is a recurring alarm. Otherwise, it is a one-time alarm. Supports human-readable recurring date formats. The default value is null, which indicates a non-recurring alarm."}
-
Parameters:
repeat_pattern parameter lets you support both one-time and recurring alarms. This avoids creating two very similar tools.
Summary
To merge similar parameters logically, identify which parameters perform the same or highly related tasks. Then, find a way to unify these behaviors. This simplifies system design, improves code maintainability, and enhances user experience. However, do not overcomplicate a single tool’s function when merging parameters. This can cause confusion or difficulty in use.
Human-readable time format
date_, the system interprets it as a humanReadableDate.
If a parameter name starts with time_, the system interprets it as a humanReadableTime.
Custom tool JSON file format
You can directly upload definitions for all tools. The file must be in JSON format. The JSON schema is as follows.
1. Definition structure
Field name | Type | Required | Description |
|
| Yes | The unique identifier for the tool. It can only contain letters, numbers, and underscores. We recommend using |
|
| Yes | Crucial. Describes the tool's function and applicable scenarios. The model uses this description to decide whether to call the tool. |
|
| Yes | Defines the parameters the tool accepts. It must be an object that conforms to the JSON Schema. |
parametersinternal structure
type: Must be"object".properties: Defines the specific key-value pairs. Each key represents a parameter.required: A string array that lists the names of all required parameters.
Provide model responses when sending instructions
Console configuration
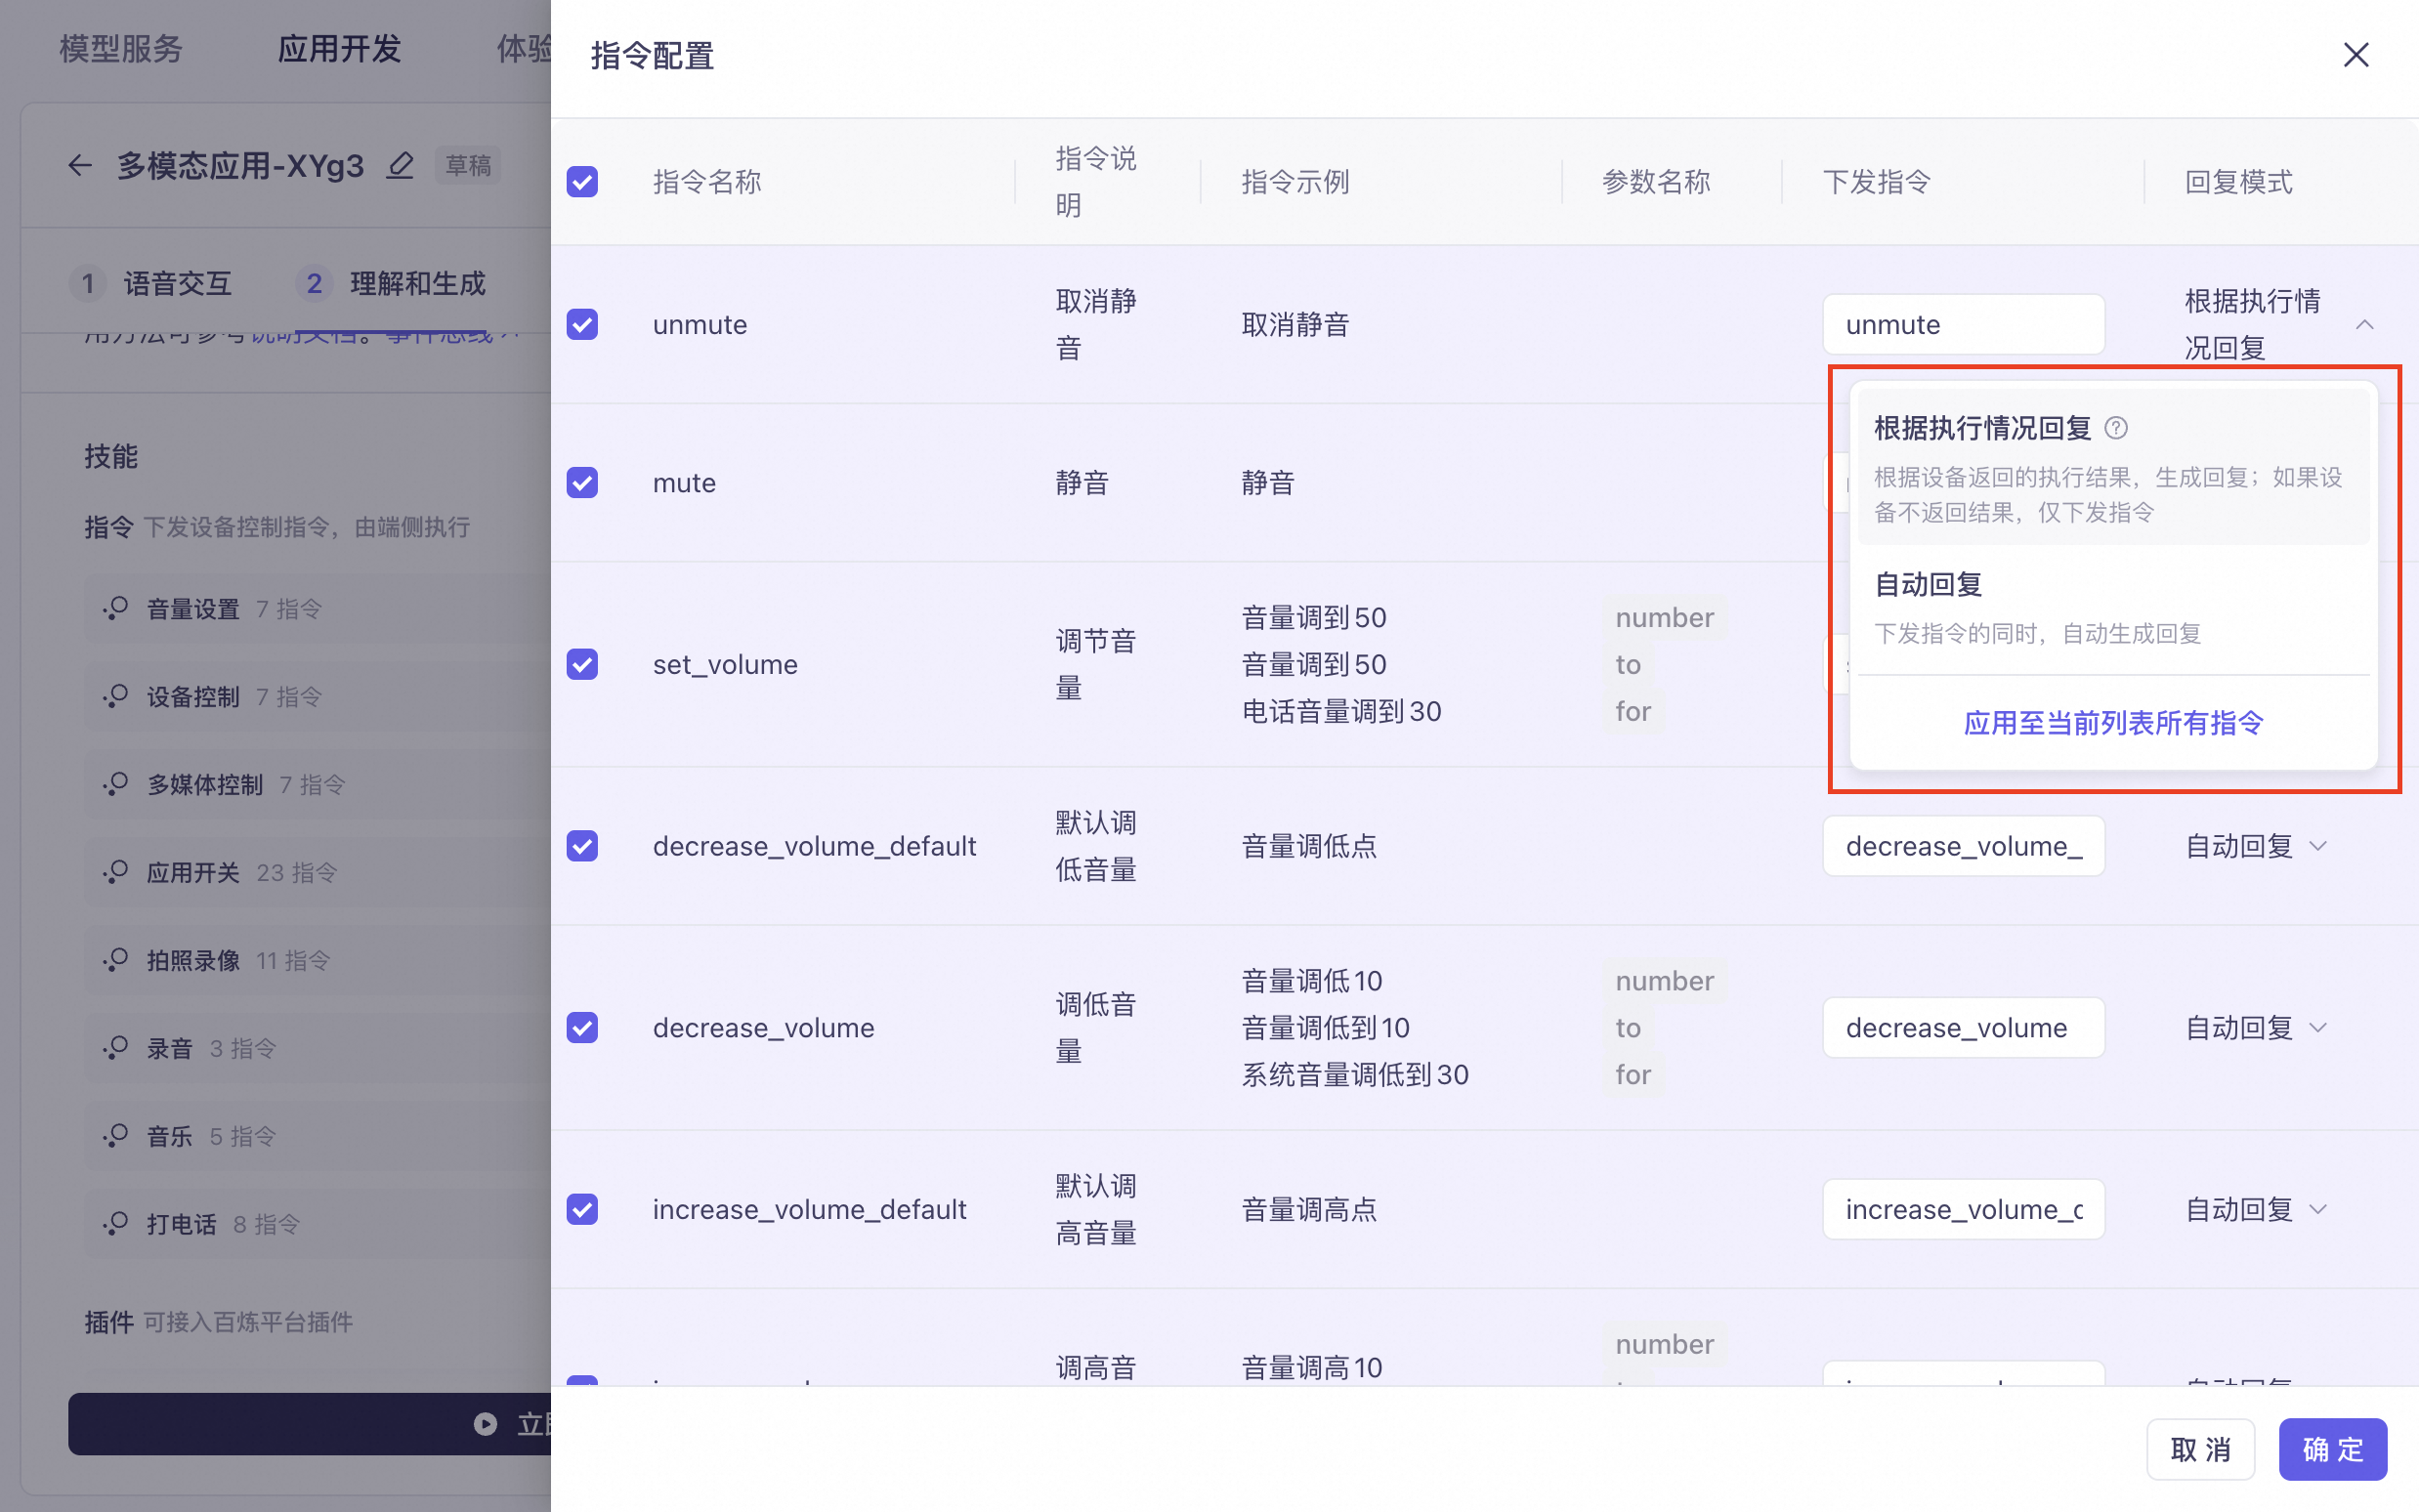
To provide a model response while sending an instruction, select a reply mode on the Settings page:
- Reply based on execution status (default): After sending the instruction, the system waits for a success or failure message from the device. The model then generates a corresponding reply, such as "The air conditioner has been set to 26 degrees" or "The volume is already at maximum and cannot be increased further."
- Auto-reply: Automatically outputs a reply when the instruction is sent.
Device-side instruction acceptance
For example, if the unmute skill is configured to require a reply.
The result of sending the "unmute" voice command is:
payload.output.extra_info.commands is the instruction execution result.
When you select "Reply based on execution status", the result includes a command_request_id. Use this ID as the key when replying with the result.
Device-side instruction reply
After you receive an instruction or an Agent result, execute it on the device. You obtain a success or failure result. Sync this result with the server-side by submitting it through the following interface:
Parameter | Level 1 parameter | Level 2 parameter | Level 3 parameter | Level 4 parameter | Description |
Skill response/Third-party Agent callback execution result | |||||
biz_params | command_results[] | command_request_id | string | Request ID | |
invoke_result | Execution result | ||||
content | Object | Varies by result. For more information, see the unified device-side return specification. | |||
structuredContent | JSON object | Structured return information | |||
structuredContent.success | Boolean | Indicates whether the operation was successful. | |||
invoke_result.content is the data part passed from the device to the Agent. We recommend using the following unified device-side return format:
Parameter name | Type | Meaning |
content | Object | Varies by result. For more information, see the text content, image content, and audio content sections below. |