
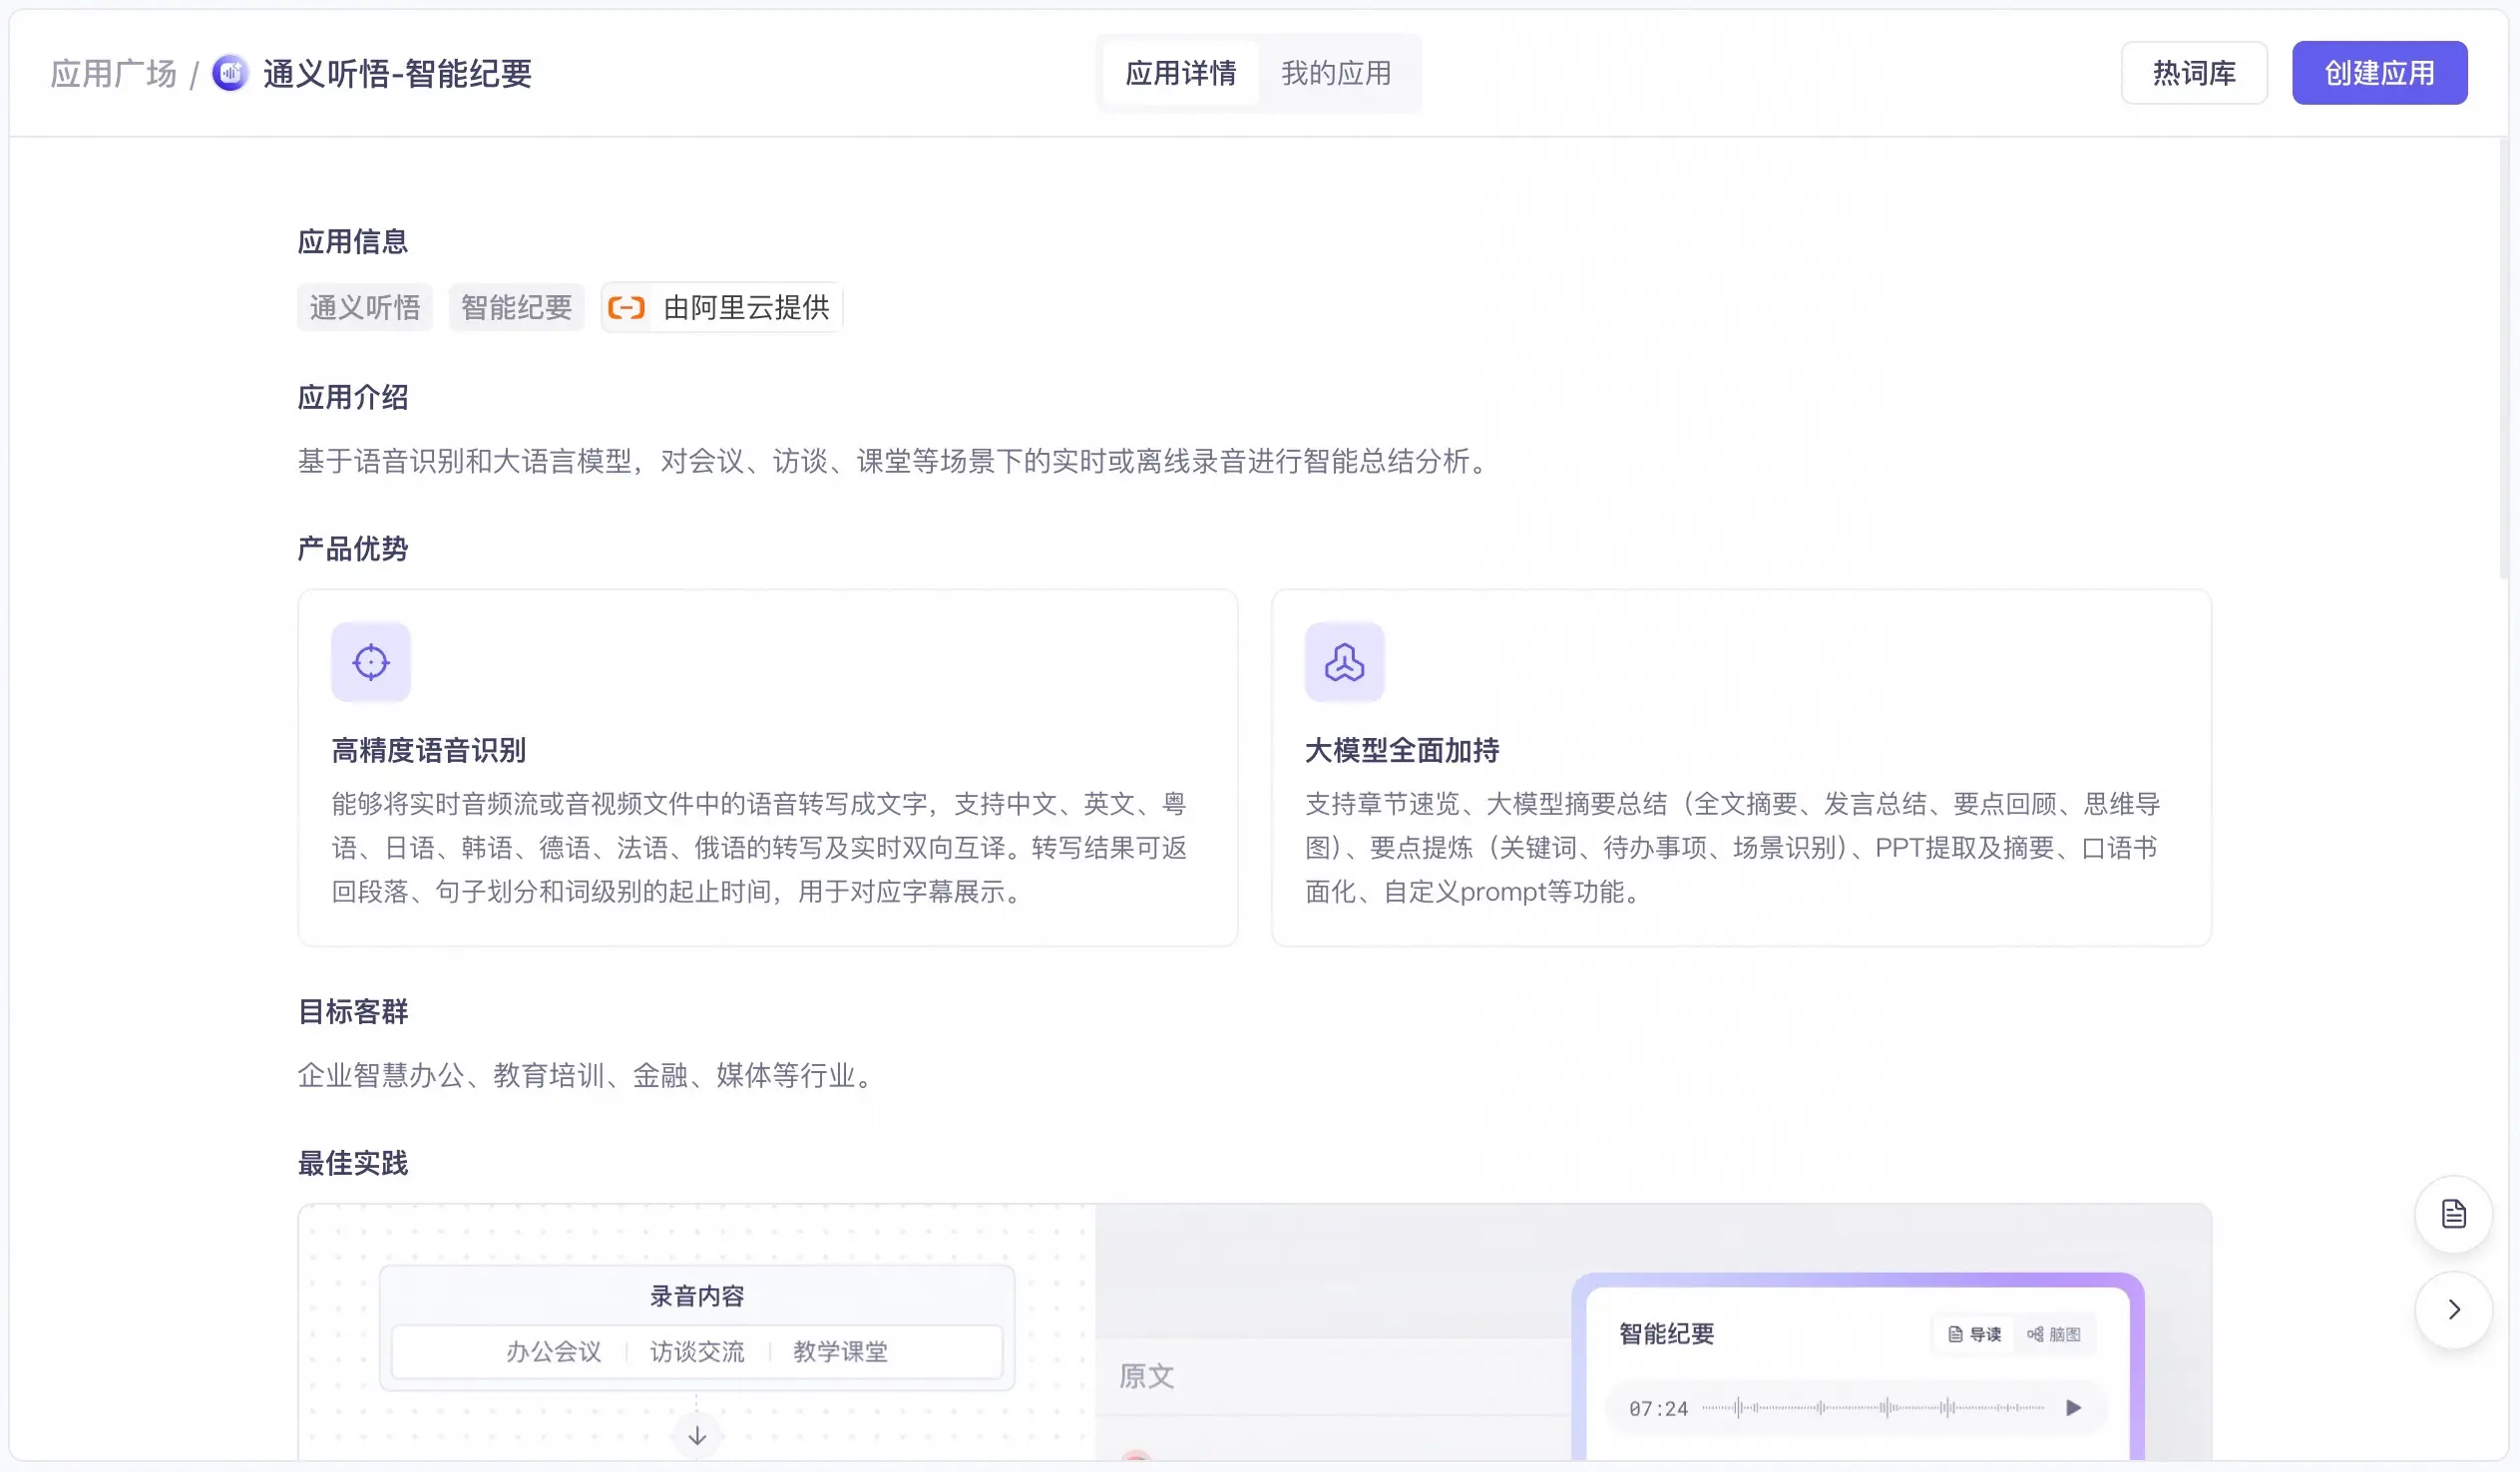
This topic describes how to configure and use the Tingwu Intelligent Summary Agent.
Preparations
Activate the Tingwu Agent service.
After activation, you can use all Tingwu Agent services on the Alibaba Cloud Model Studio platform.
1. Create an application
Click the Create Application button in the center or upper-right corner of the console to create an application. You can create up to 100 applications.
2. Configure and test
After you configure and test the application, you can experience the results multiple times. After you confirm that the results meet your expectations, publish the application. Then, see API integration for information about making API calls.
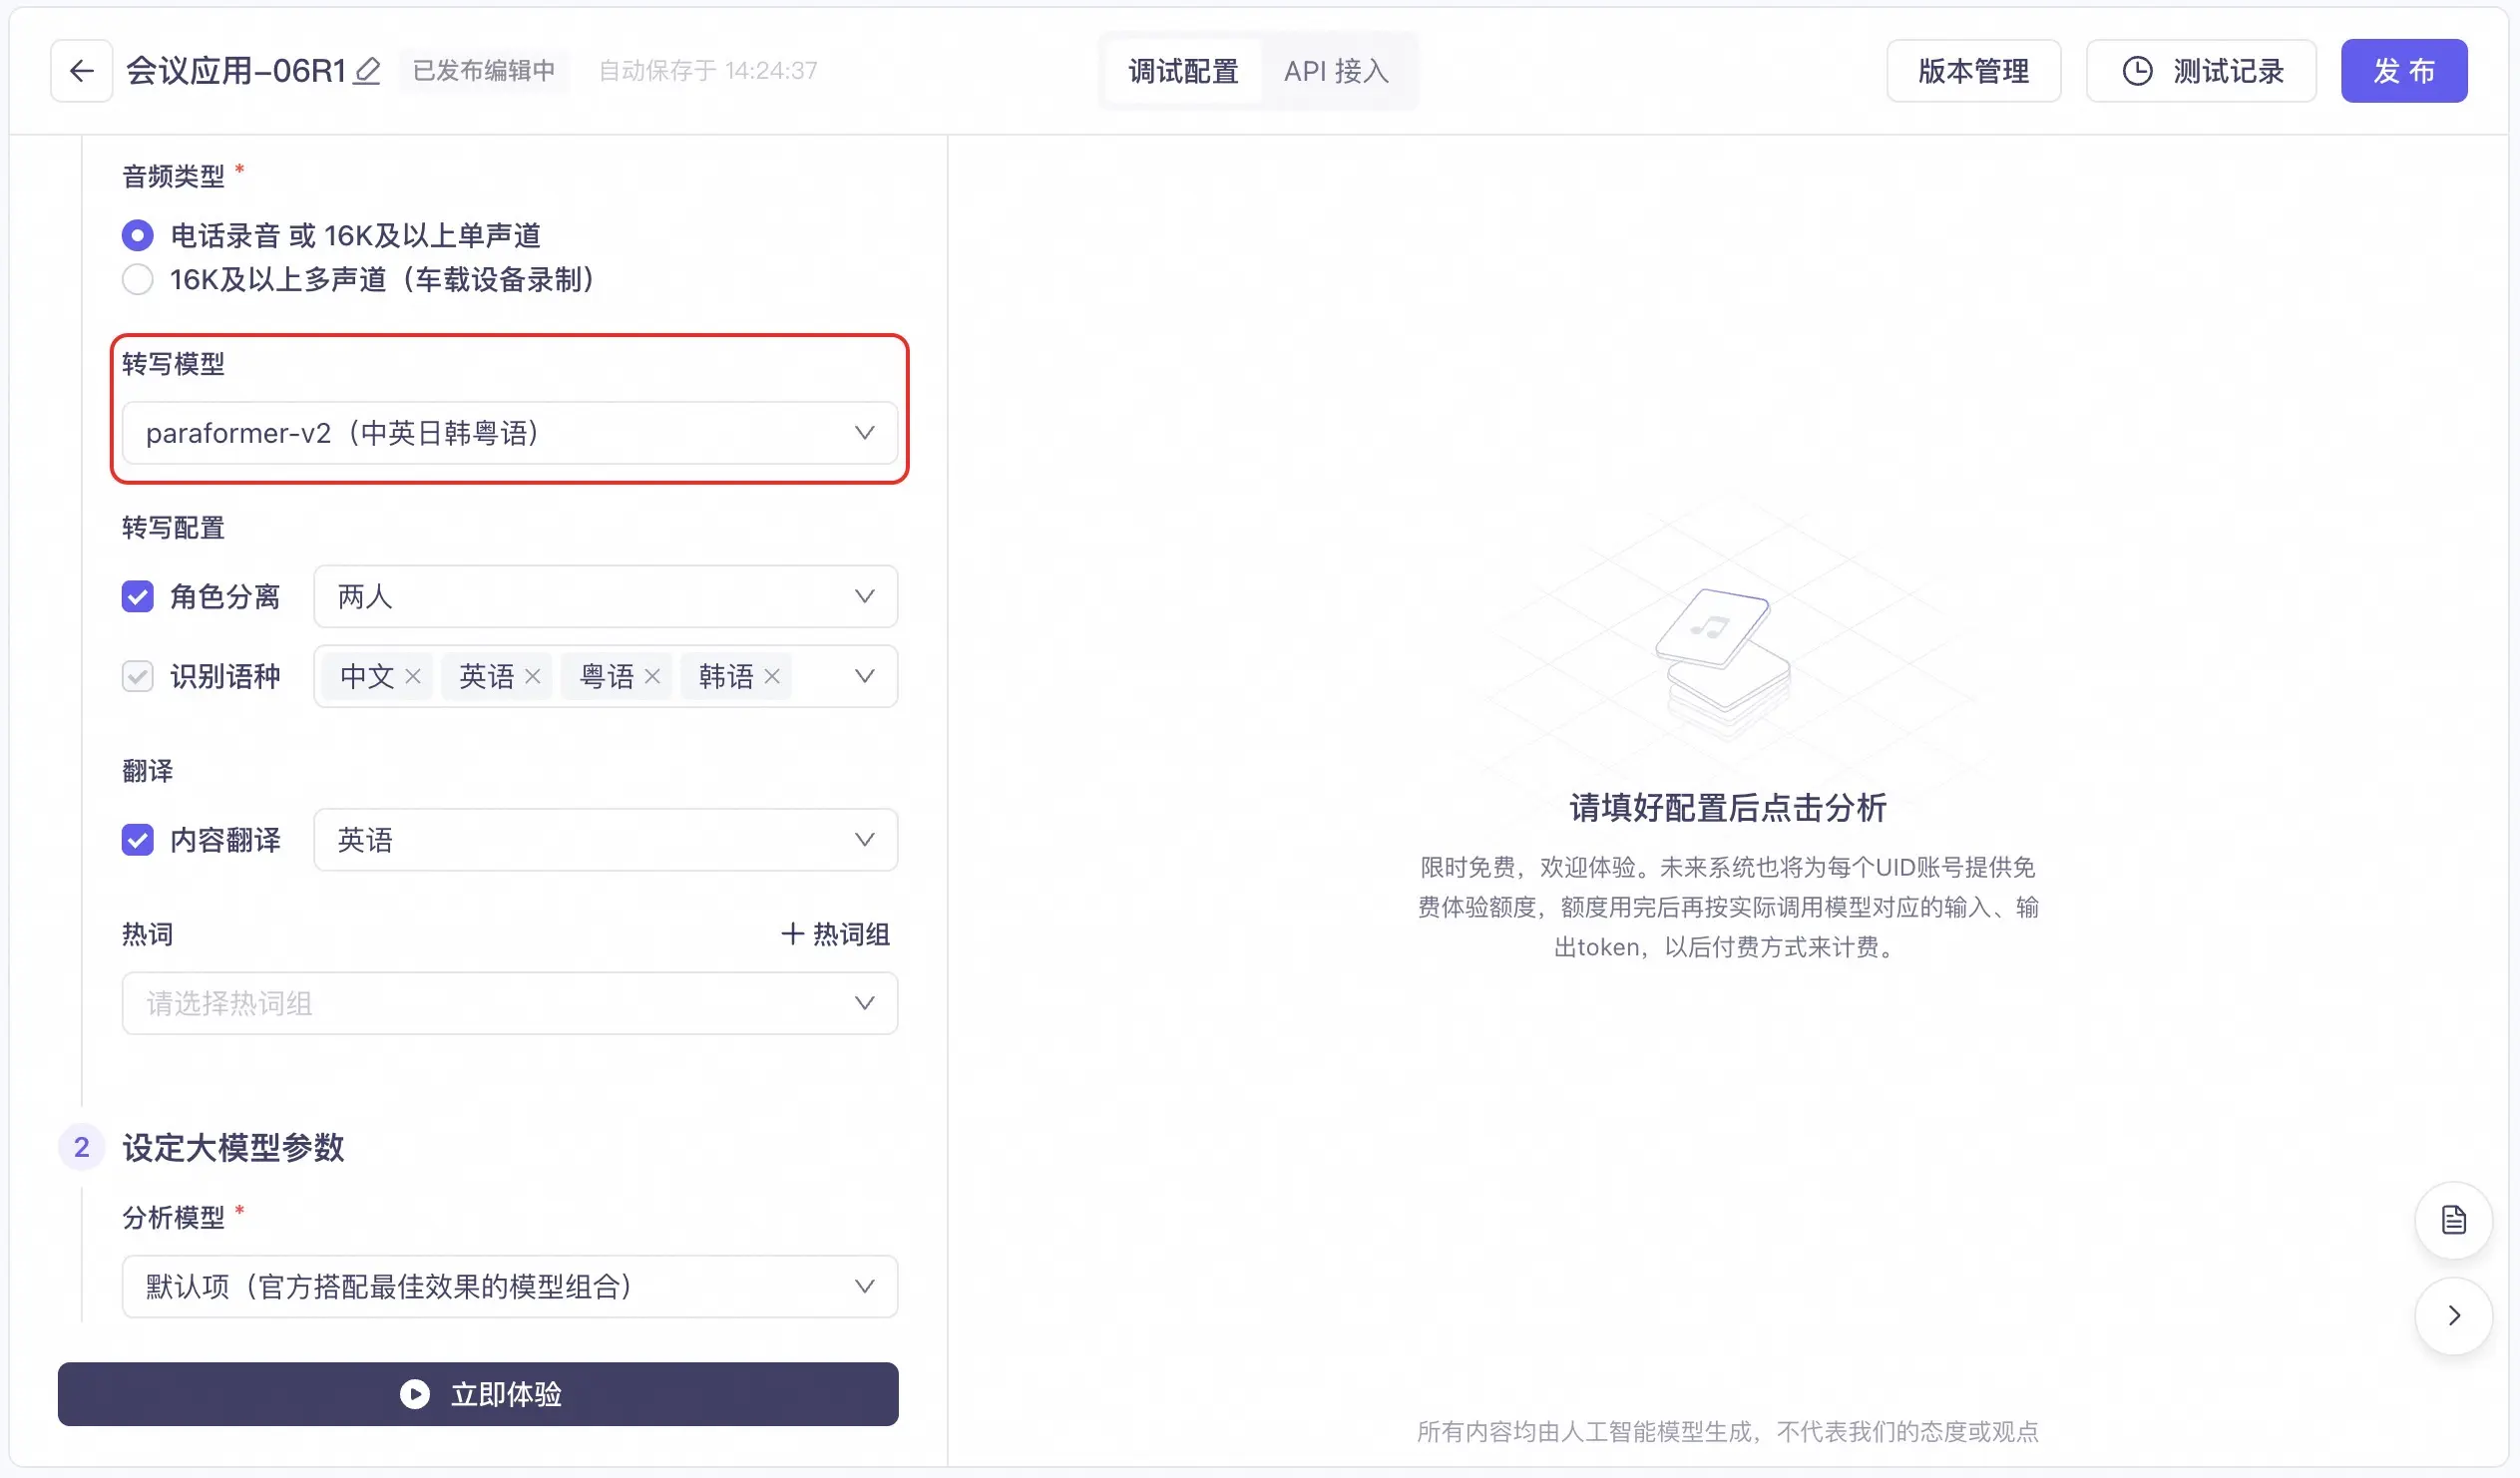
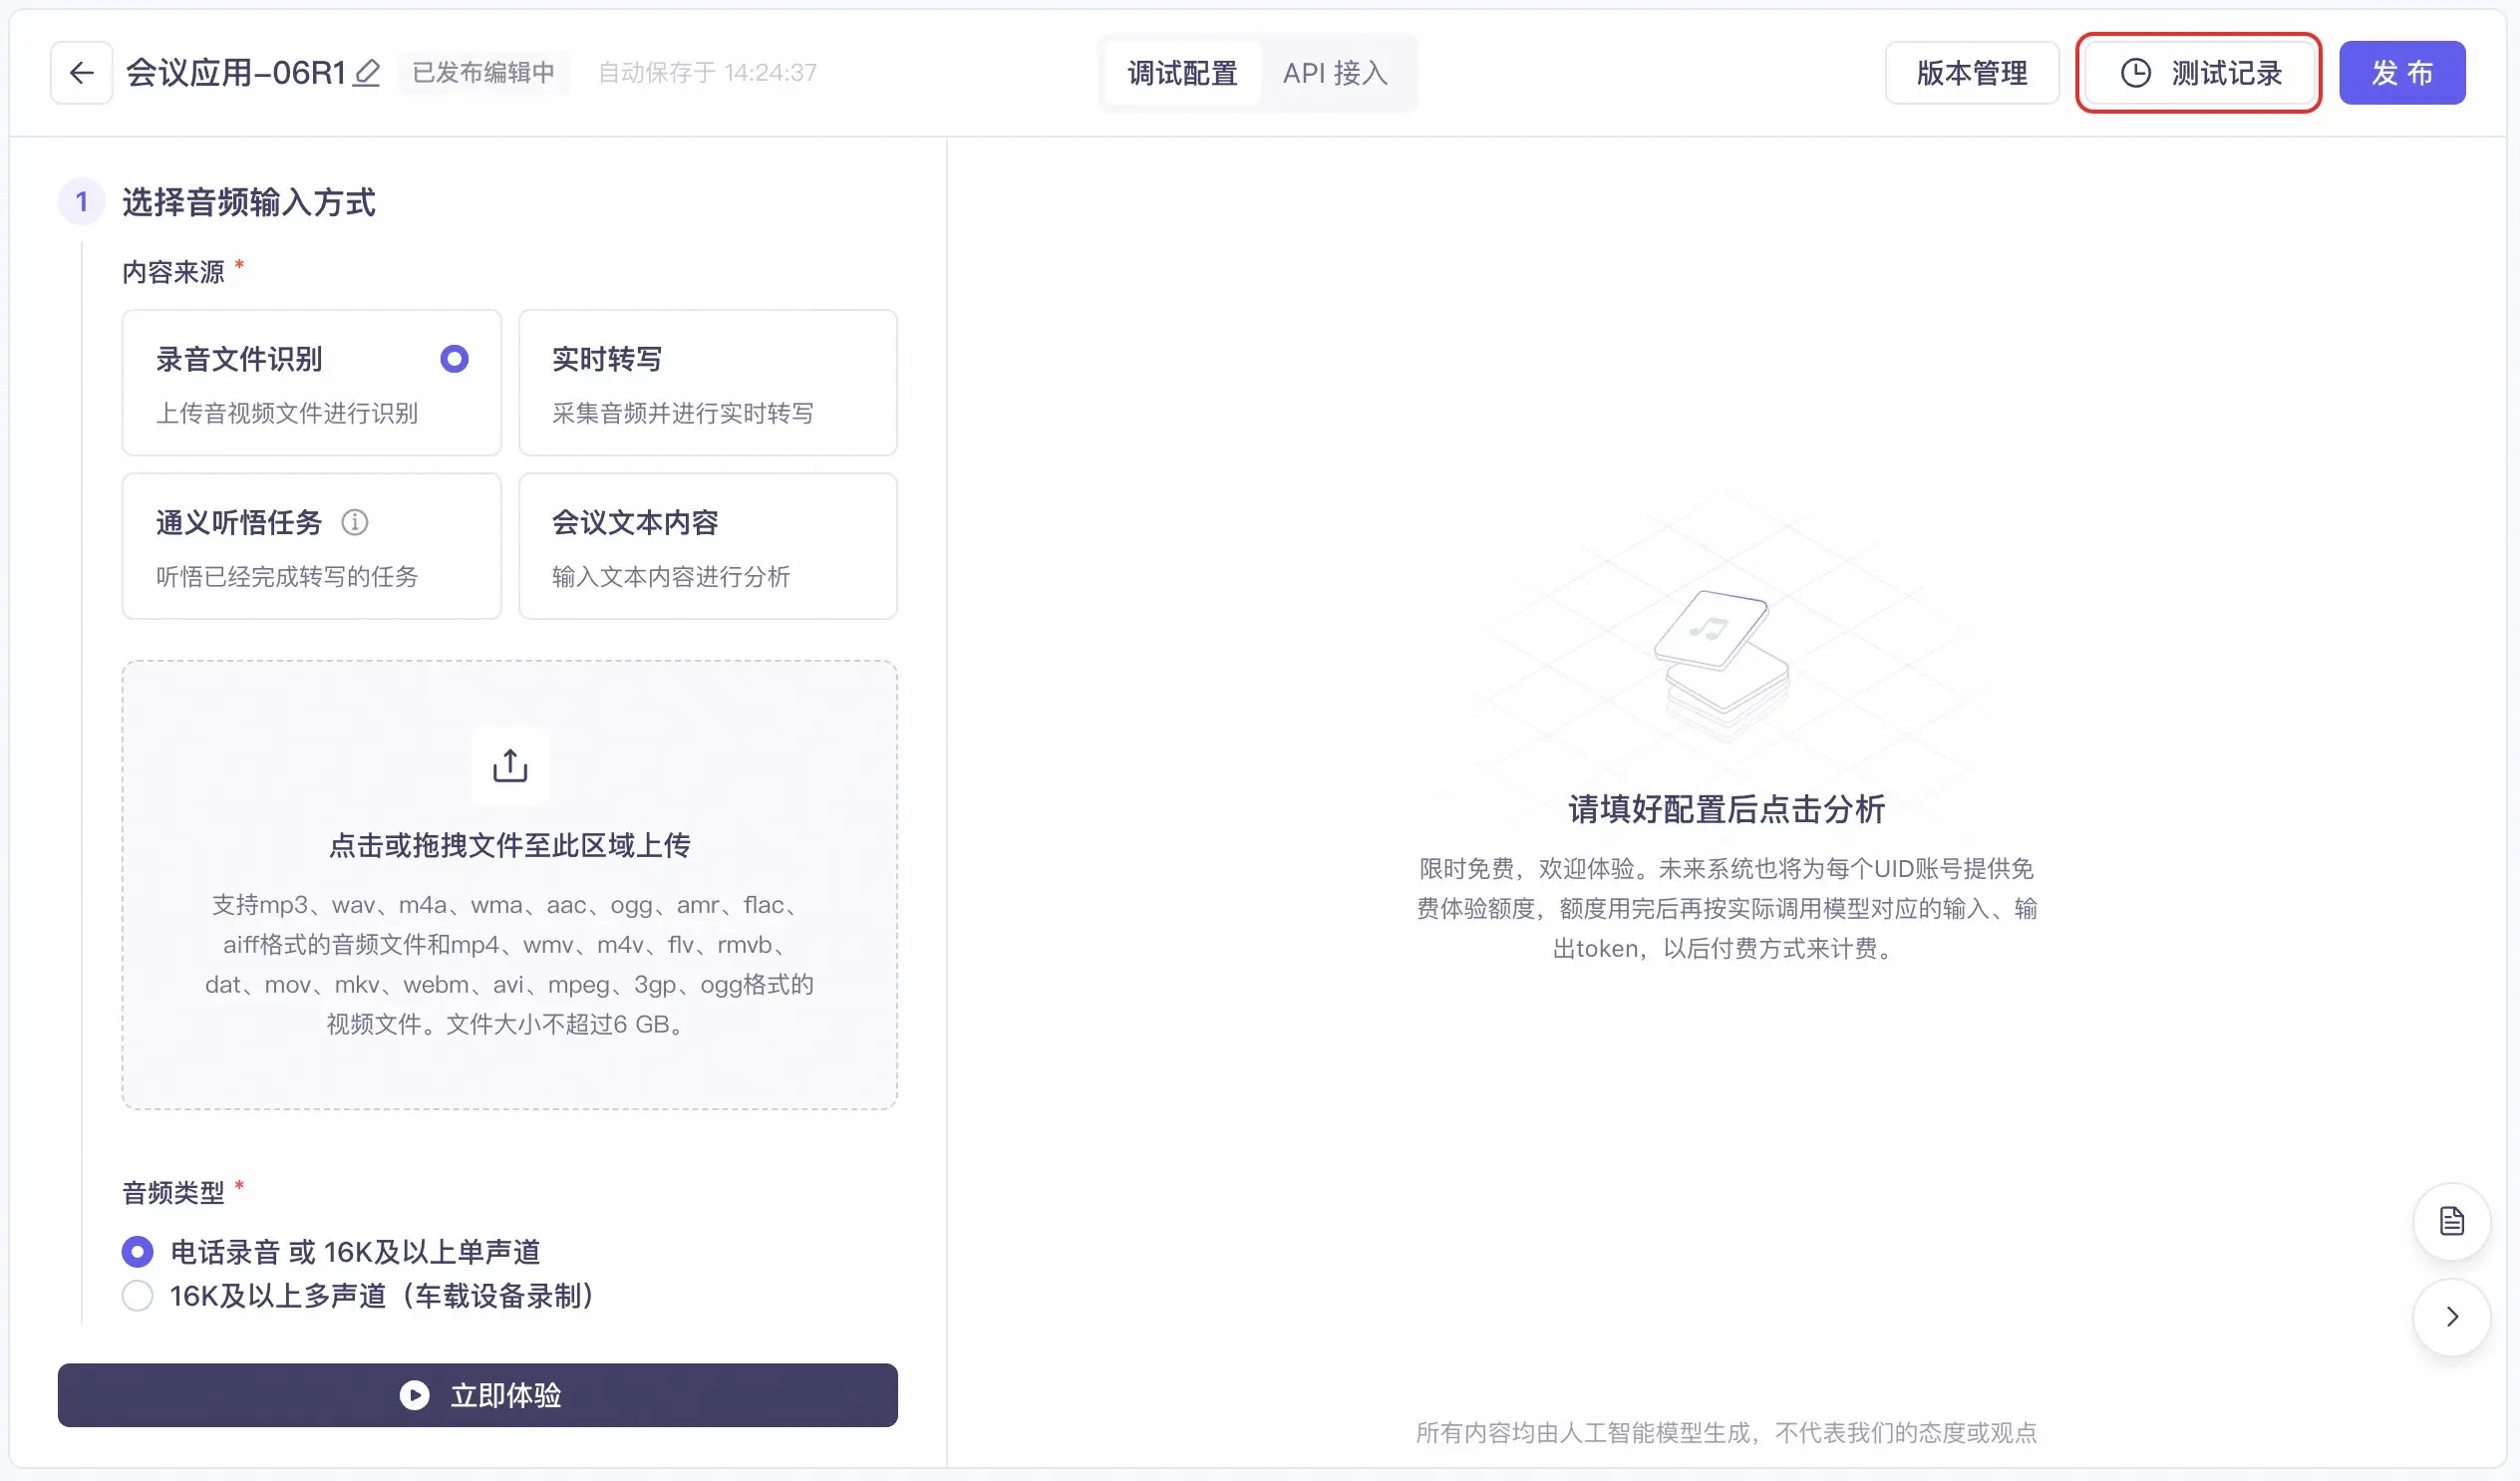
1. Select an audio input method
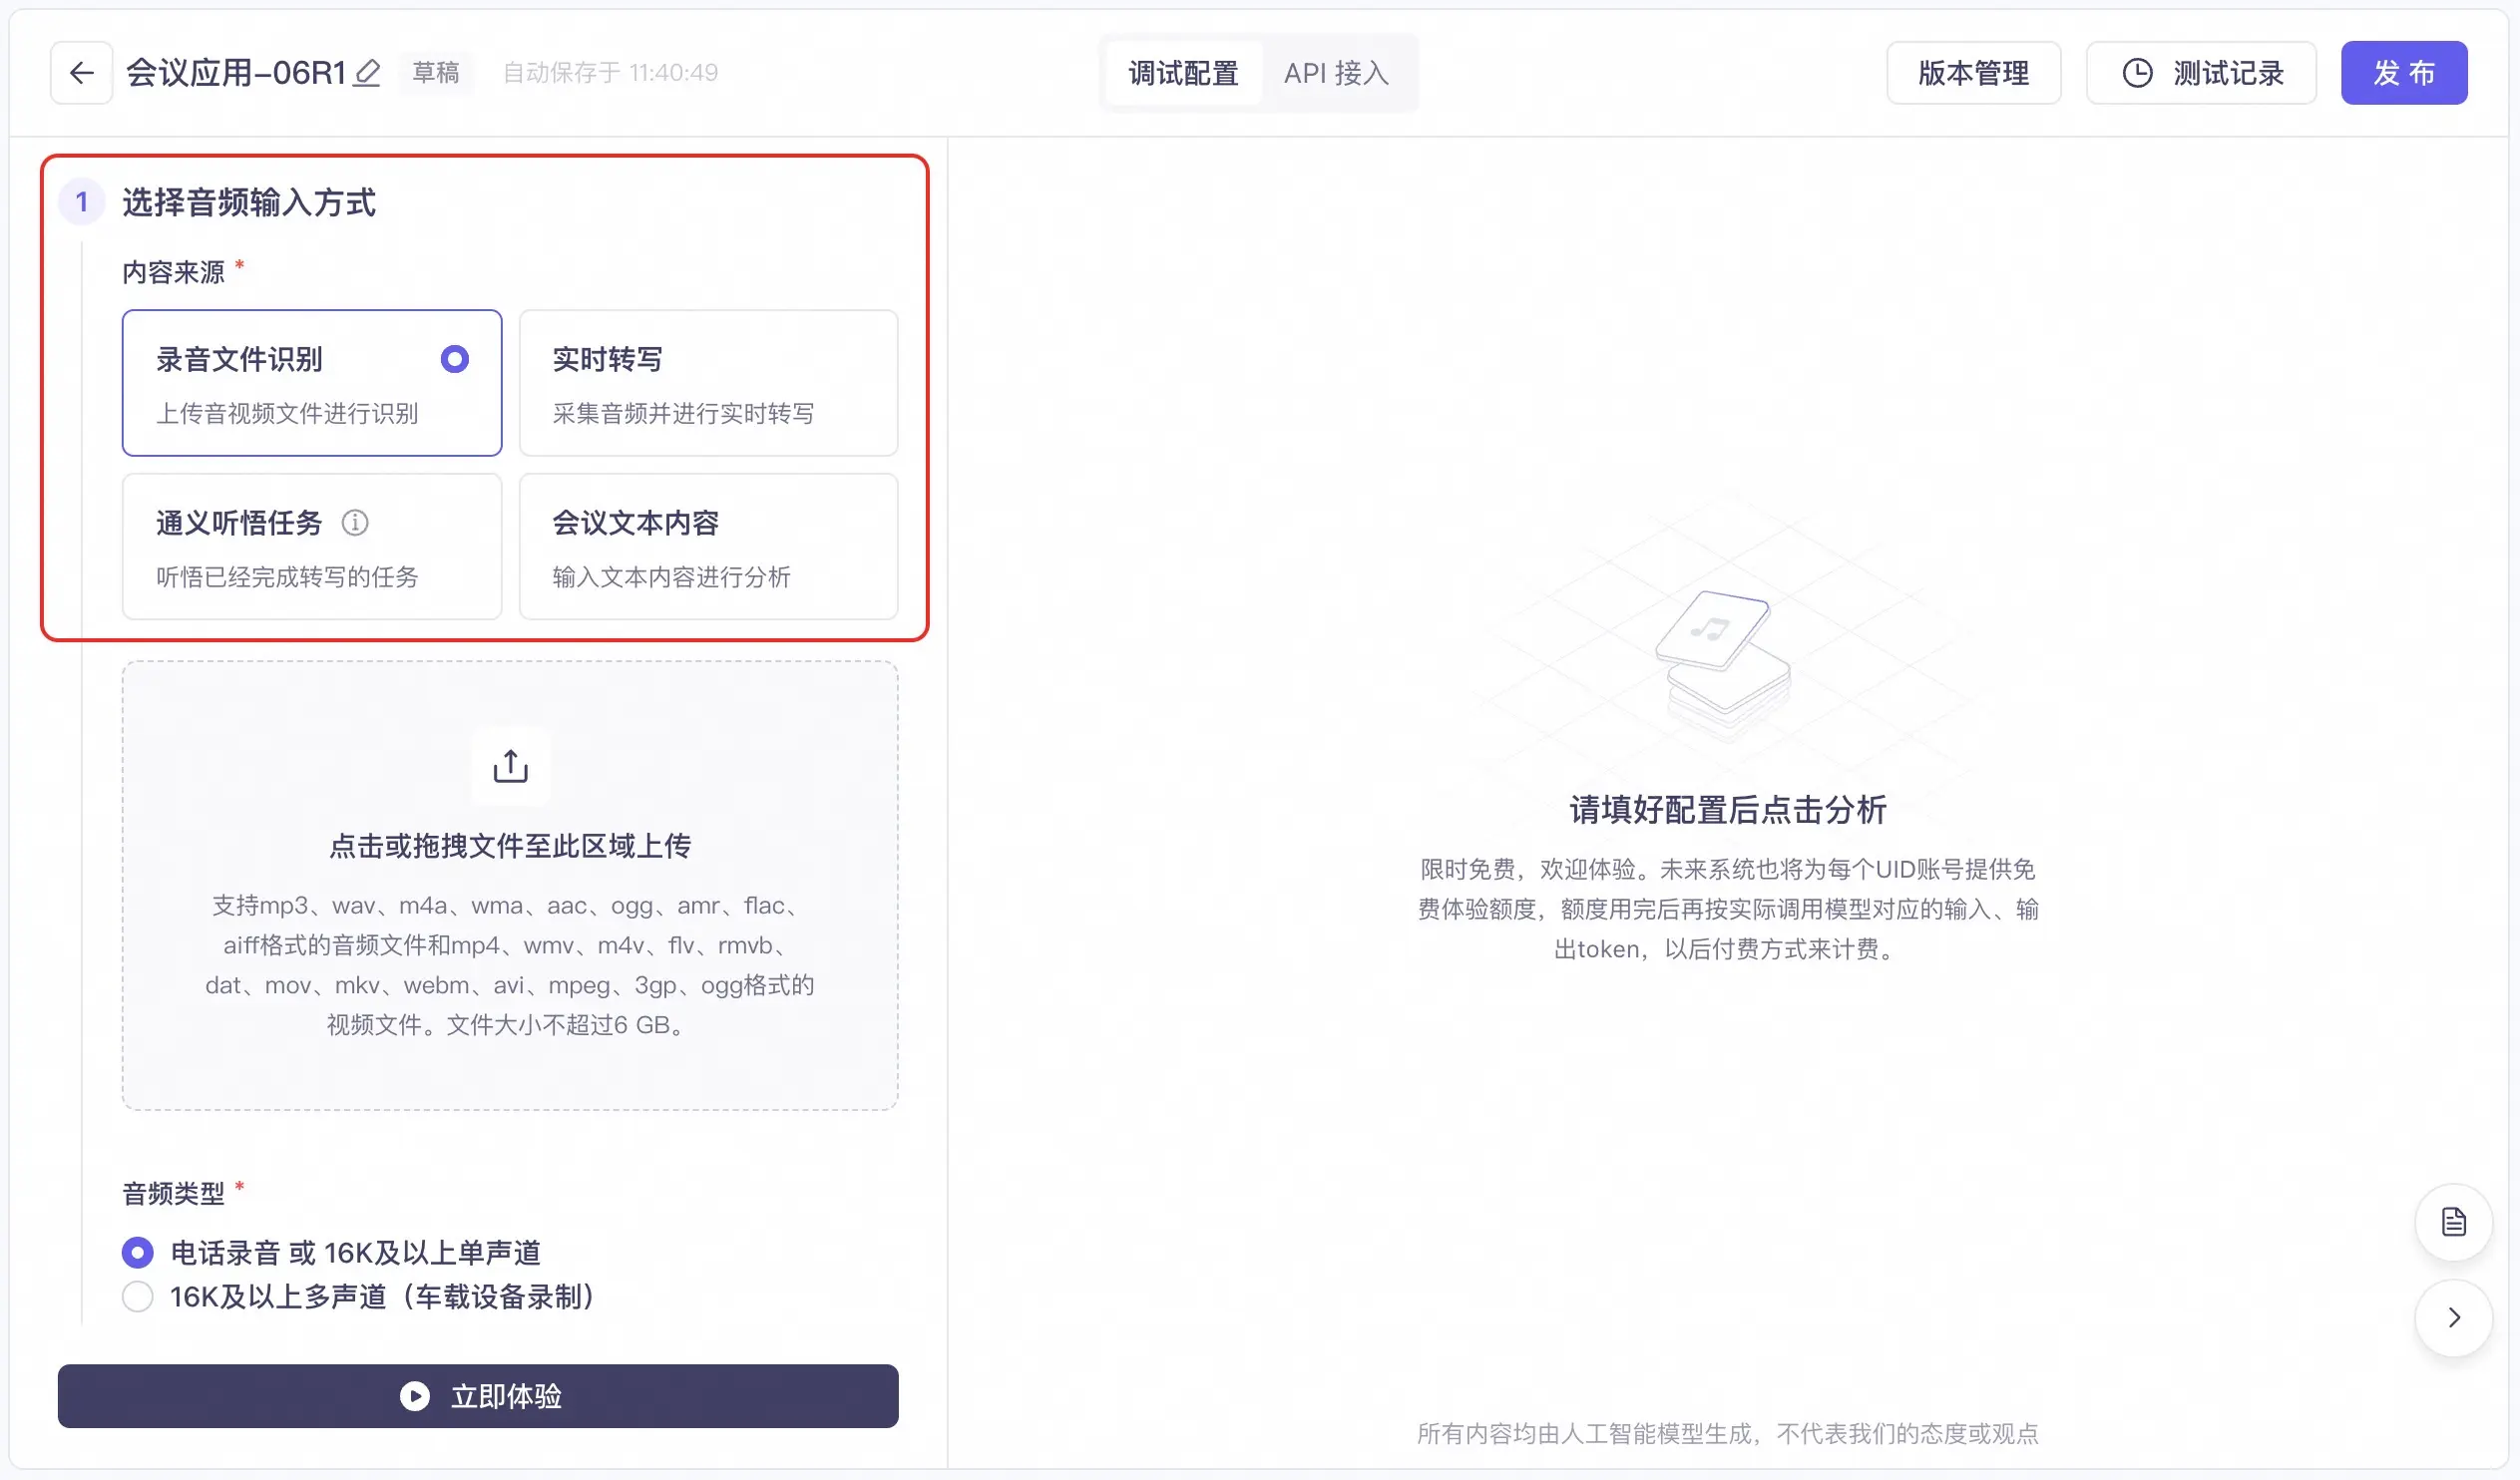
- Content Source
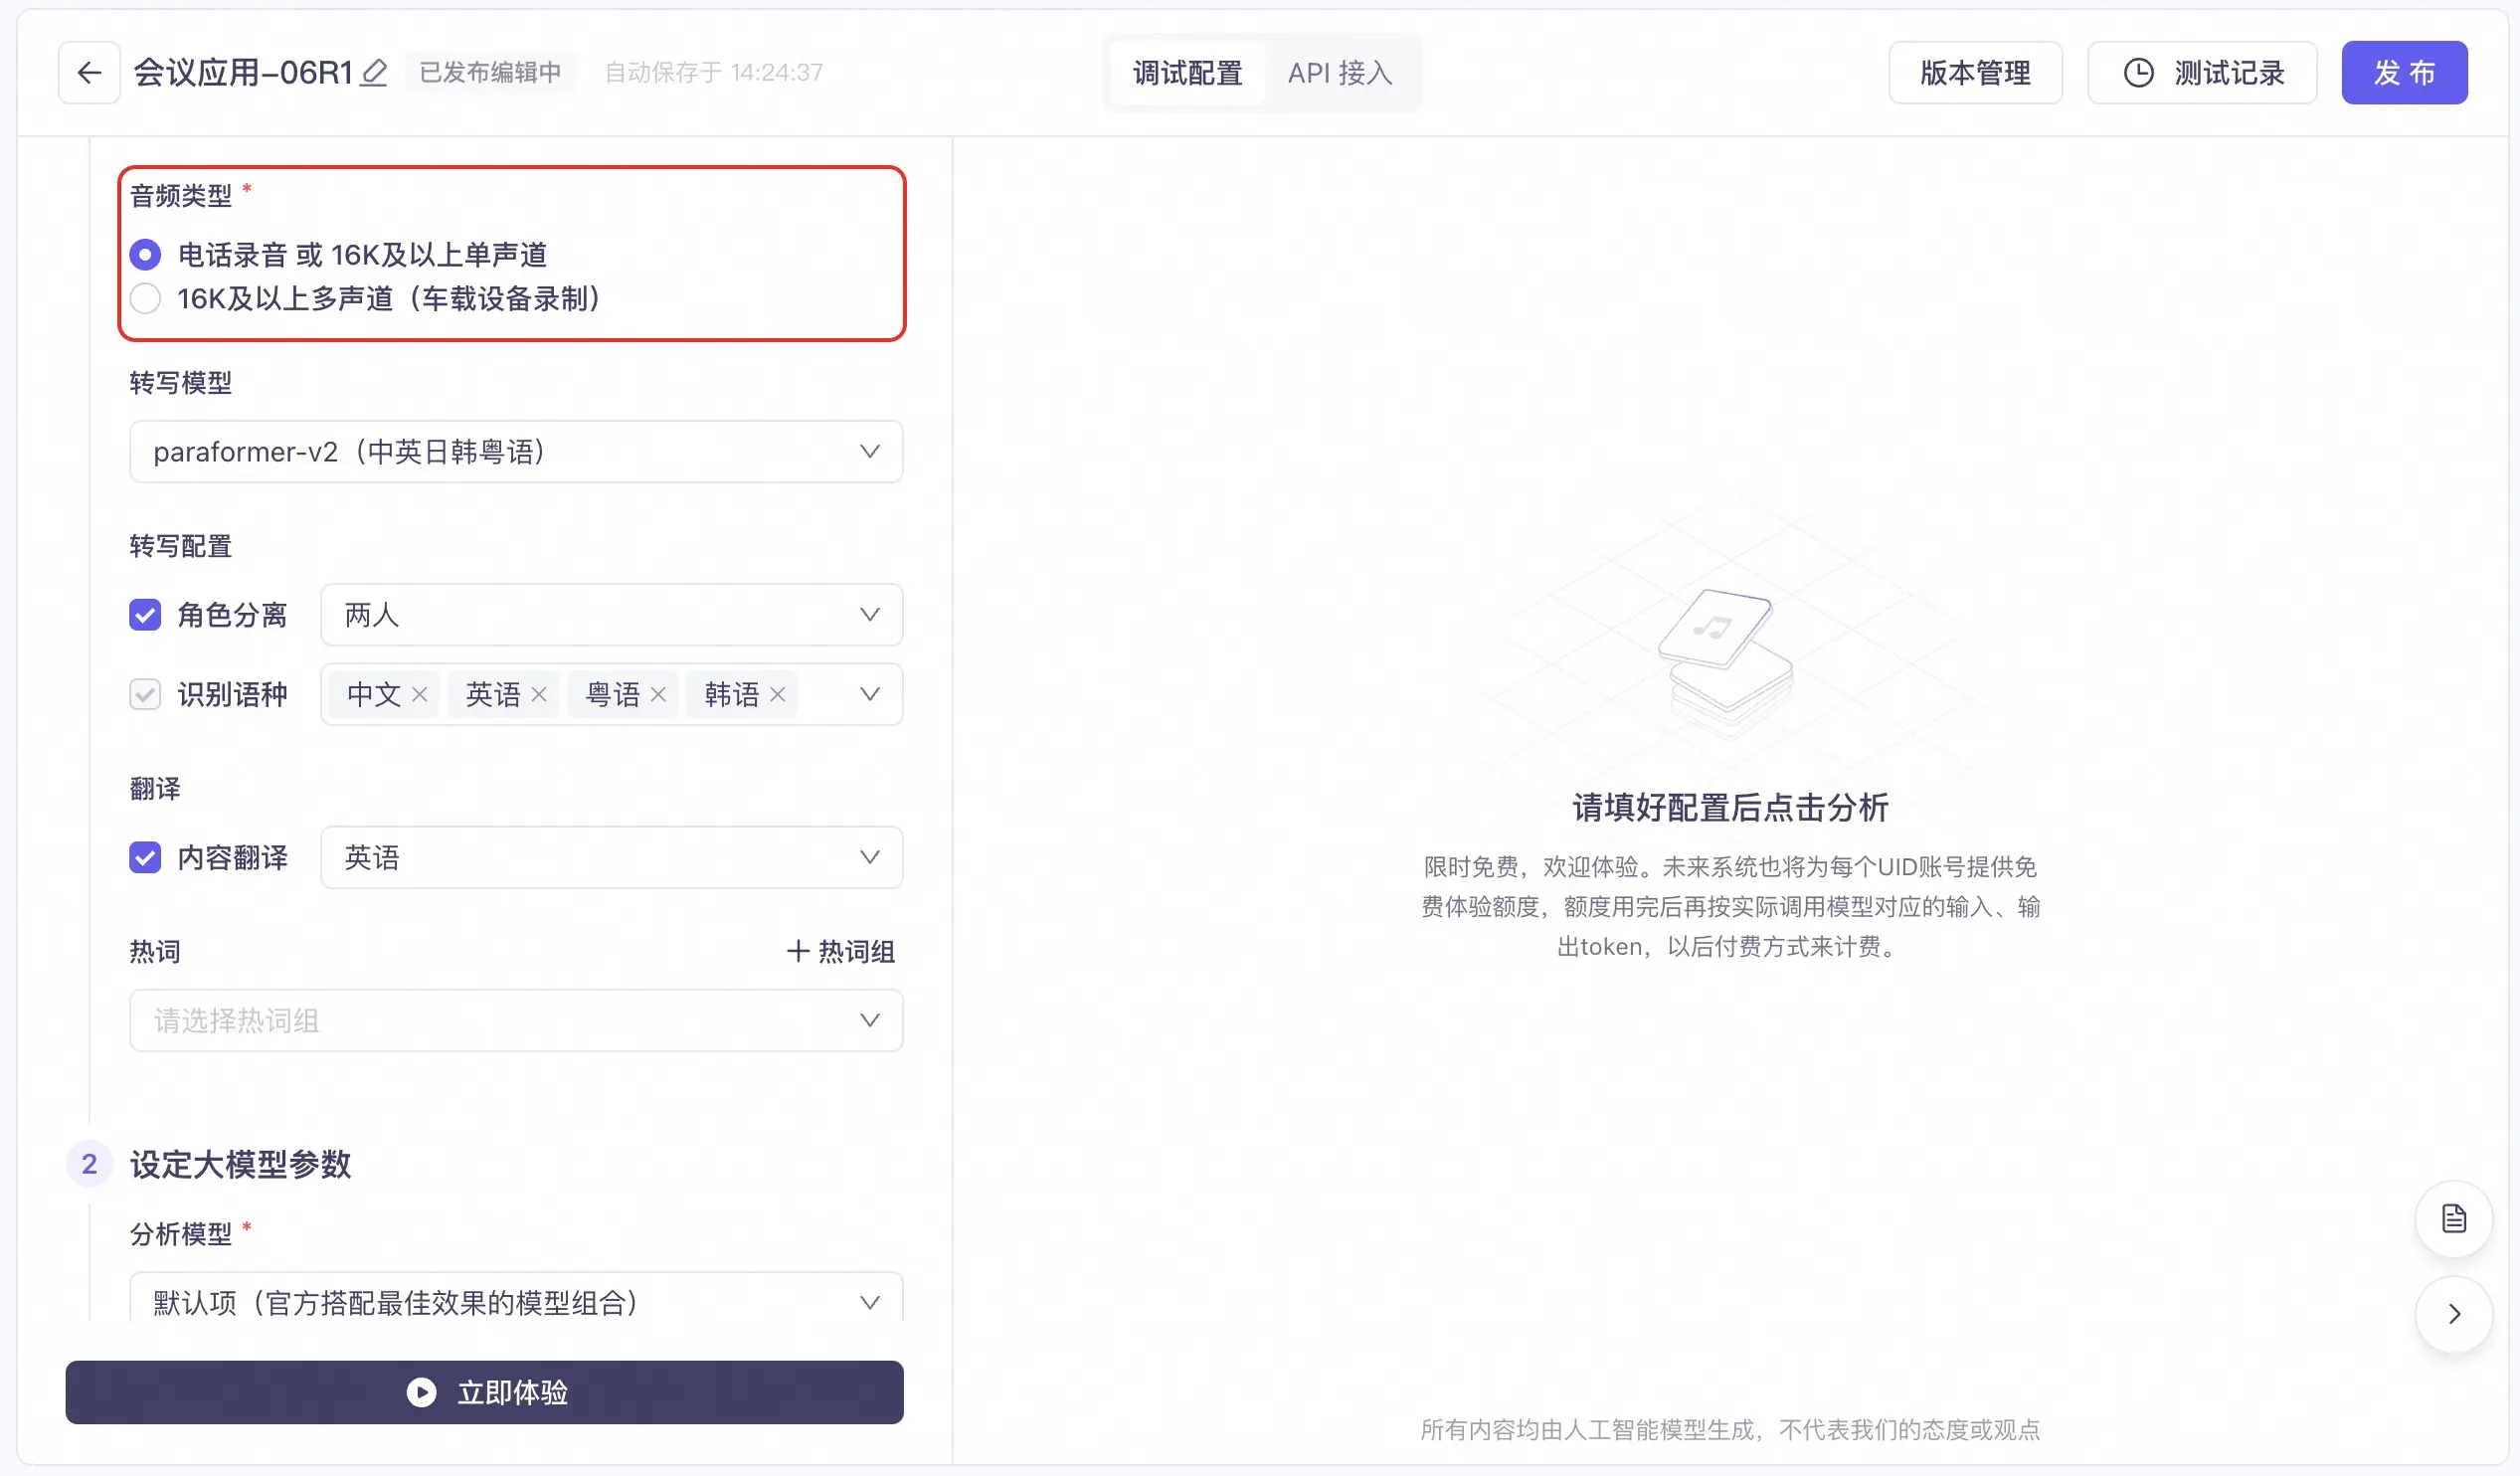
- Audio type
- Transcription model
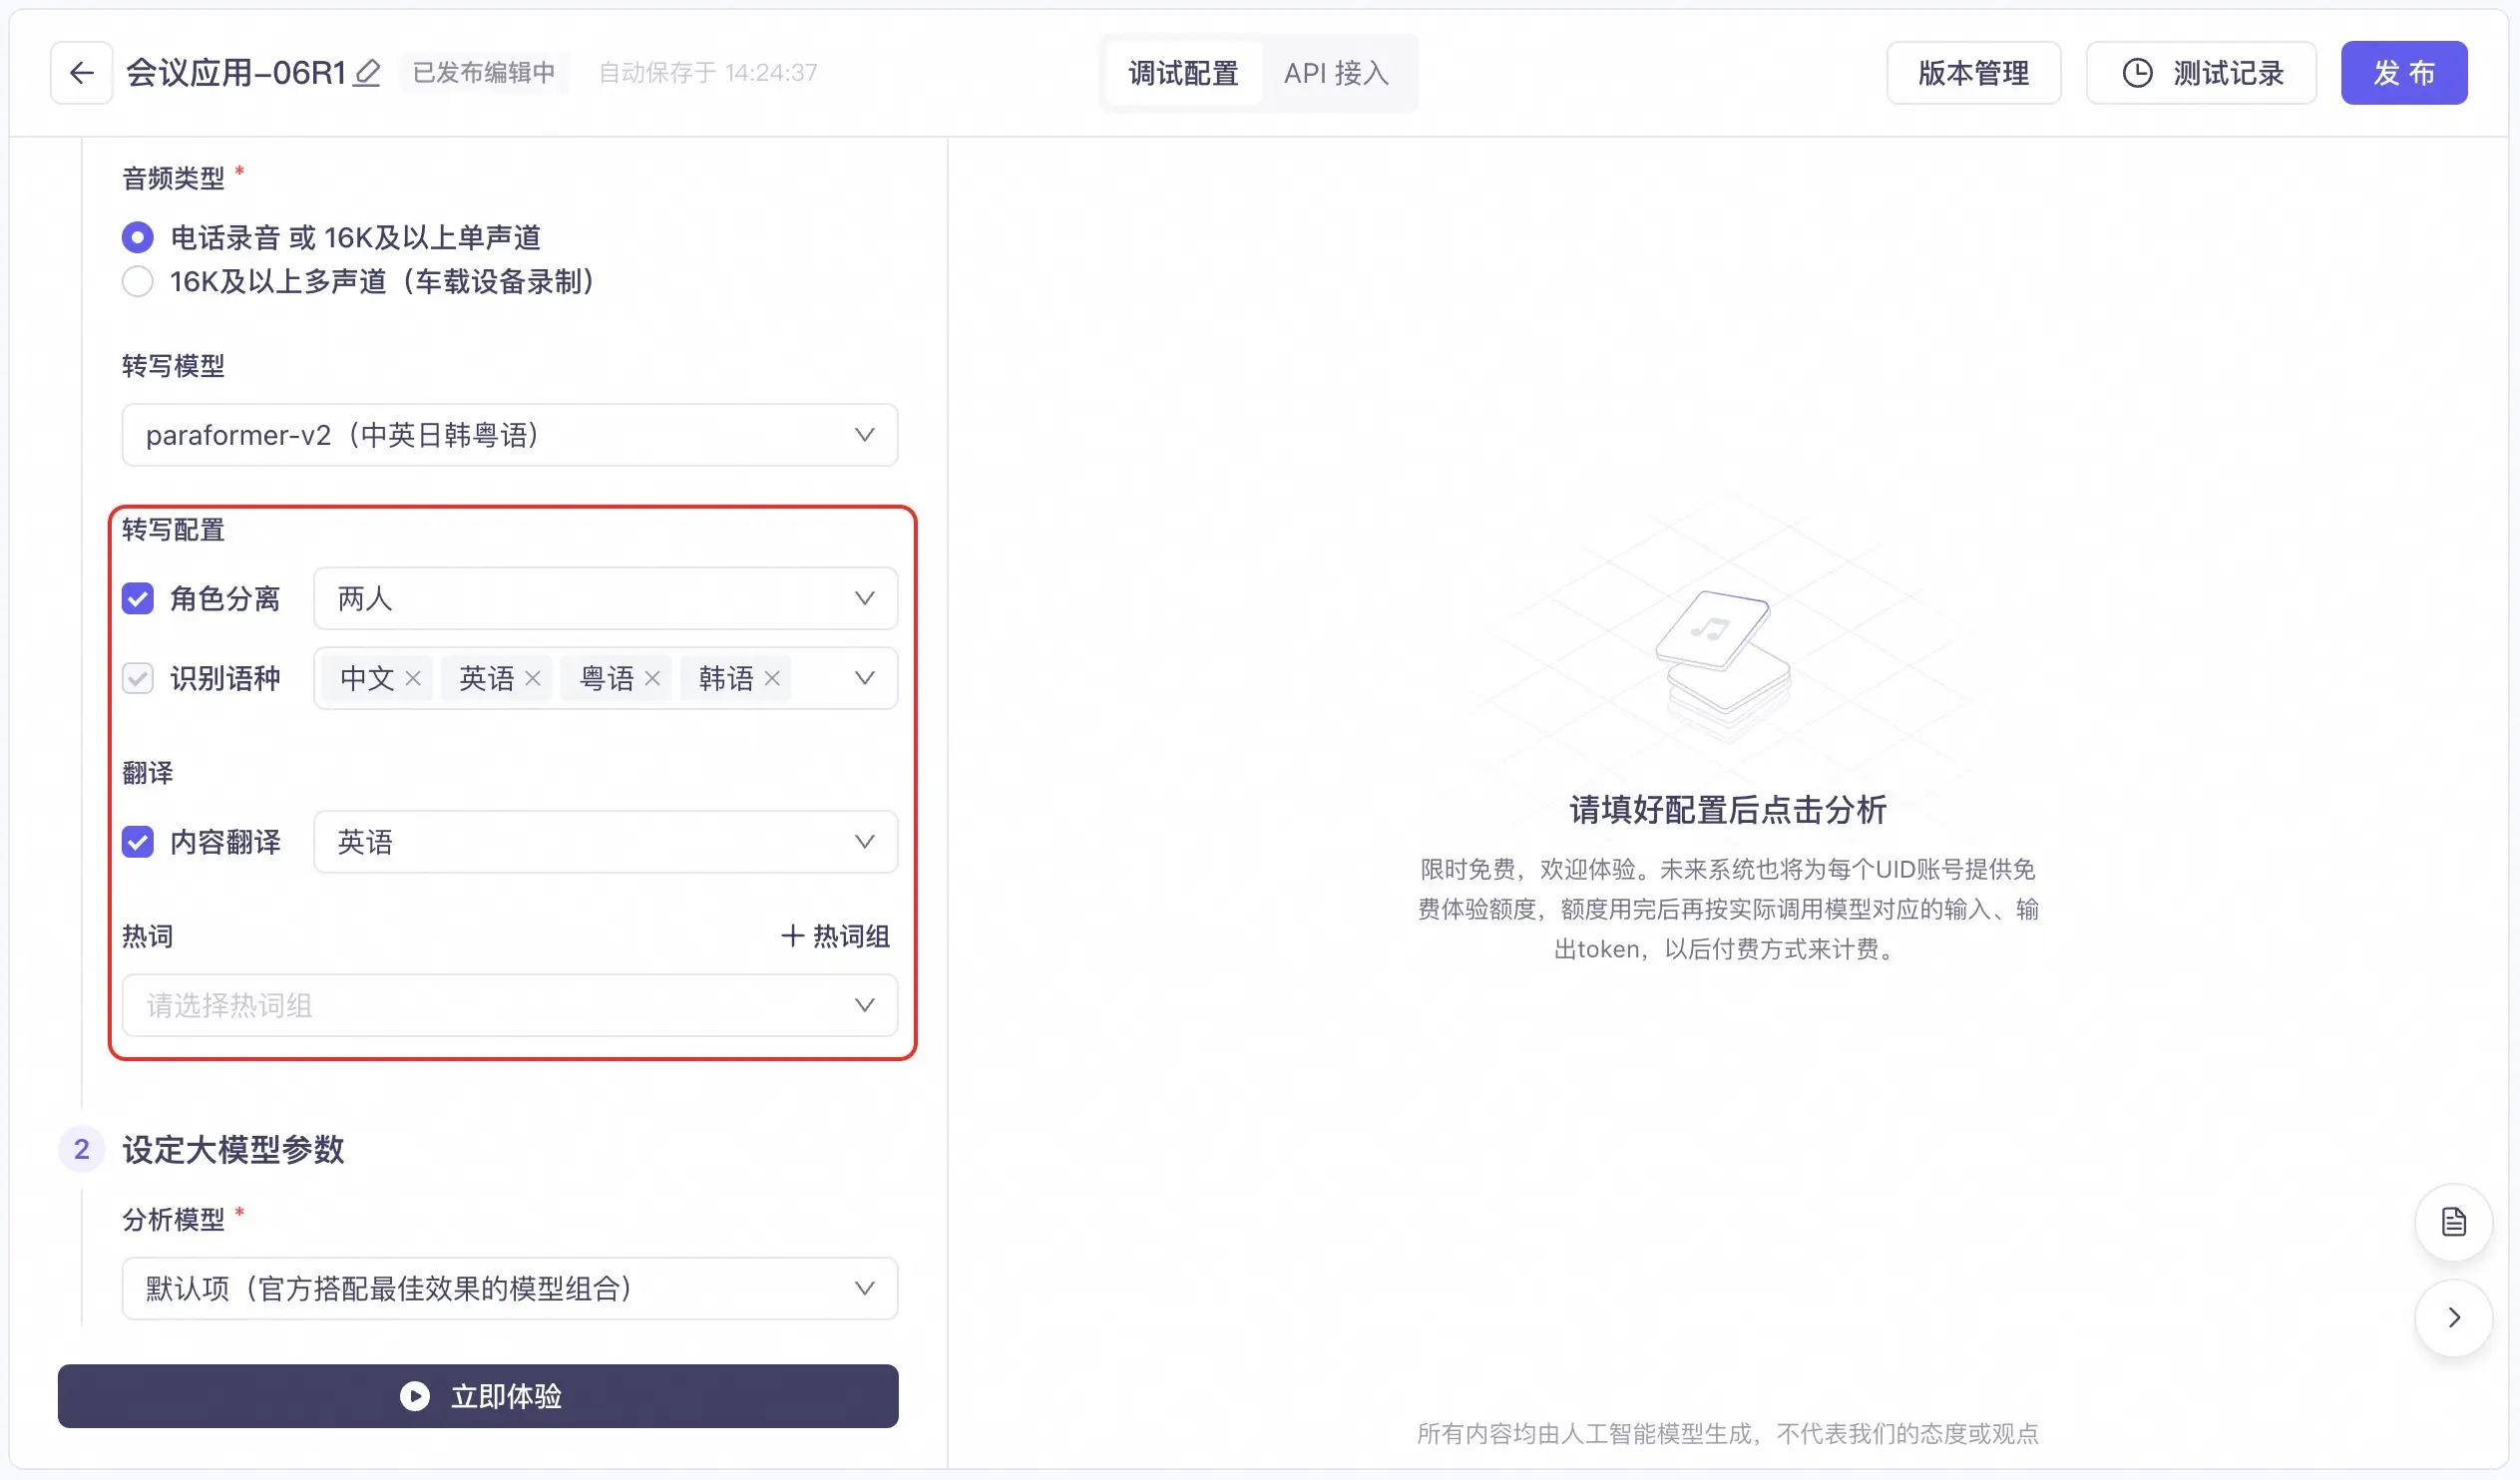
- Transcription Configuration
Select one of the following content sources:
- Recorded file recognition: Supports audio files in MP3, WAV, M4A, WMA, AAC, OGG, AMR, FLAC, and AIFF formats, and video files in MP4, WMV, M4V, FLV, RMVB, DAT, MOV, MKV, WEBM, AVI, MPEG, 3GP, and OGG formats. The file size cannot exceed 6 GB.
- Real-time transcription: Captures and transcribes audio in real time.
-
Tingwu task: Enter the task ID of a completed transcription task for the current application. This can reduce speech-to-text costs.
After a task is created, the system returns the TaskID field in the response.
- Meeting text content: Enter the dialogue text in the specified format. This can also reduce speech-to-text costs.
2. Set large model parameters
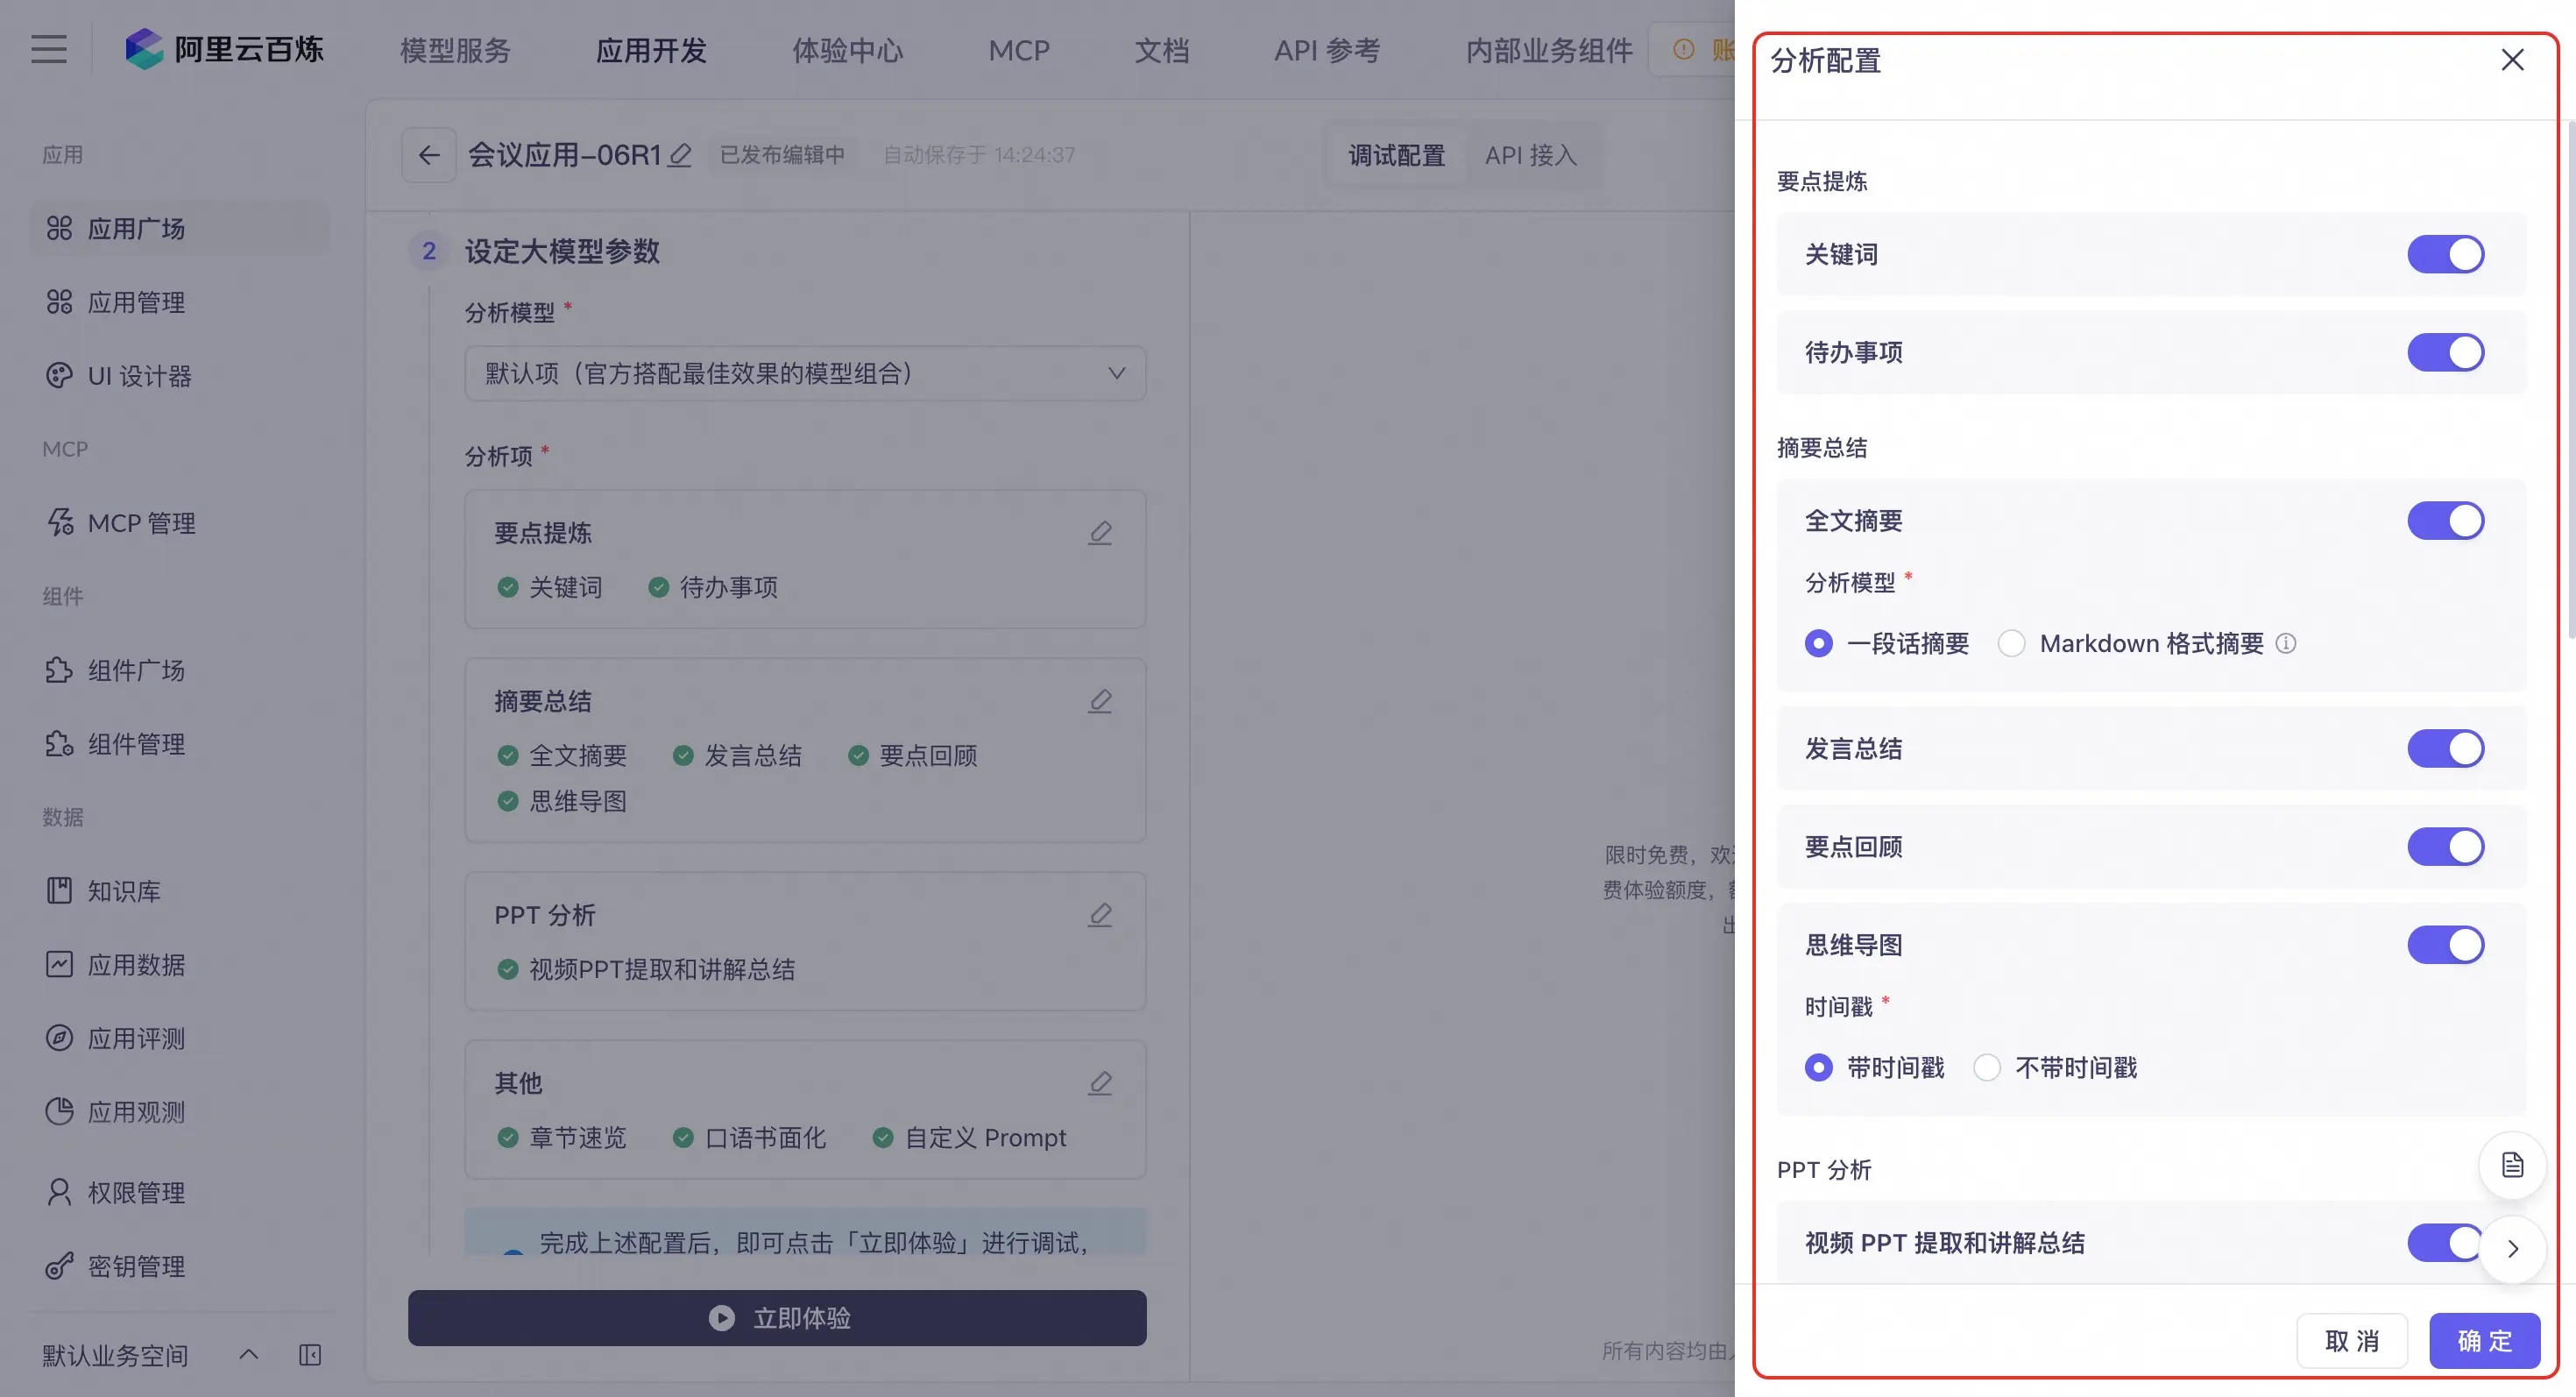
- Analytical Model
- Analysis options
The following models are currently supported:
- Default (official model combination for optimal results)
- tingwu-plus
- qwen-plus
- qwq
Application configurations made on the interface apply to API calls. You can also update parameters in an API call to overwrite the interface configurations.
3. API call configuration
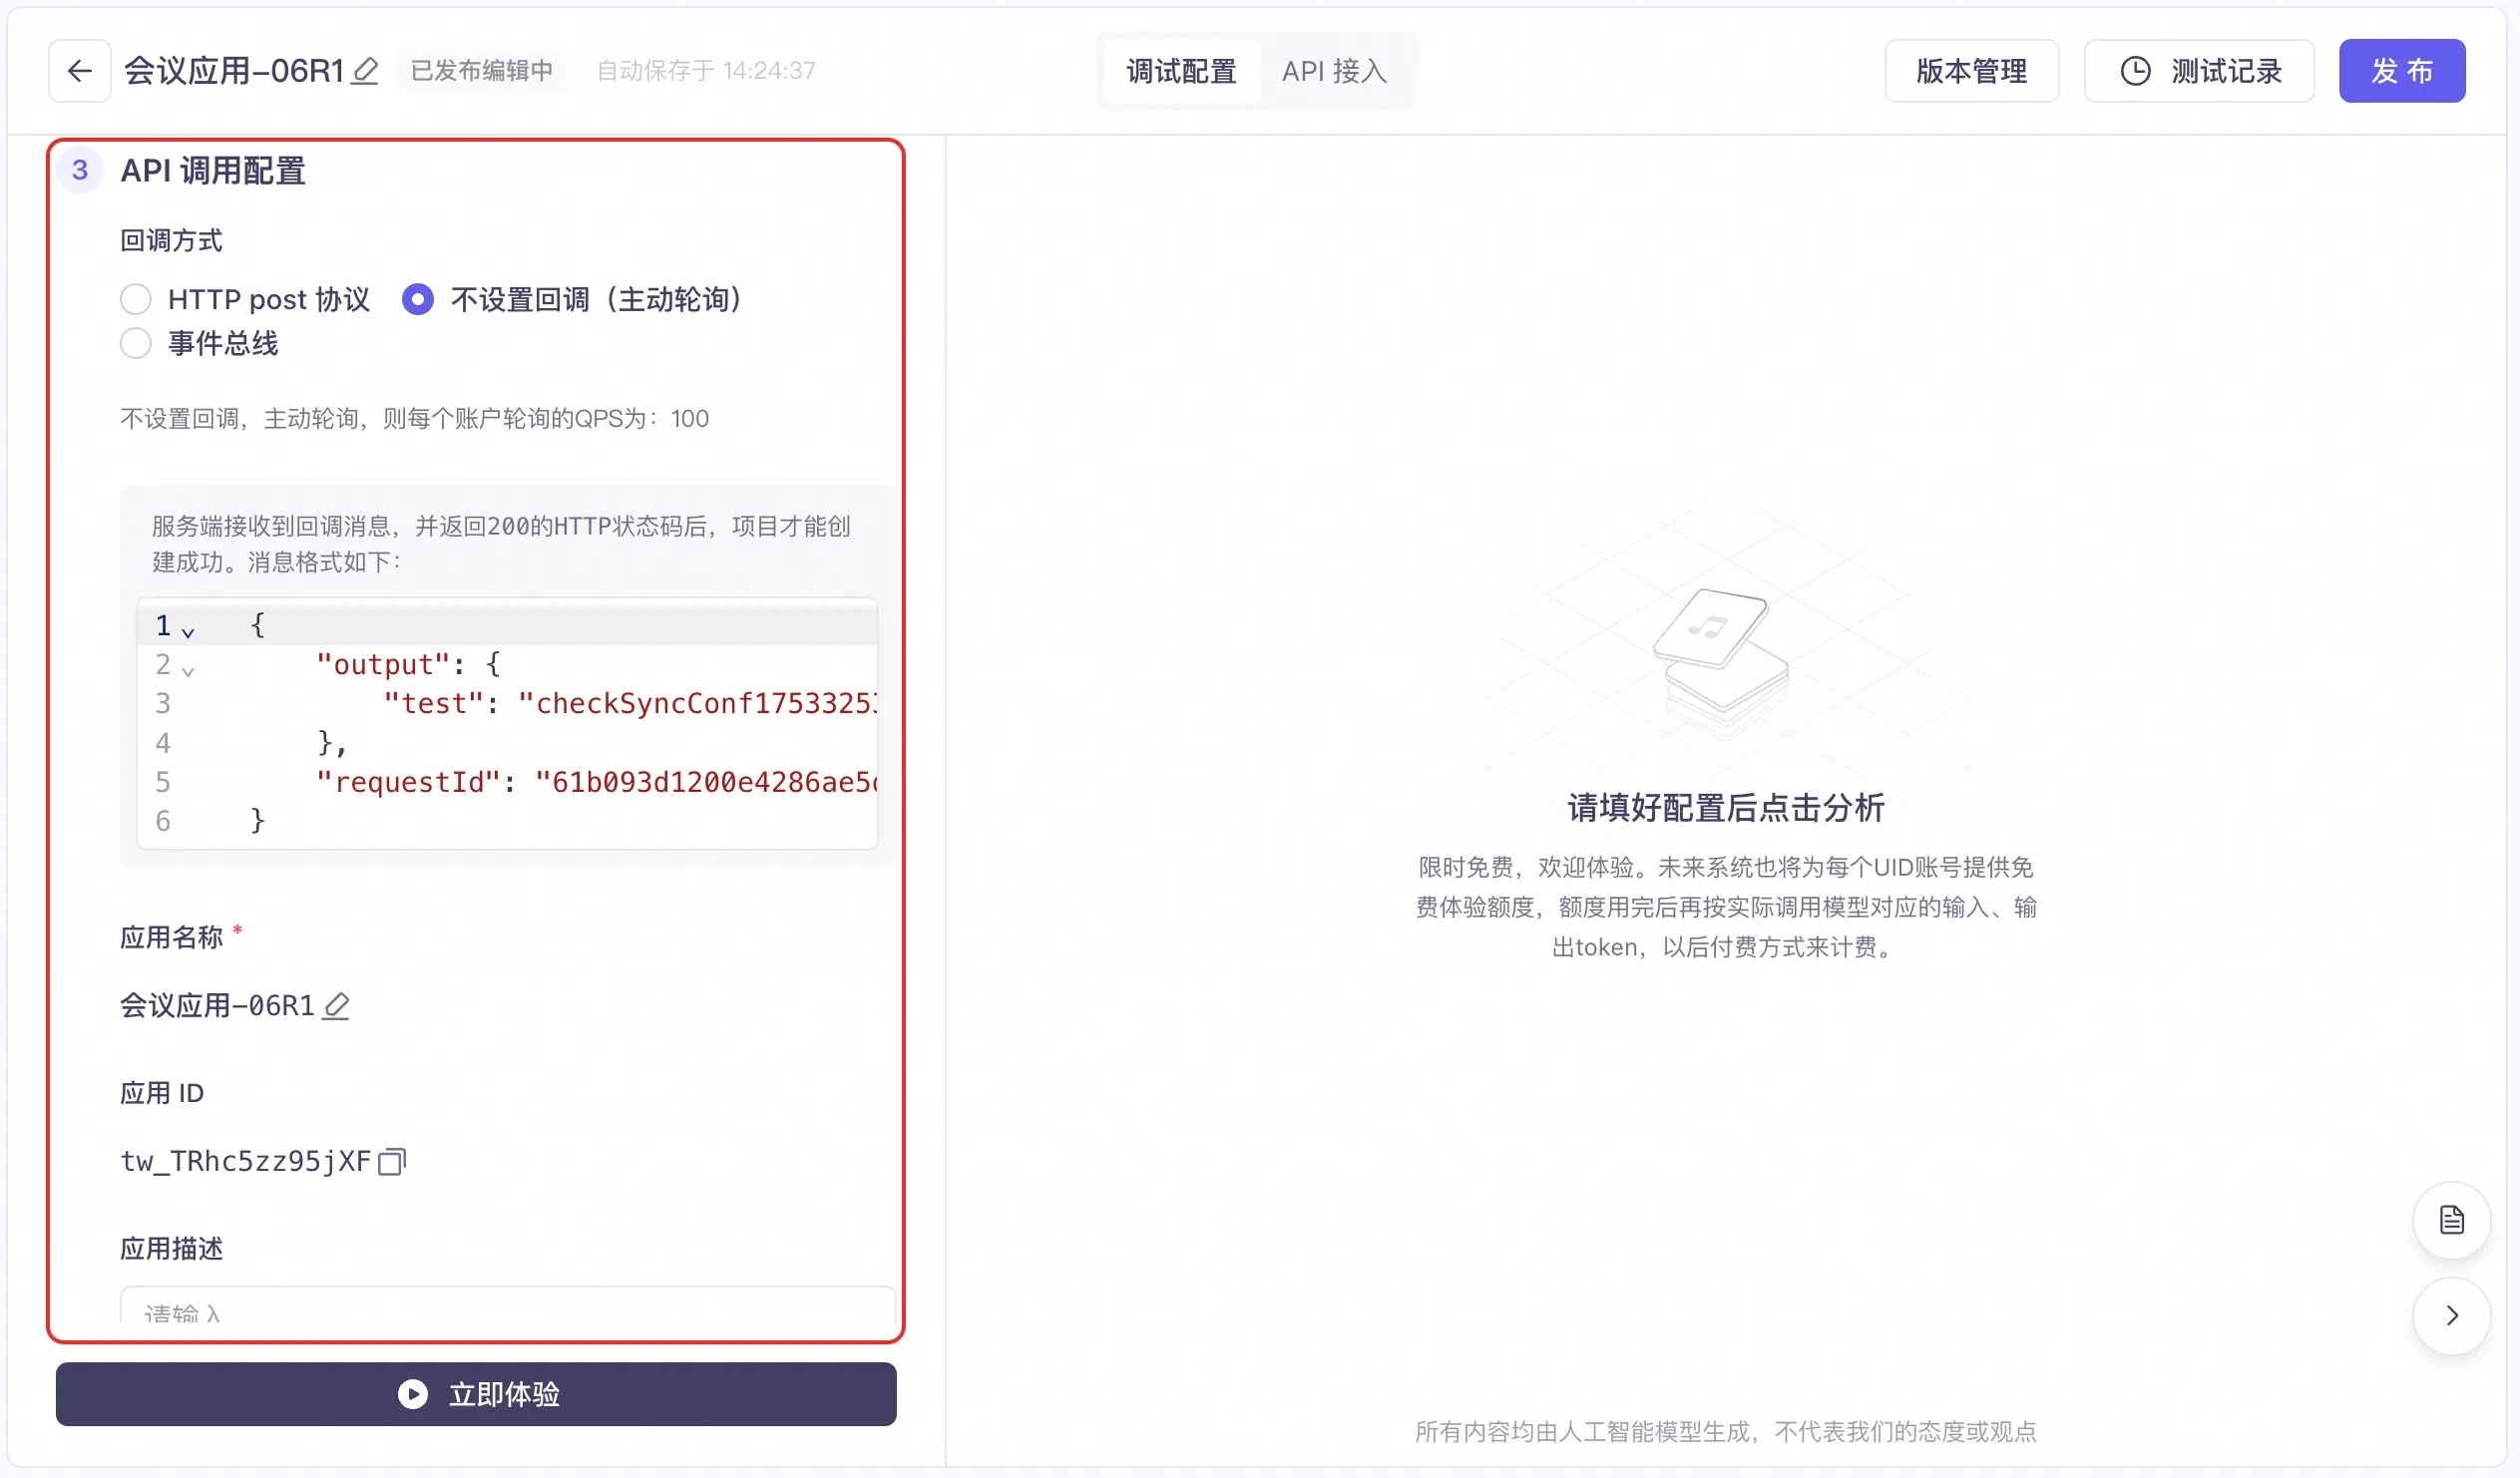
- Callback Method
- Application name
- Application ID
- Application Description
For more information about setting the callback method, see How to obtain asynchronous task results through callbacks.
- HTTP POST protocol: Enter the corresponding URL. Tingwu sends a POST request to the configured HTTP URL. The check is successful if the server returns an HTTP status code of 200.
- No callback (active polling): If you choose not to set a callback, you can actively poll for results using the getTask API for the Agent task. The default number of queries per second (QPS) for polling for each account is 100.
- EventBridge: The processing results are sent to your service based on the default configuration of EventBridge in the China (Beijing) region. You must activate Alibaba Cloud EventBridge first.
3. Experience the results
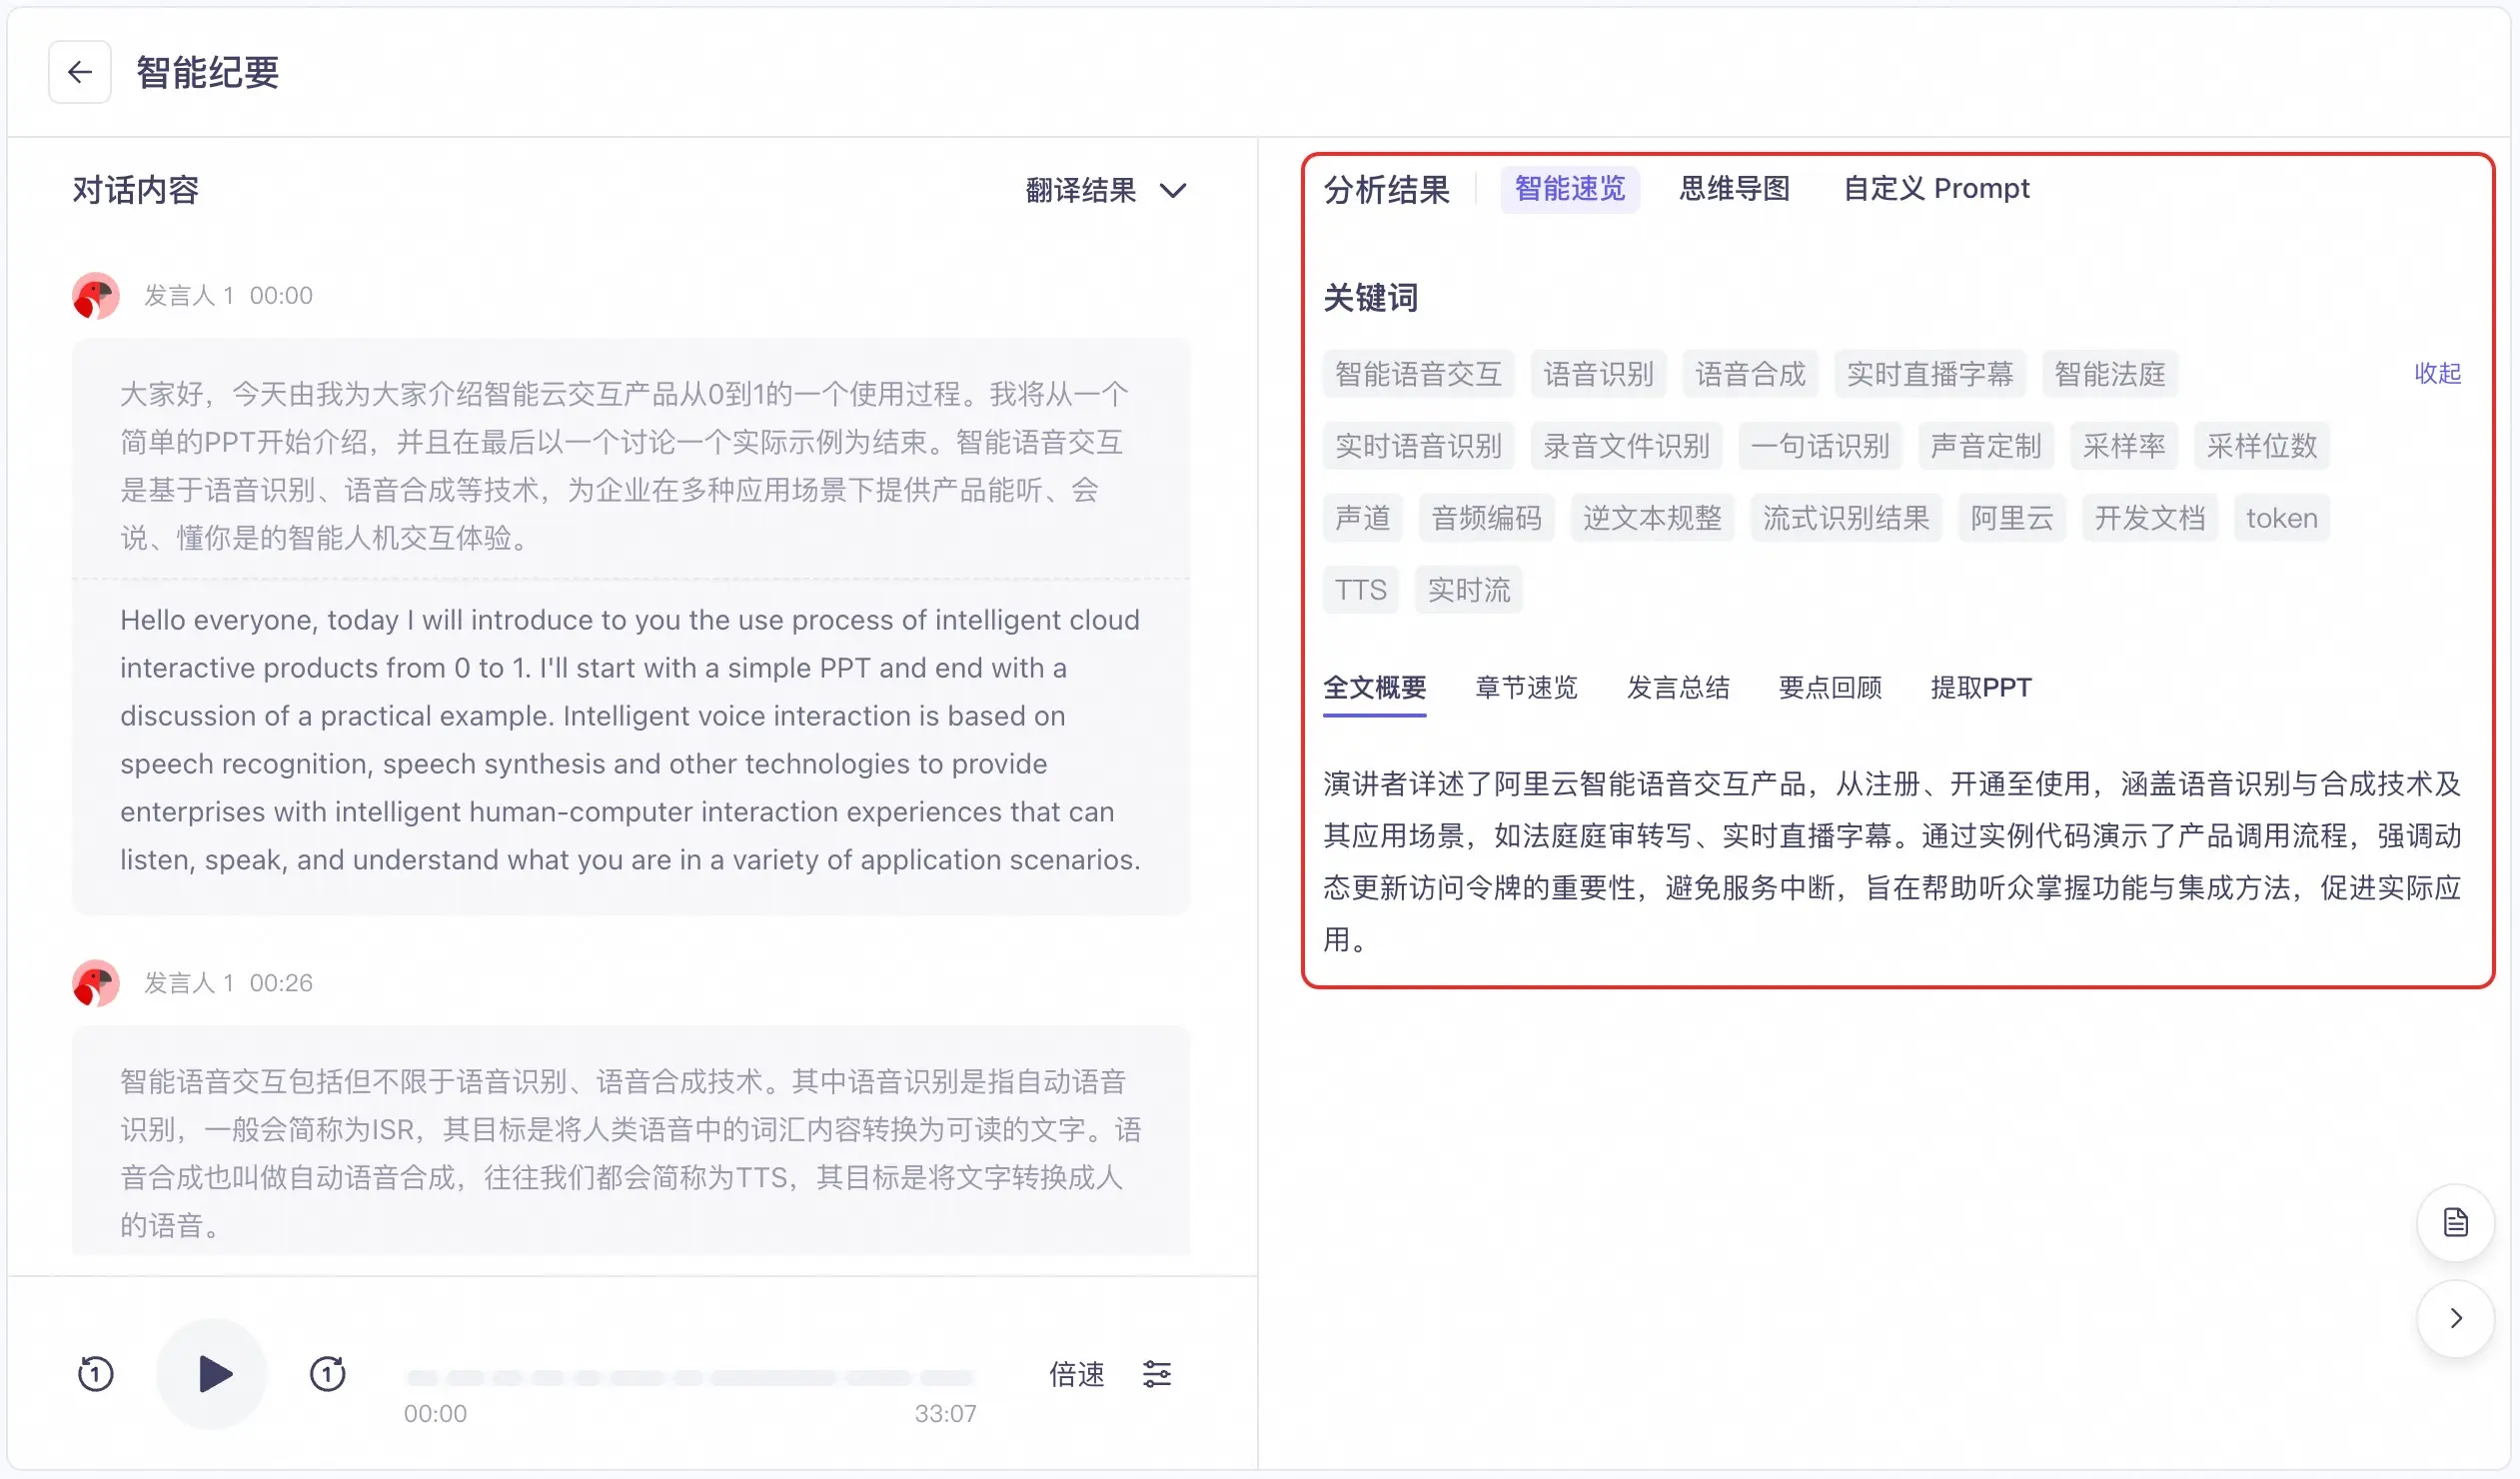
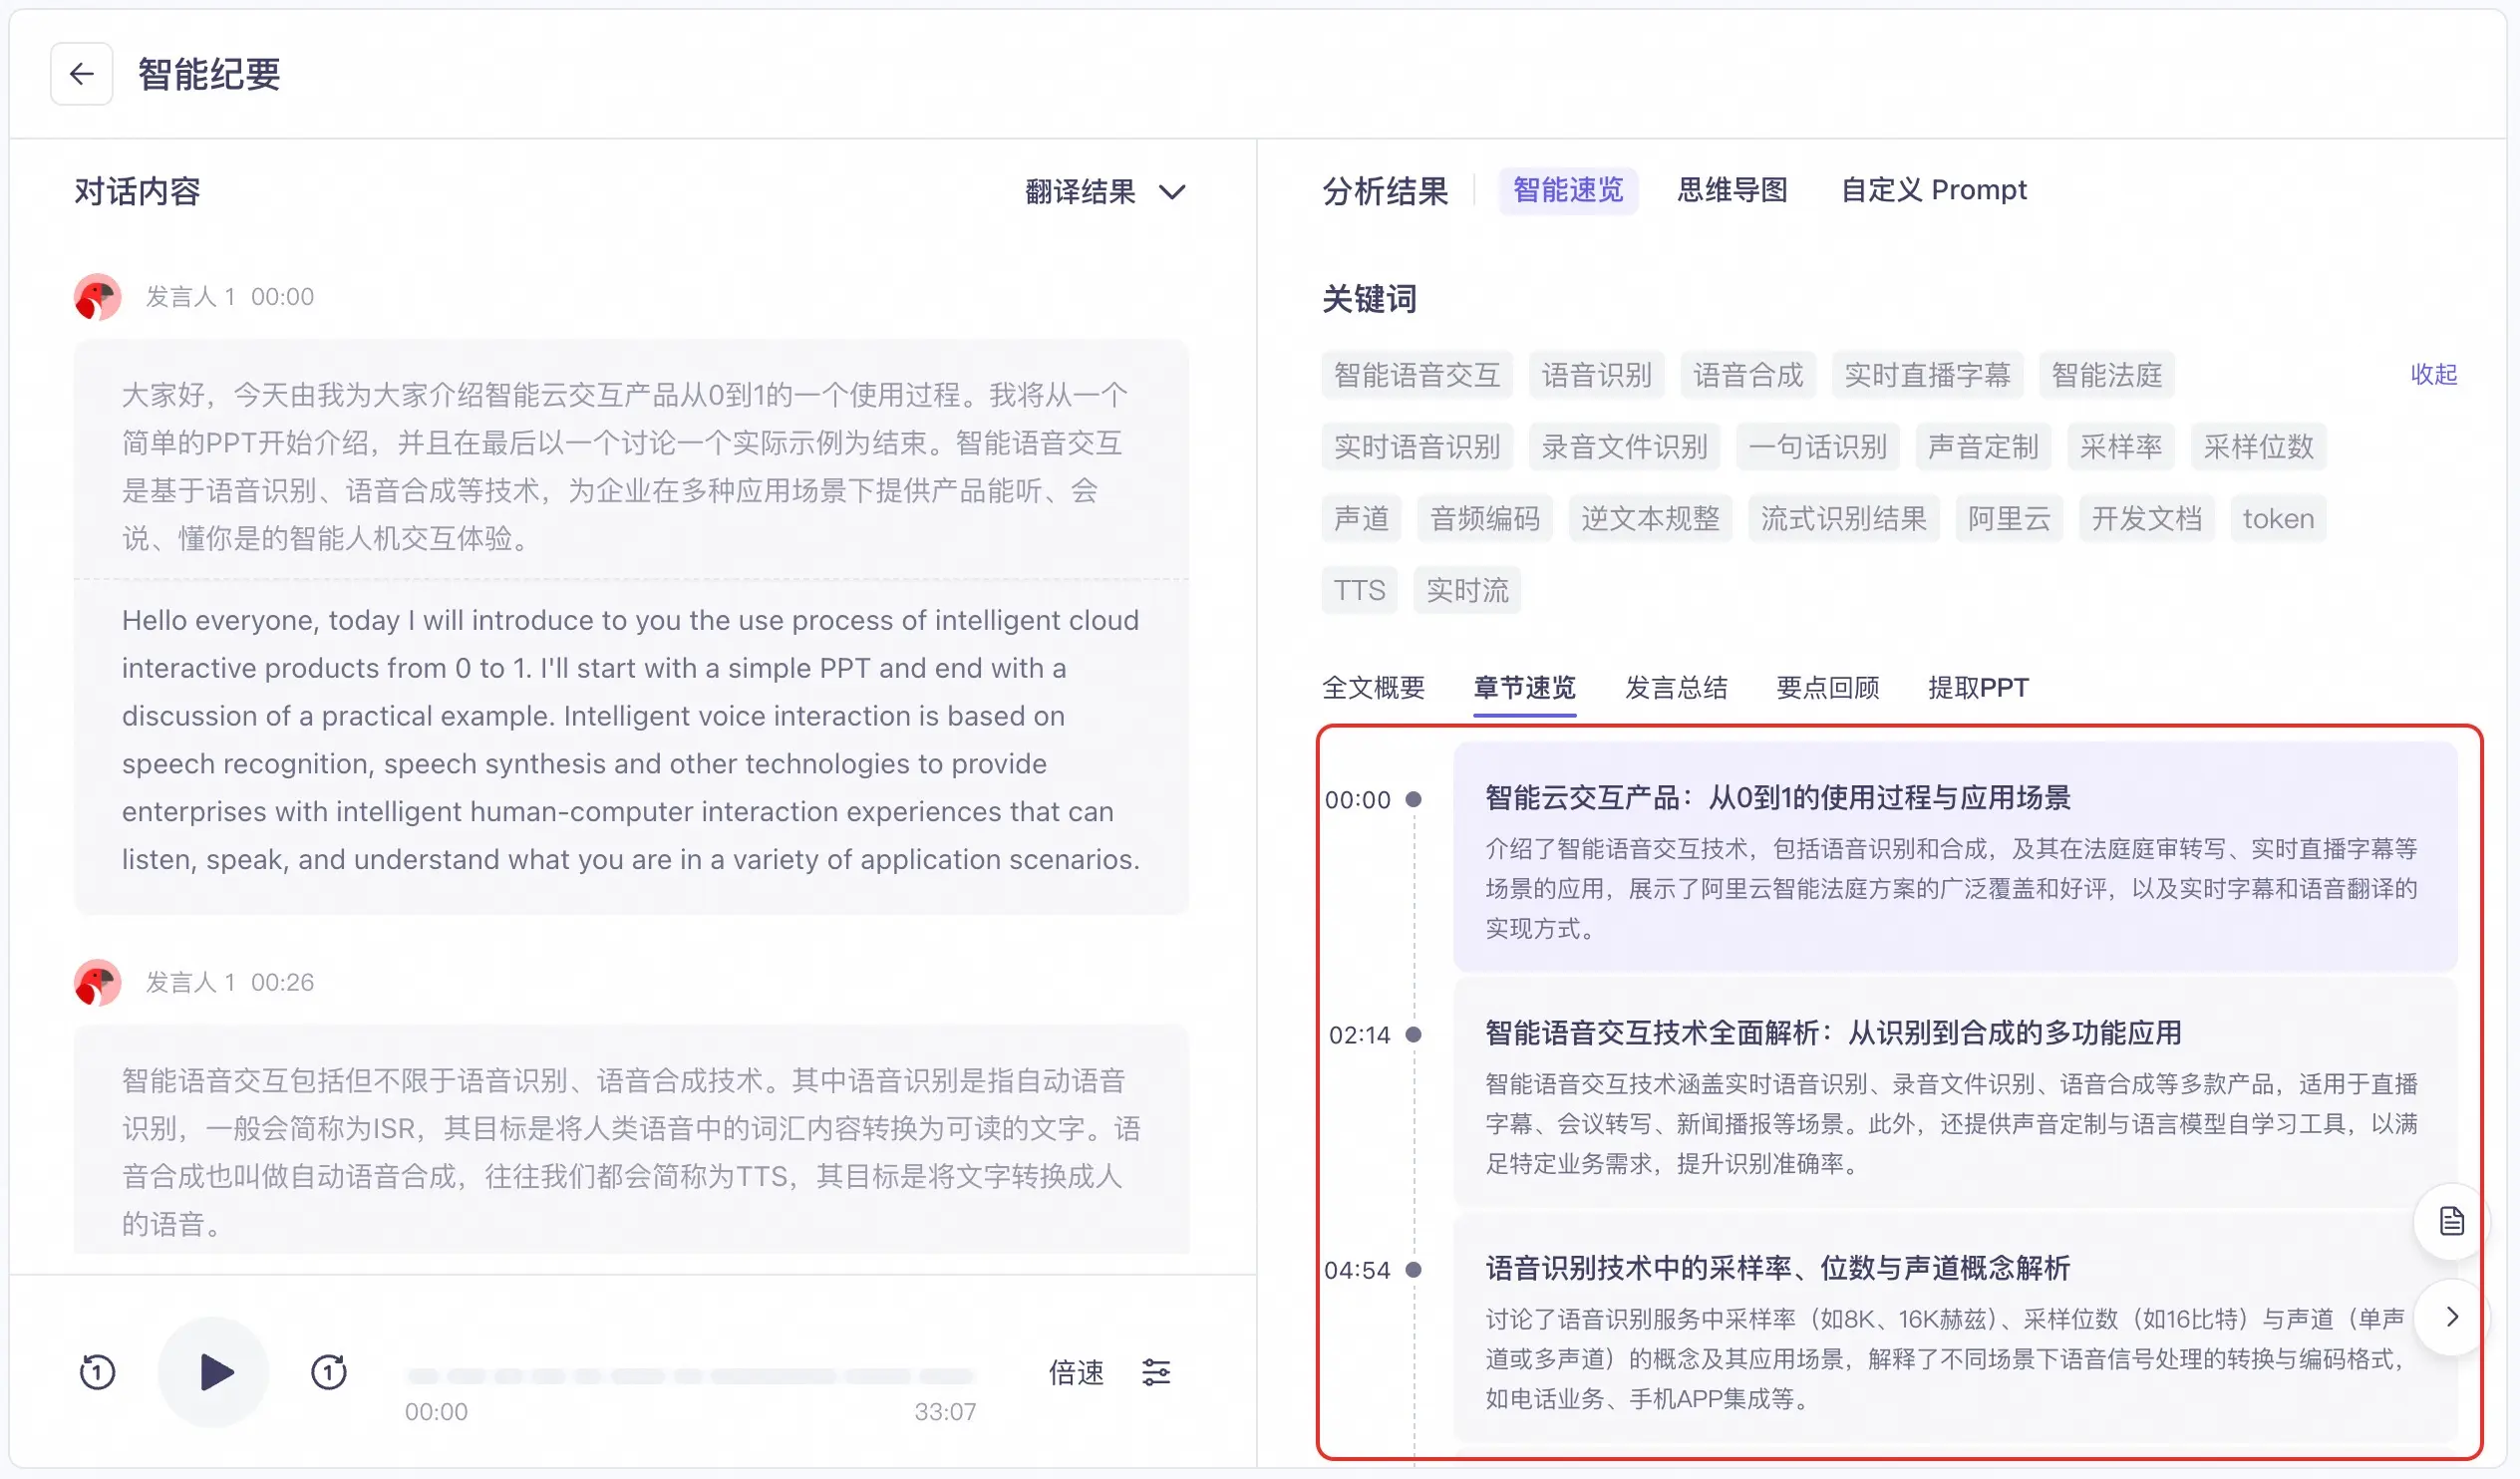
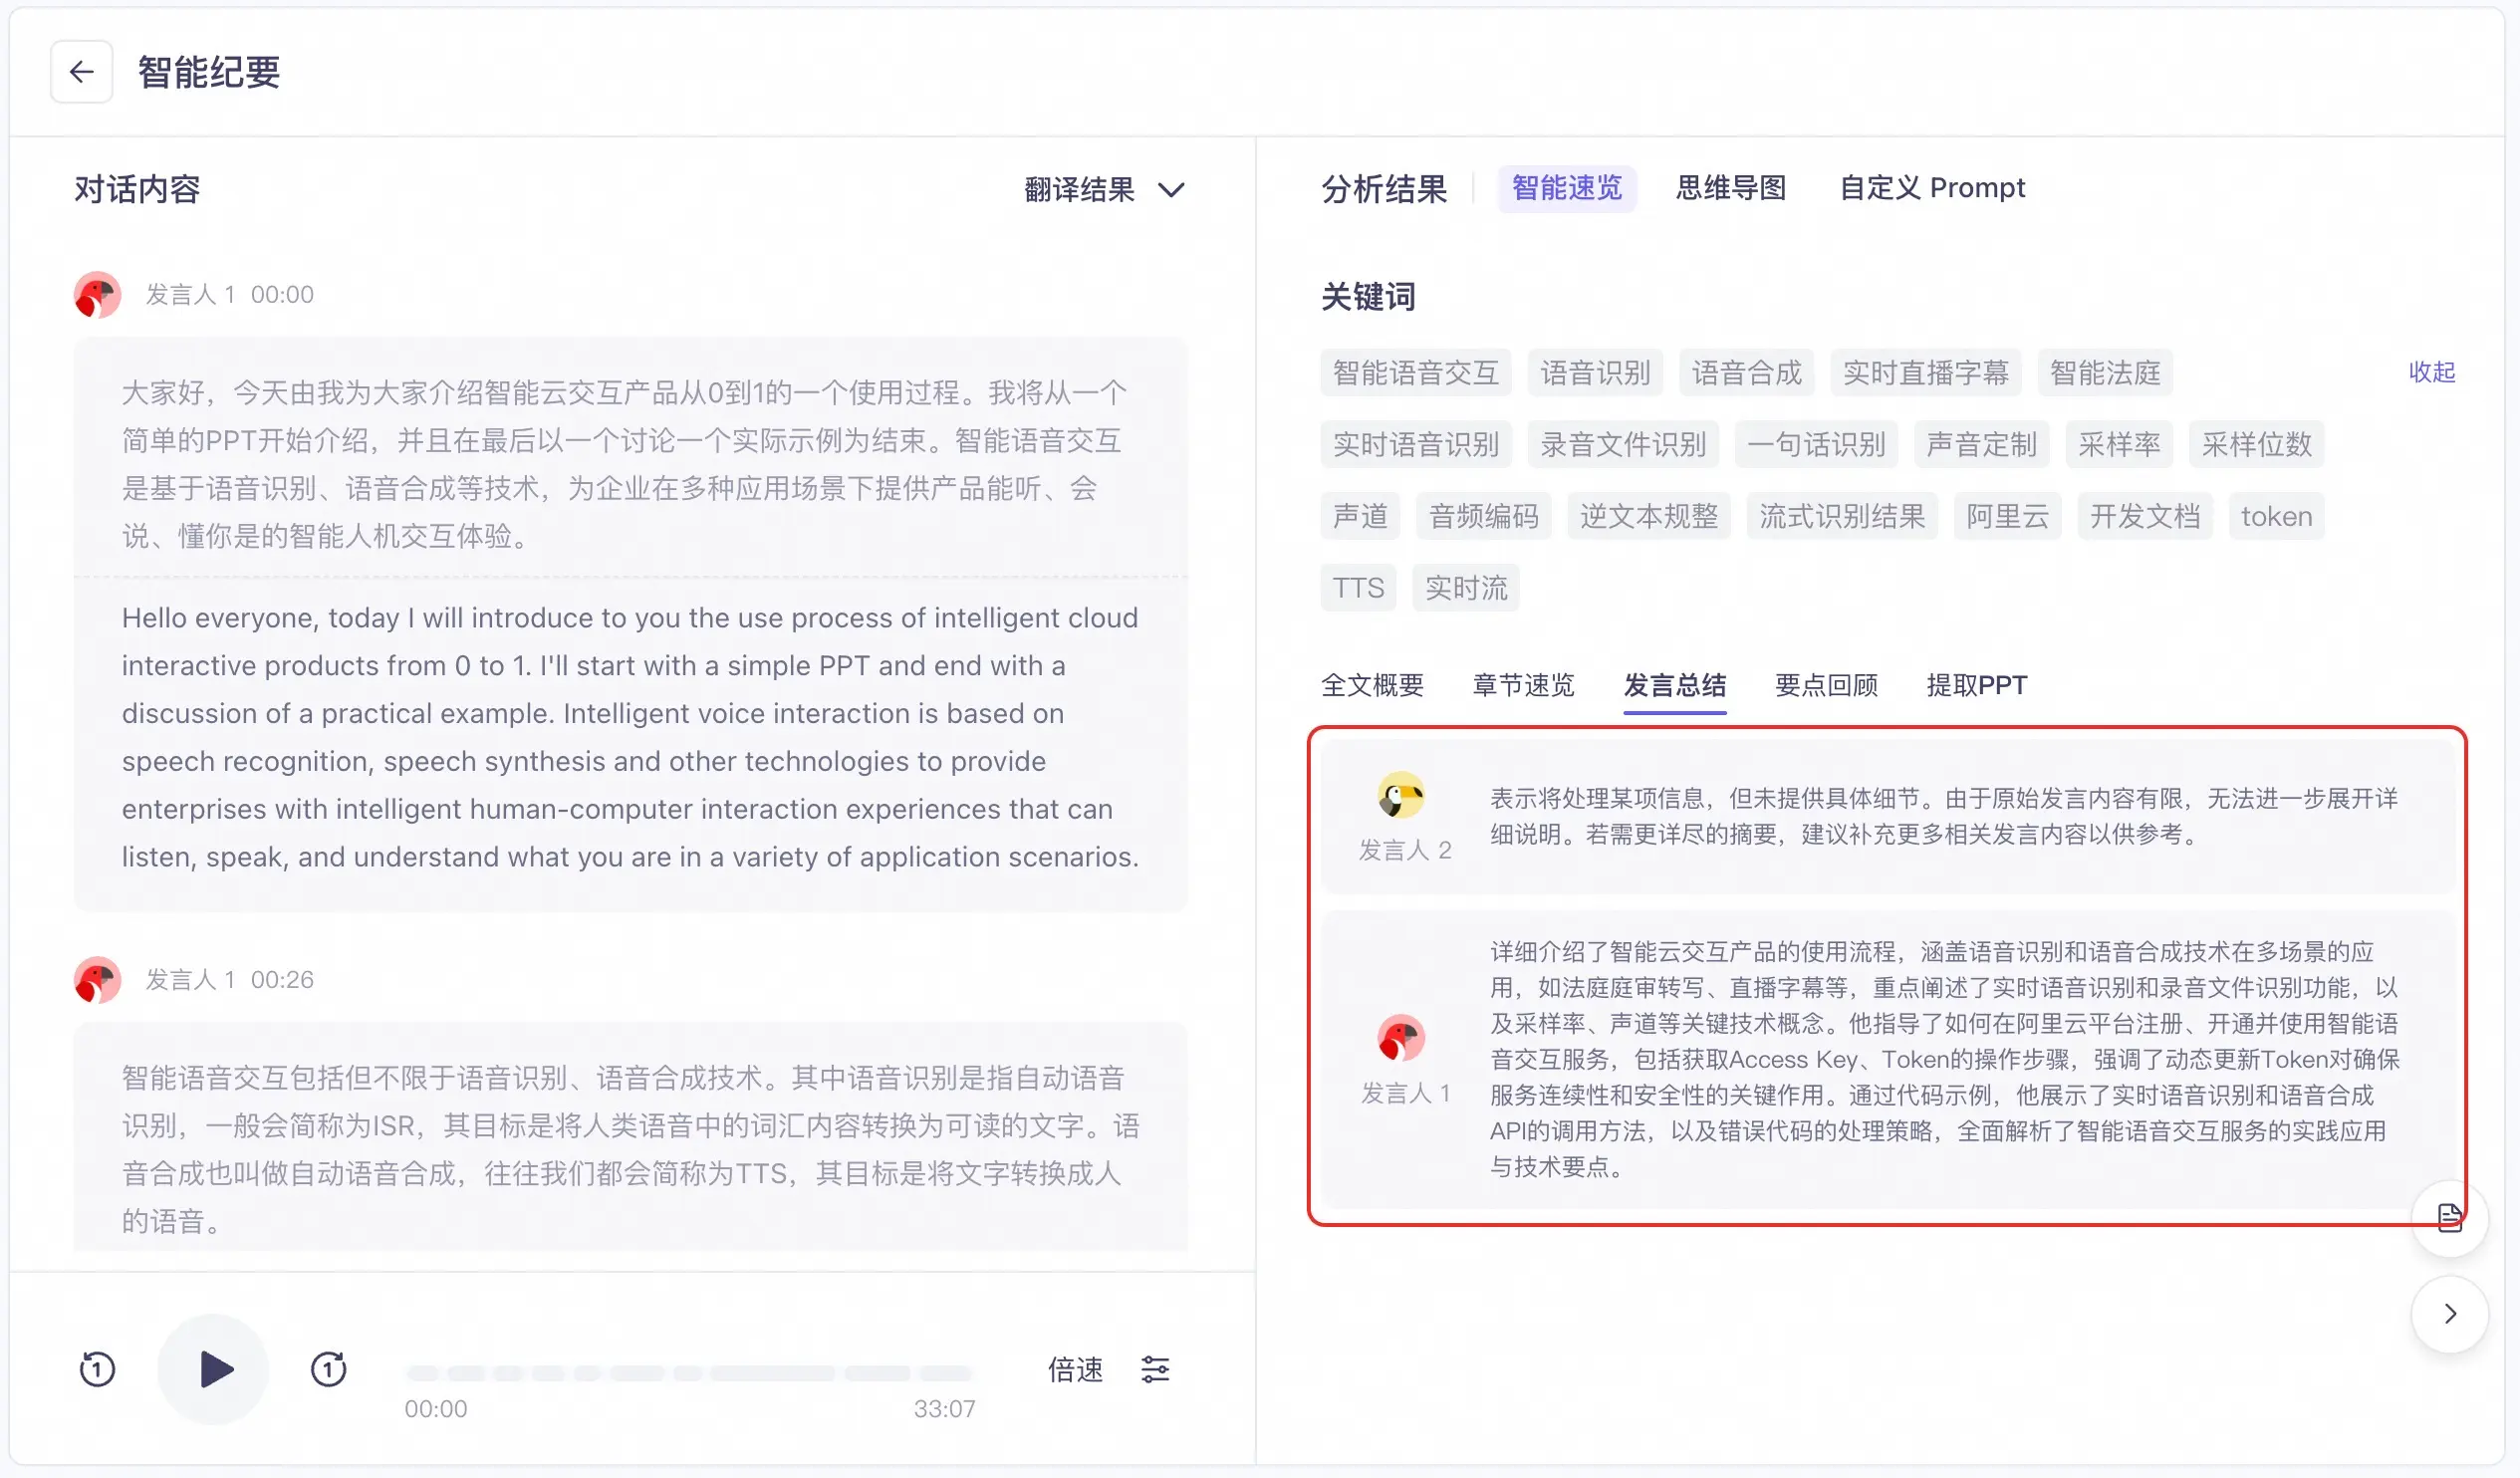
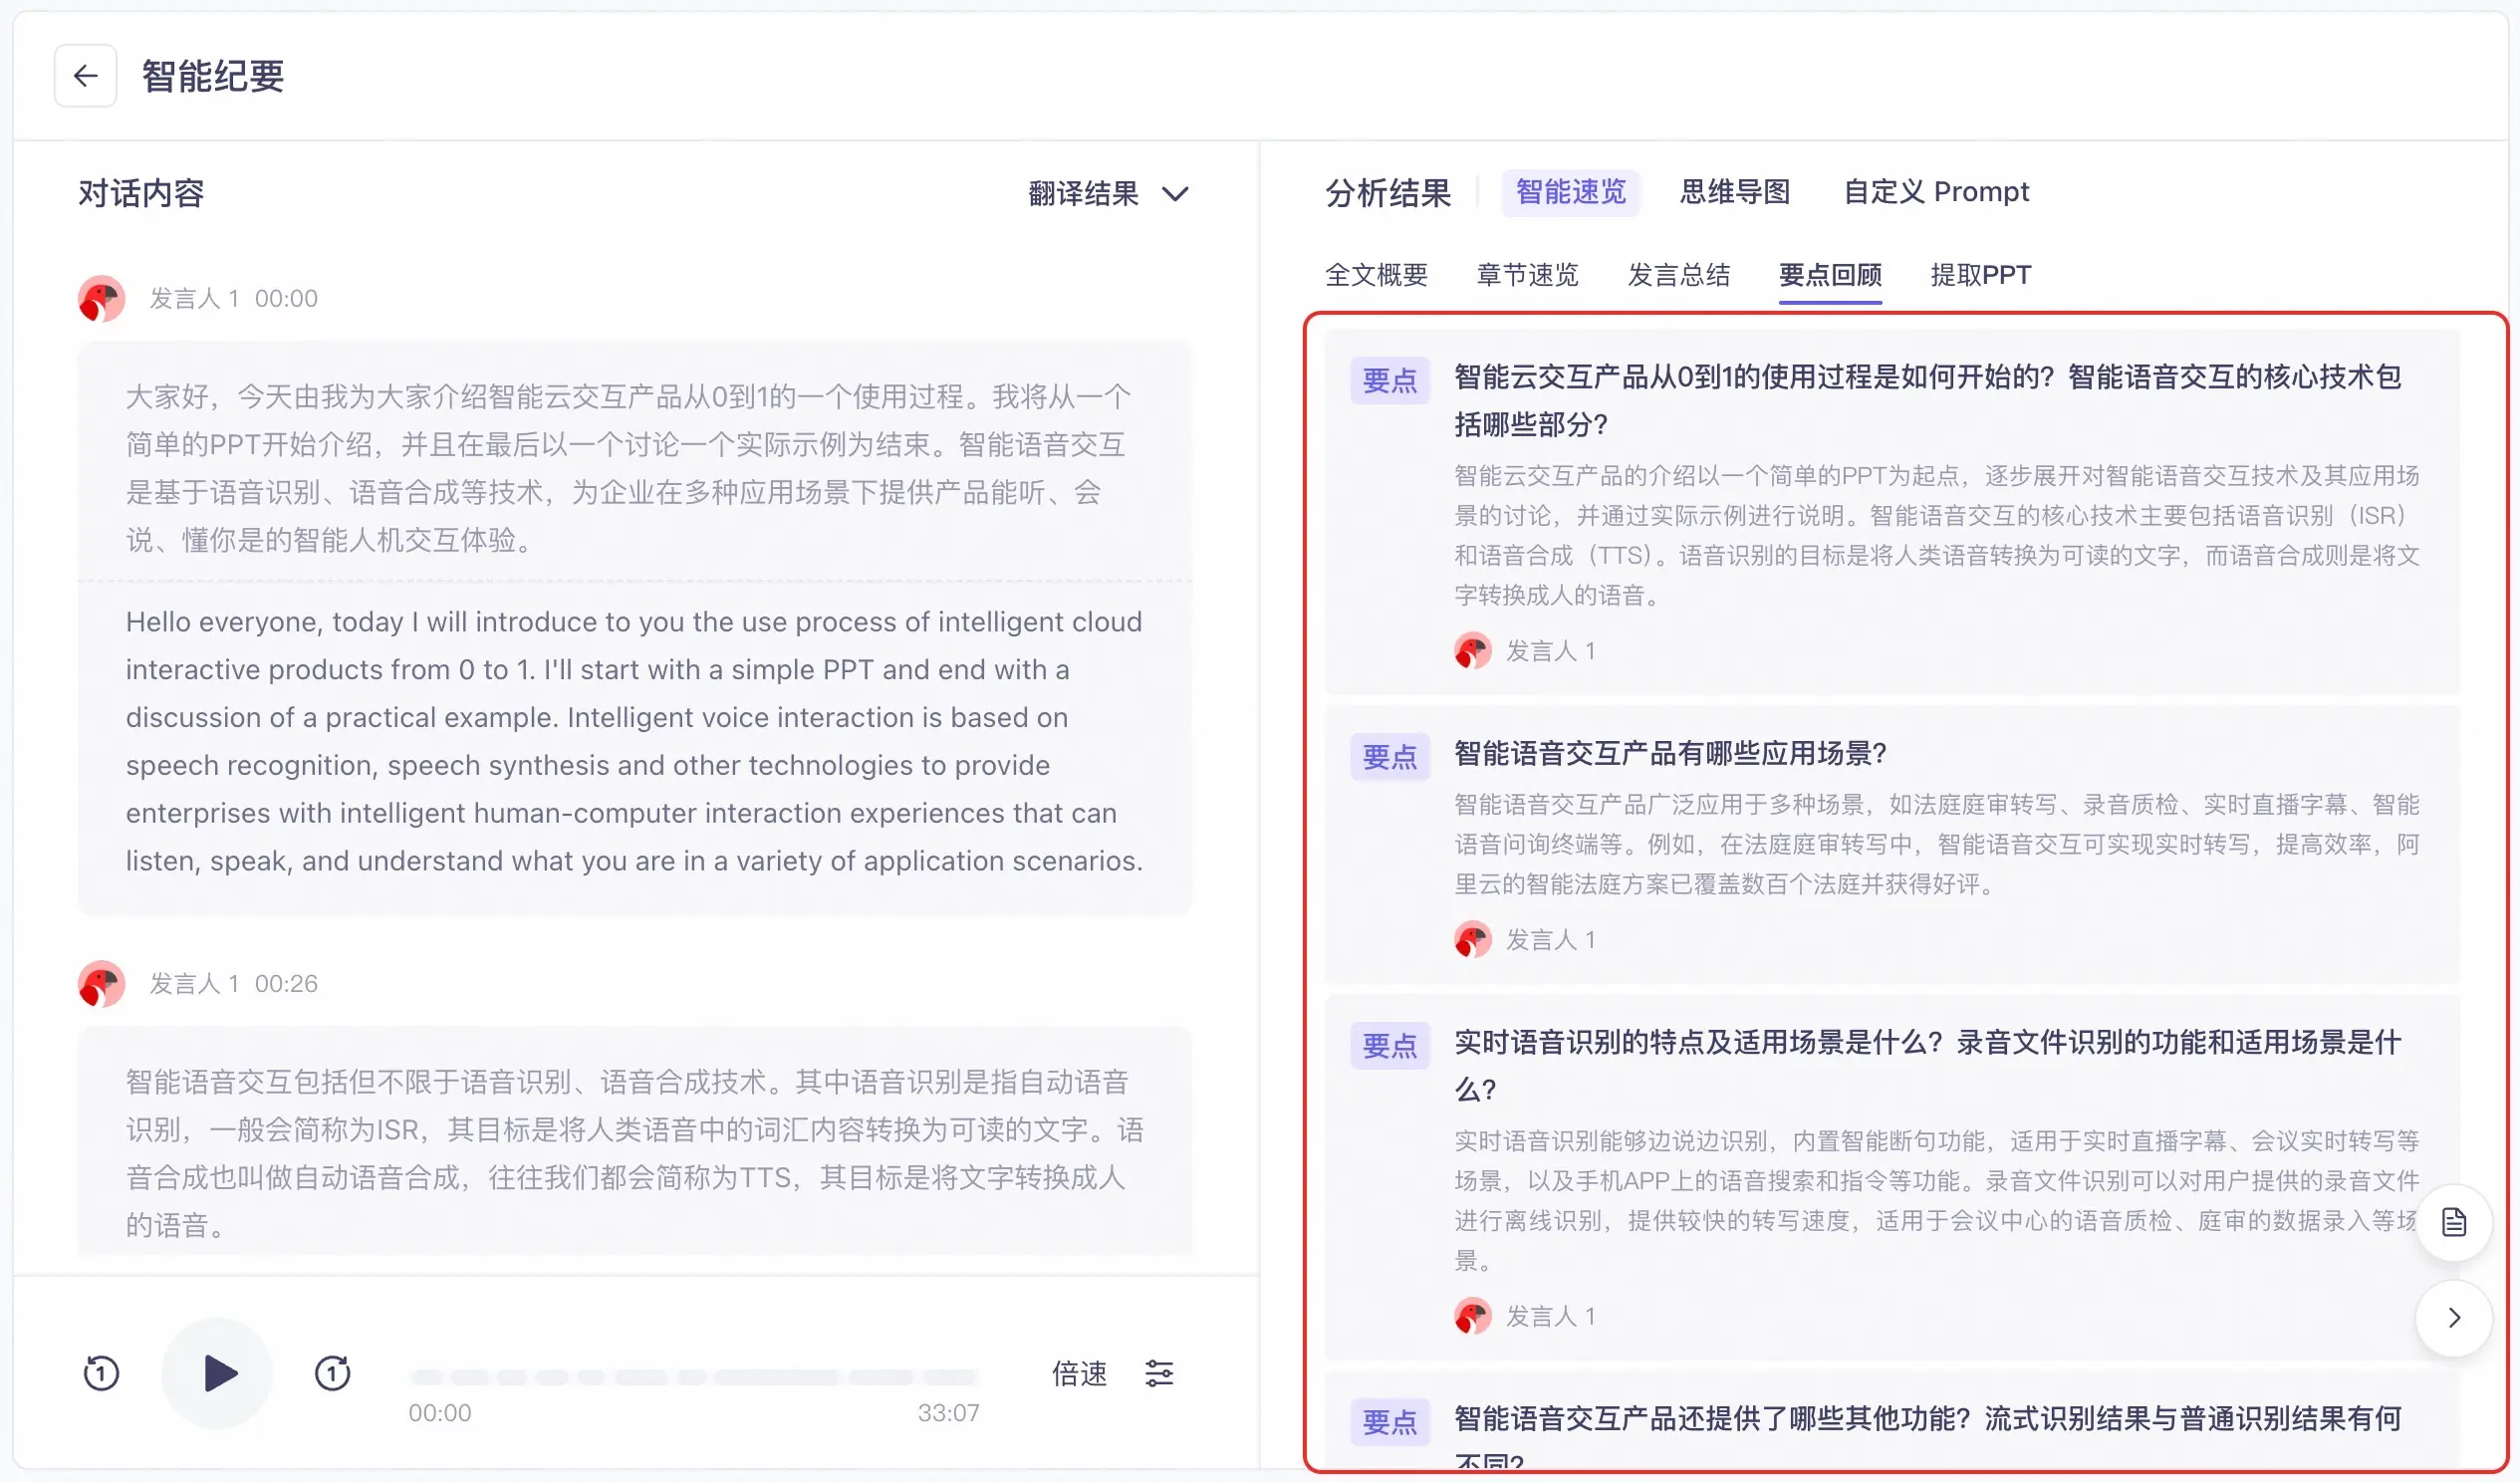
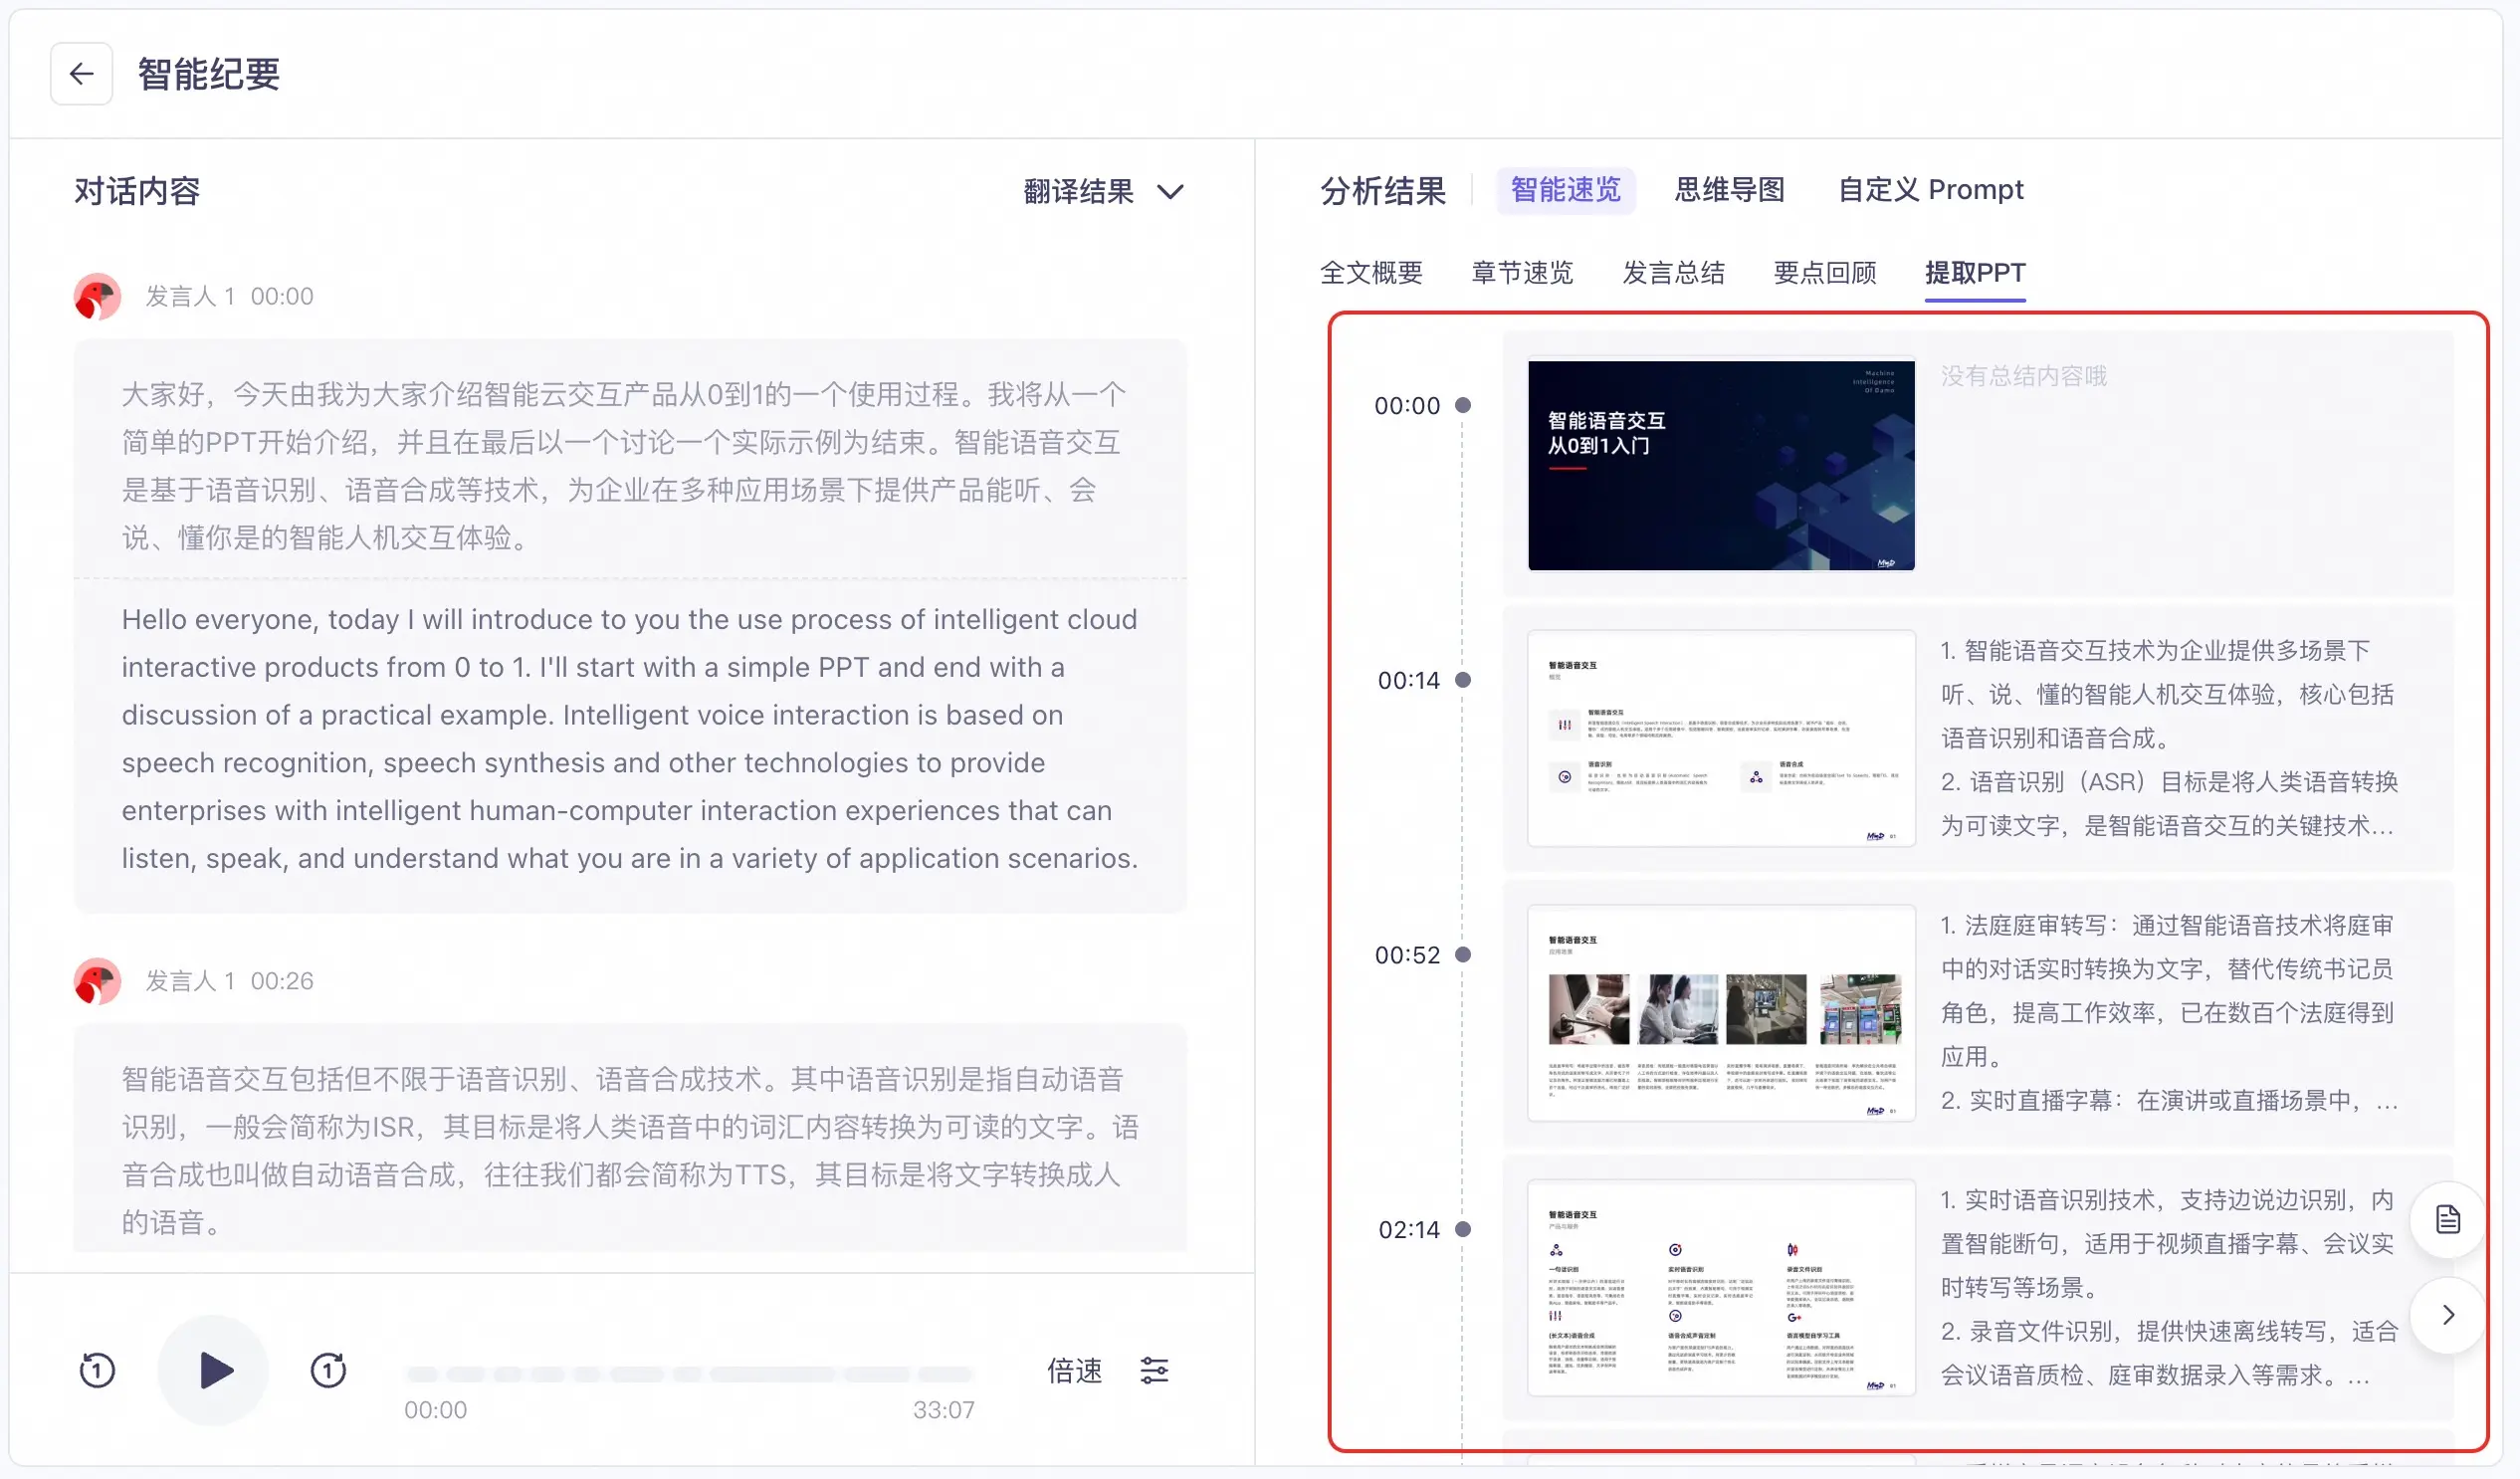
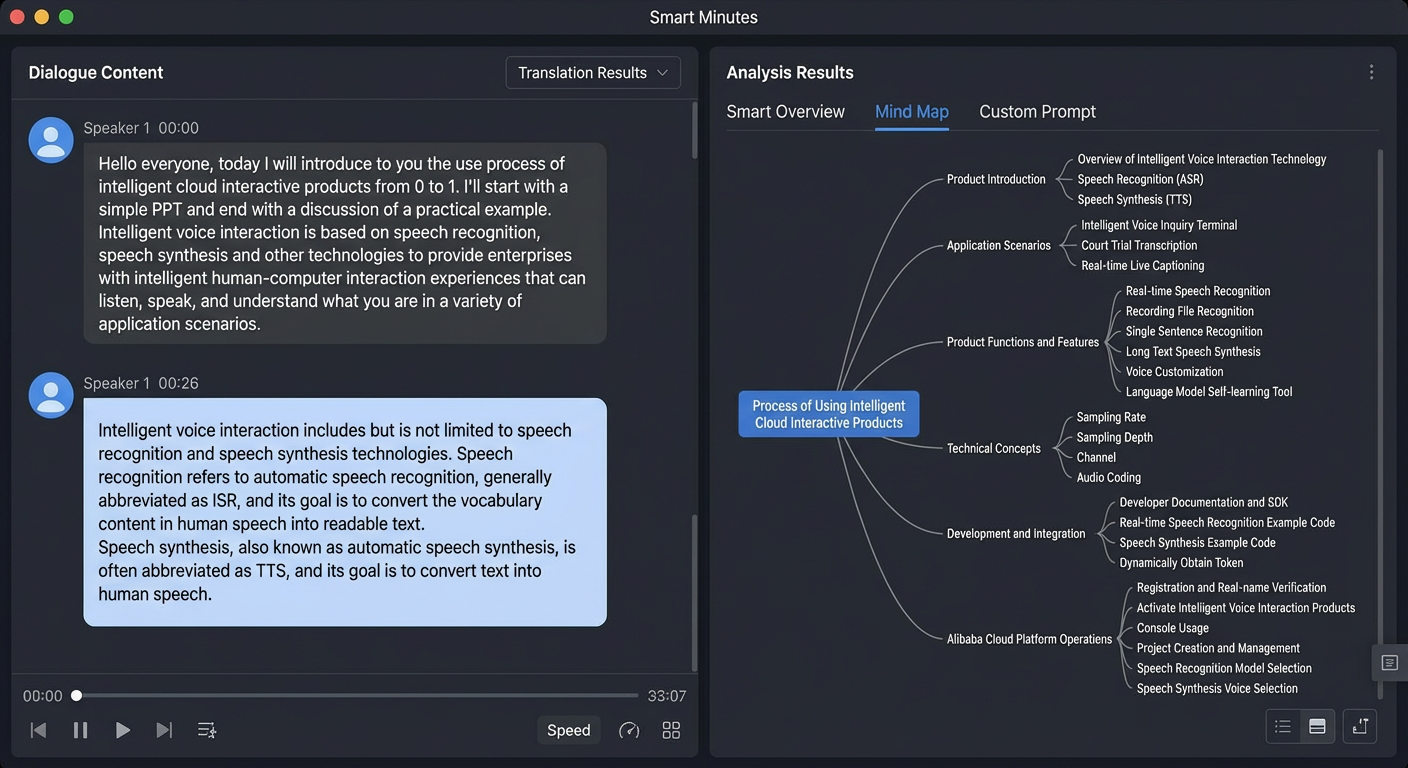
Click the Experience Now button and wait a moment. You can then view the dialogue content and the intelligent summary's analysis results.
- Conversation content
- Analysis results
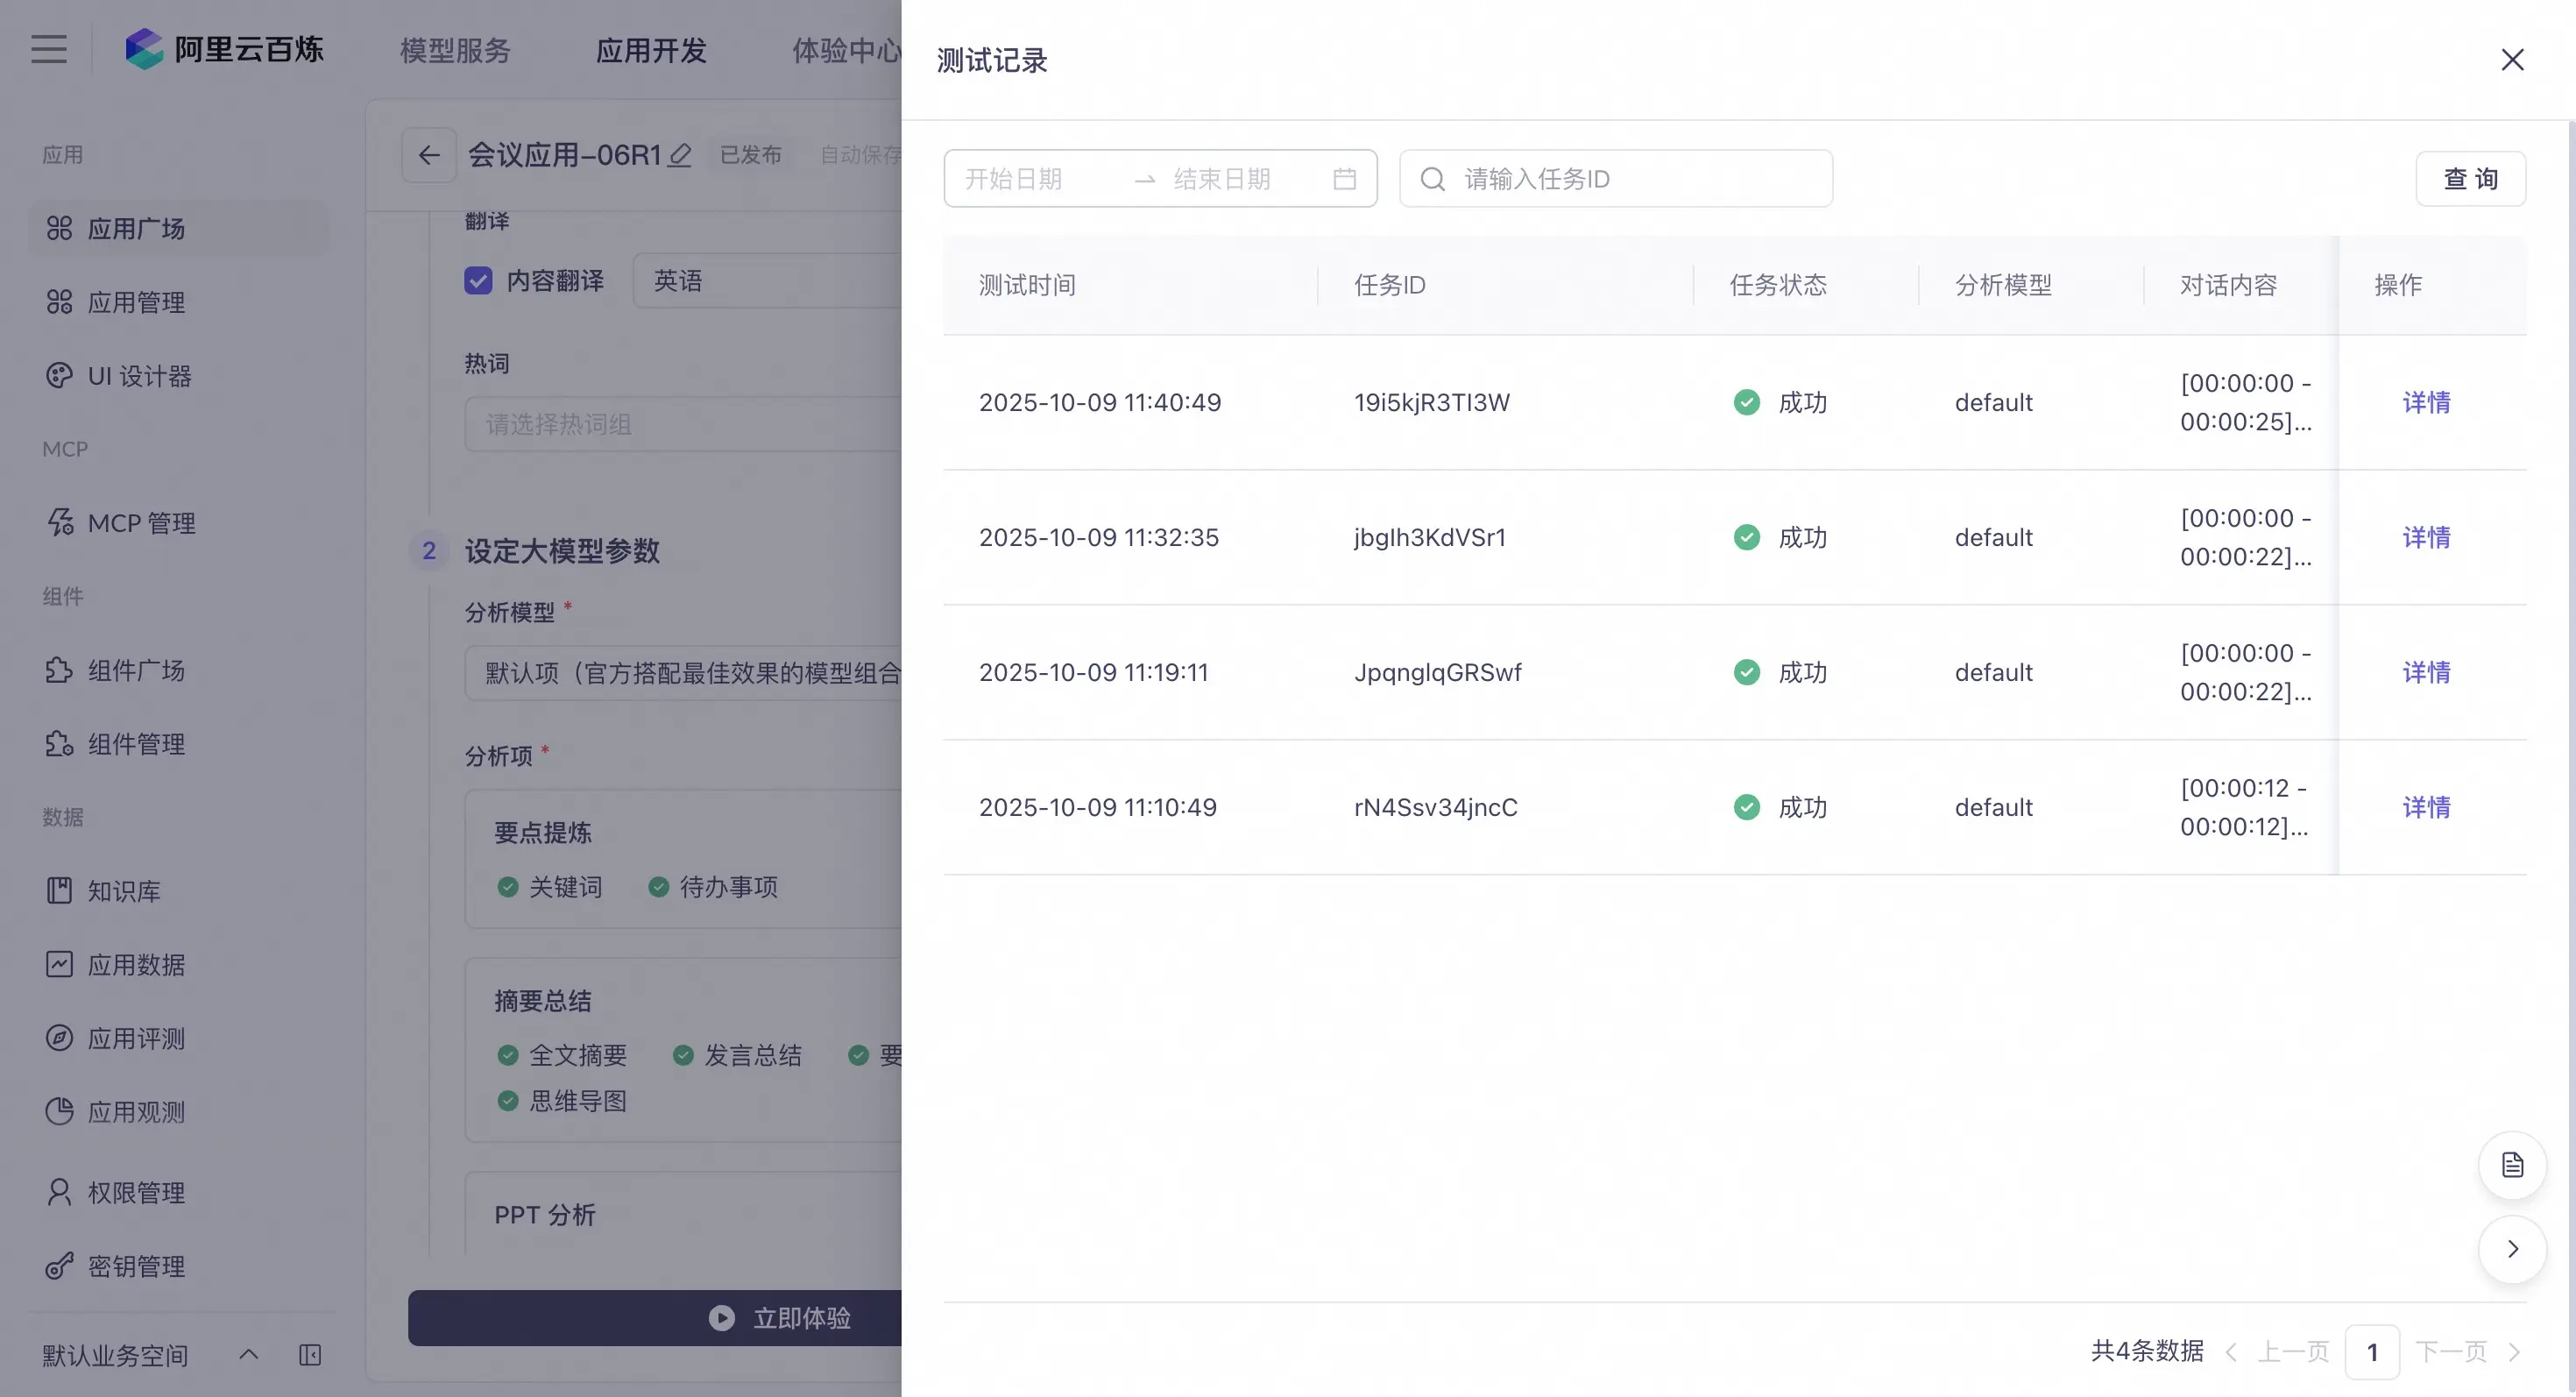
- Test Records
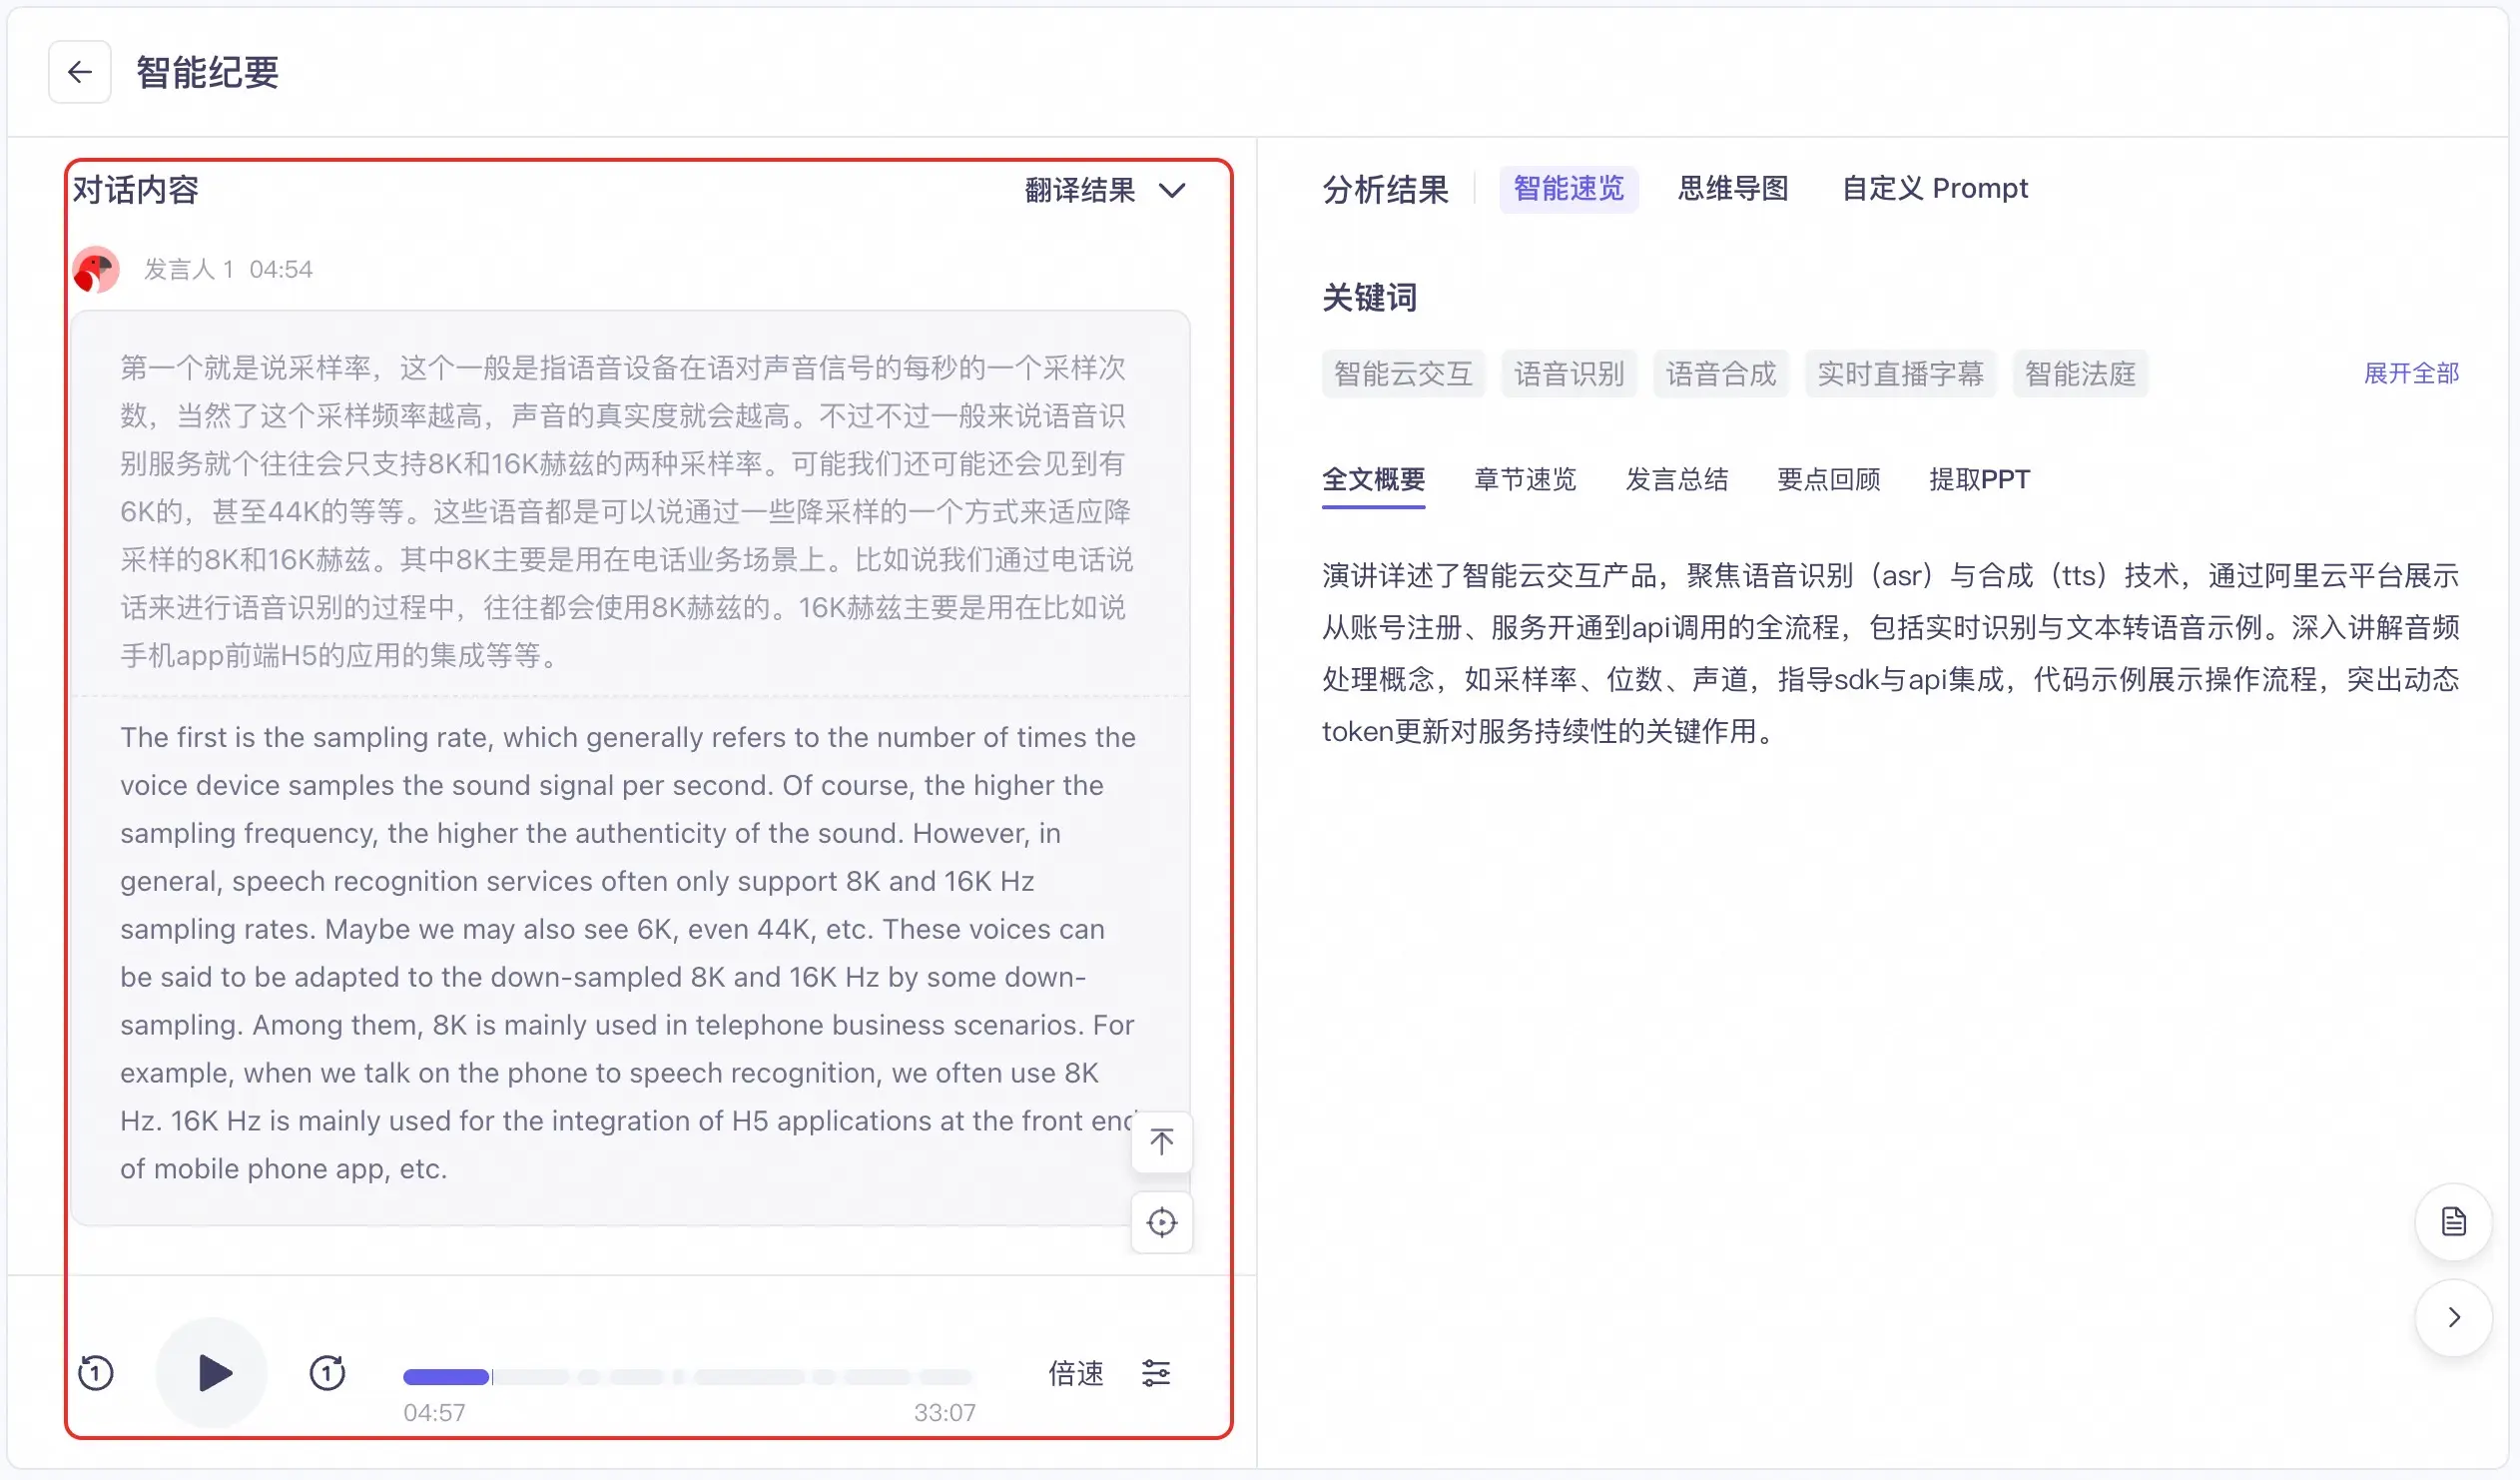
- If the content source is Recorded file recognition, Real-time transcription, or Tingwu task, the conversation content box displays the corresponding audio or video transcription results. The box also shows the speaker ID and dialogue timestamp. You can play the audio file for comparison.
- If the content source is Meeting text content, the dialogue timestamp information may not be displayed. However, this does not affect the analysis results.
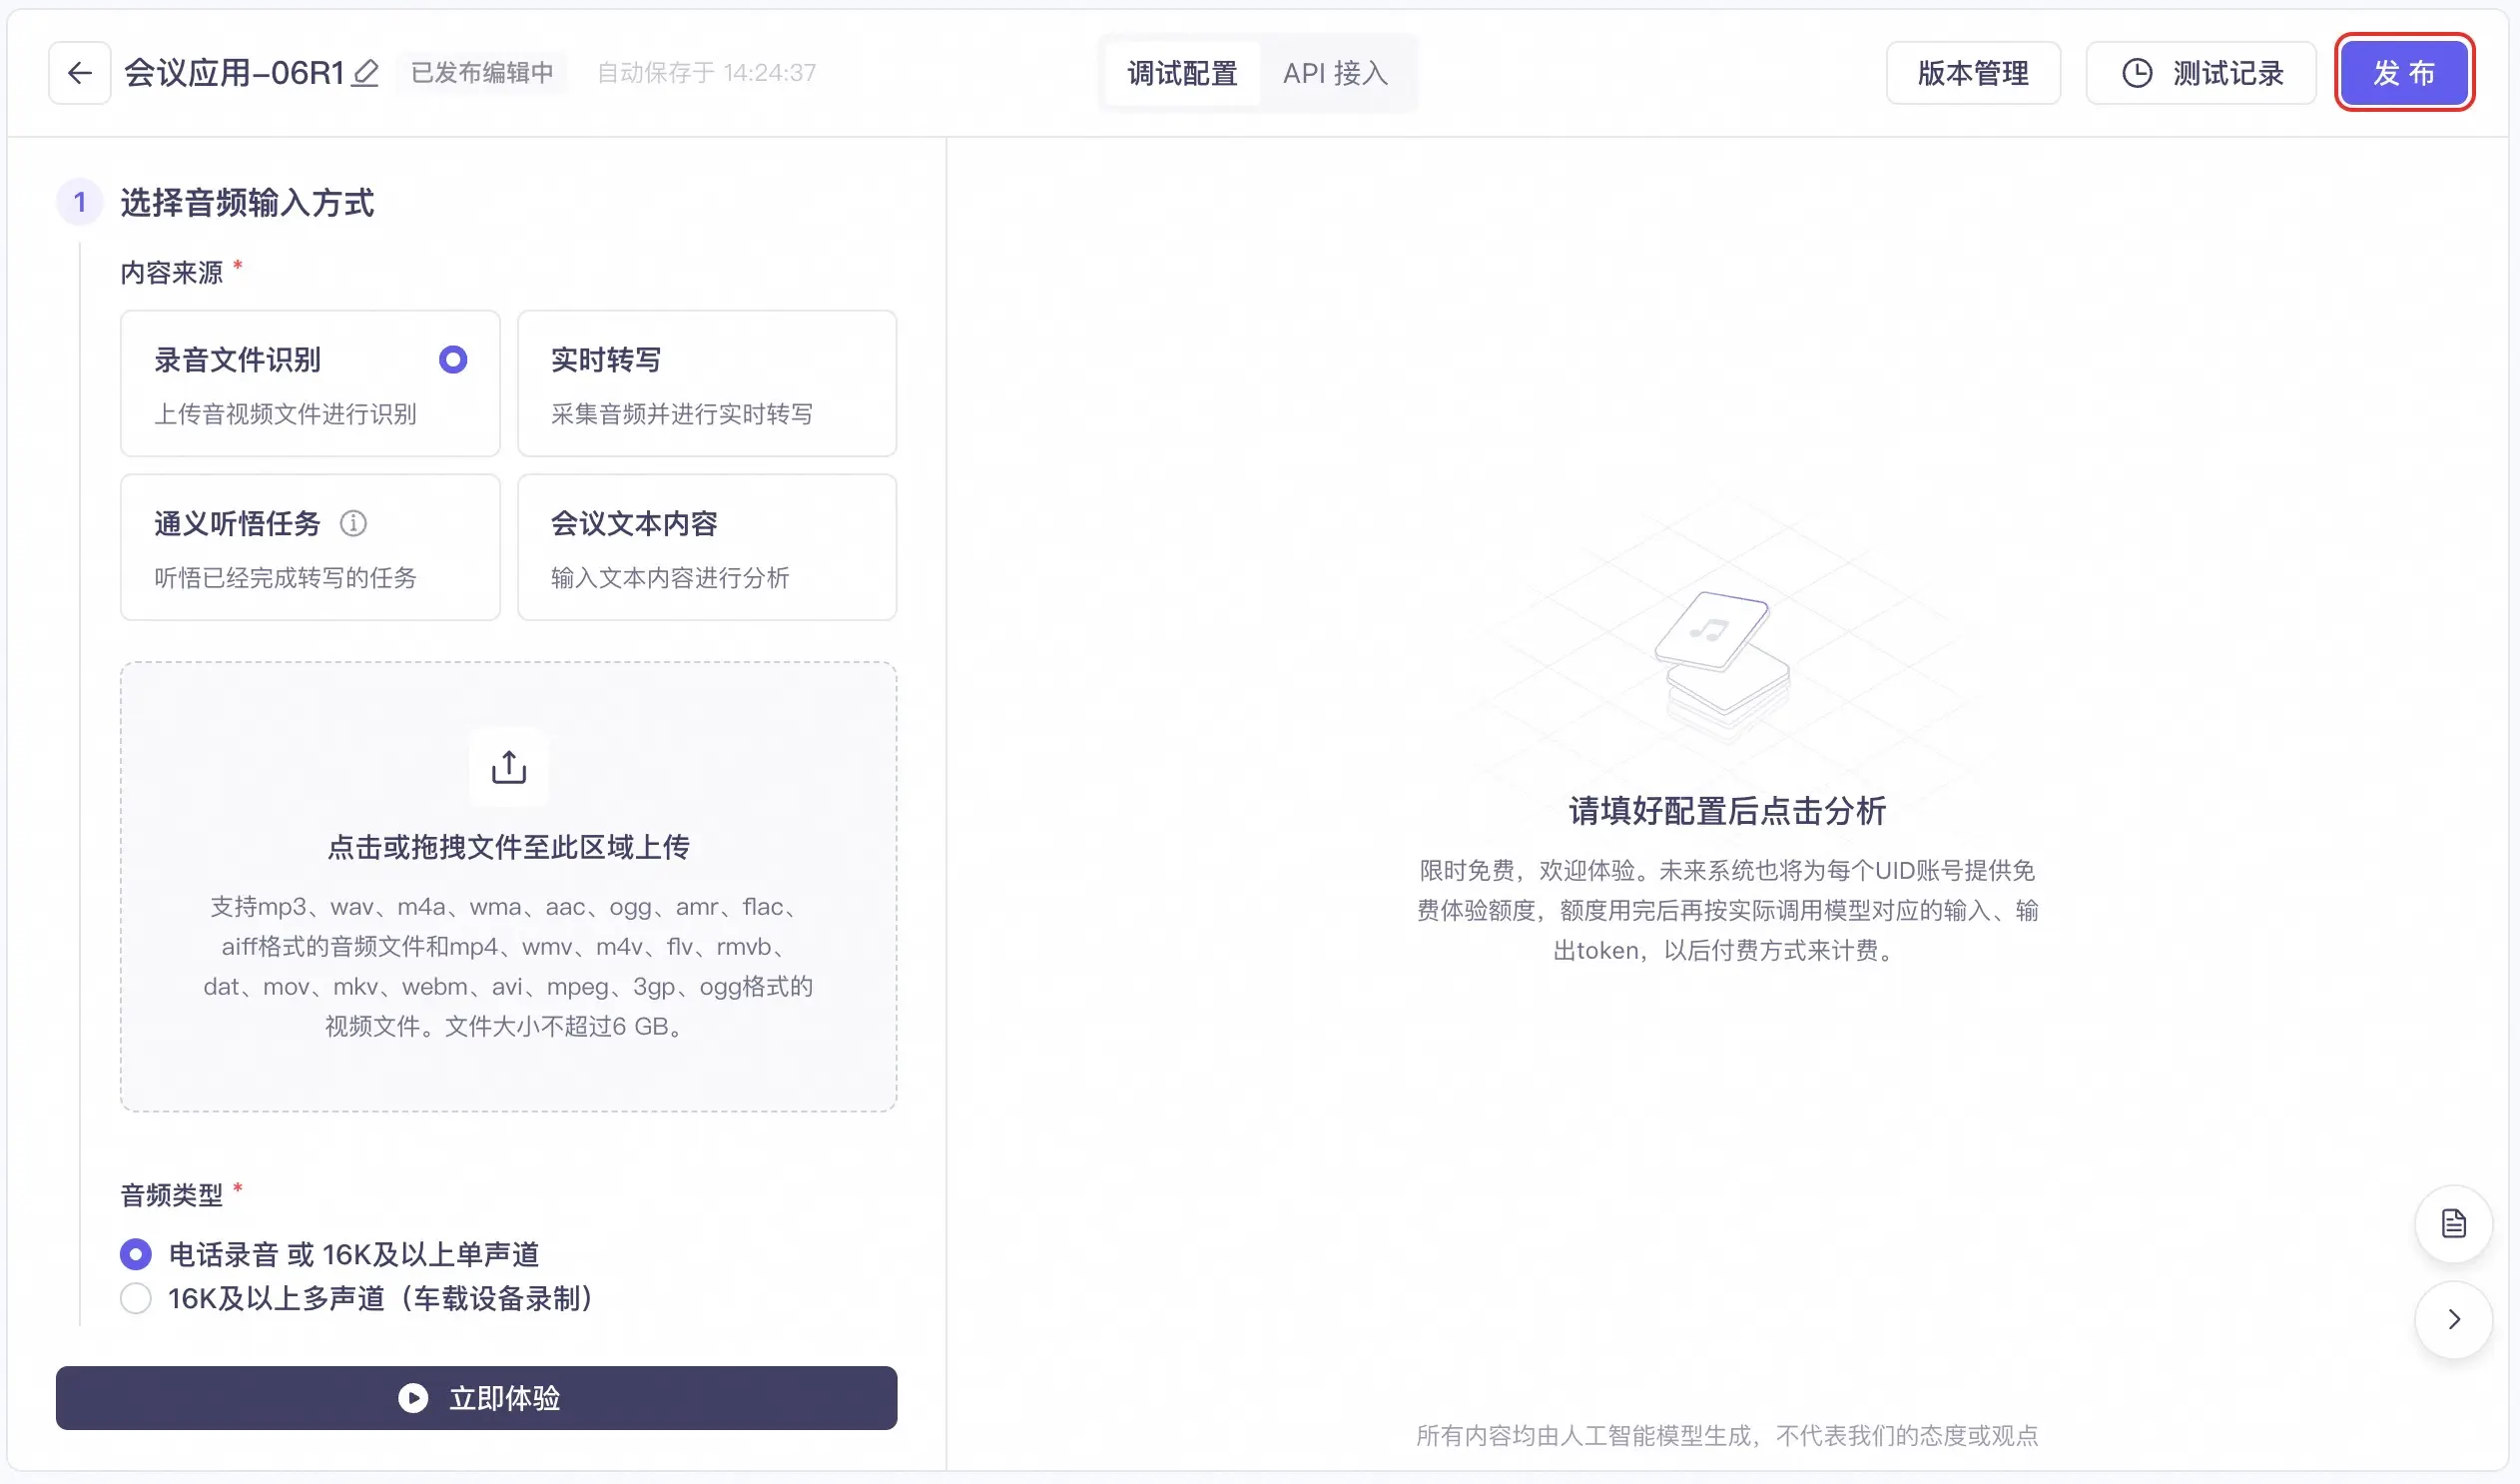
4. Publish the application
Click the Publish button in the upper-right corner of the console and enter a version description to publish the application. The application takes effect online immediately after publication.
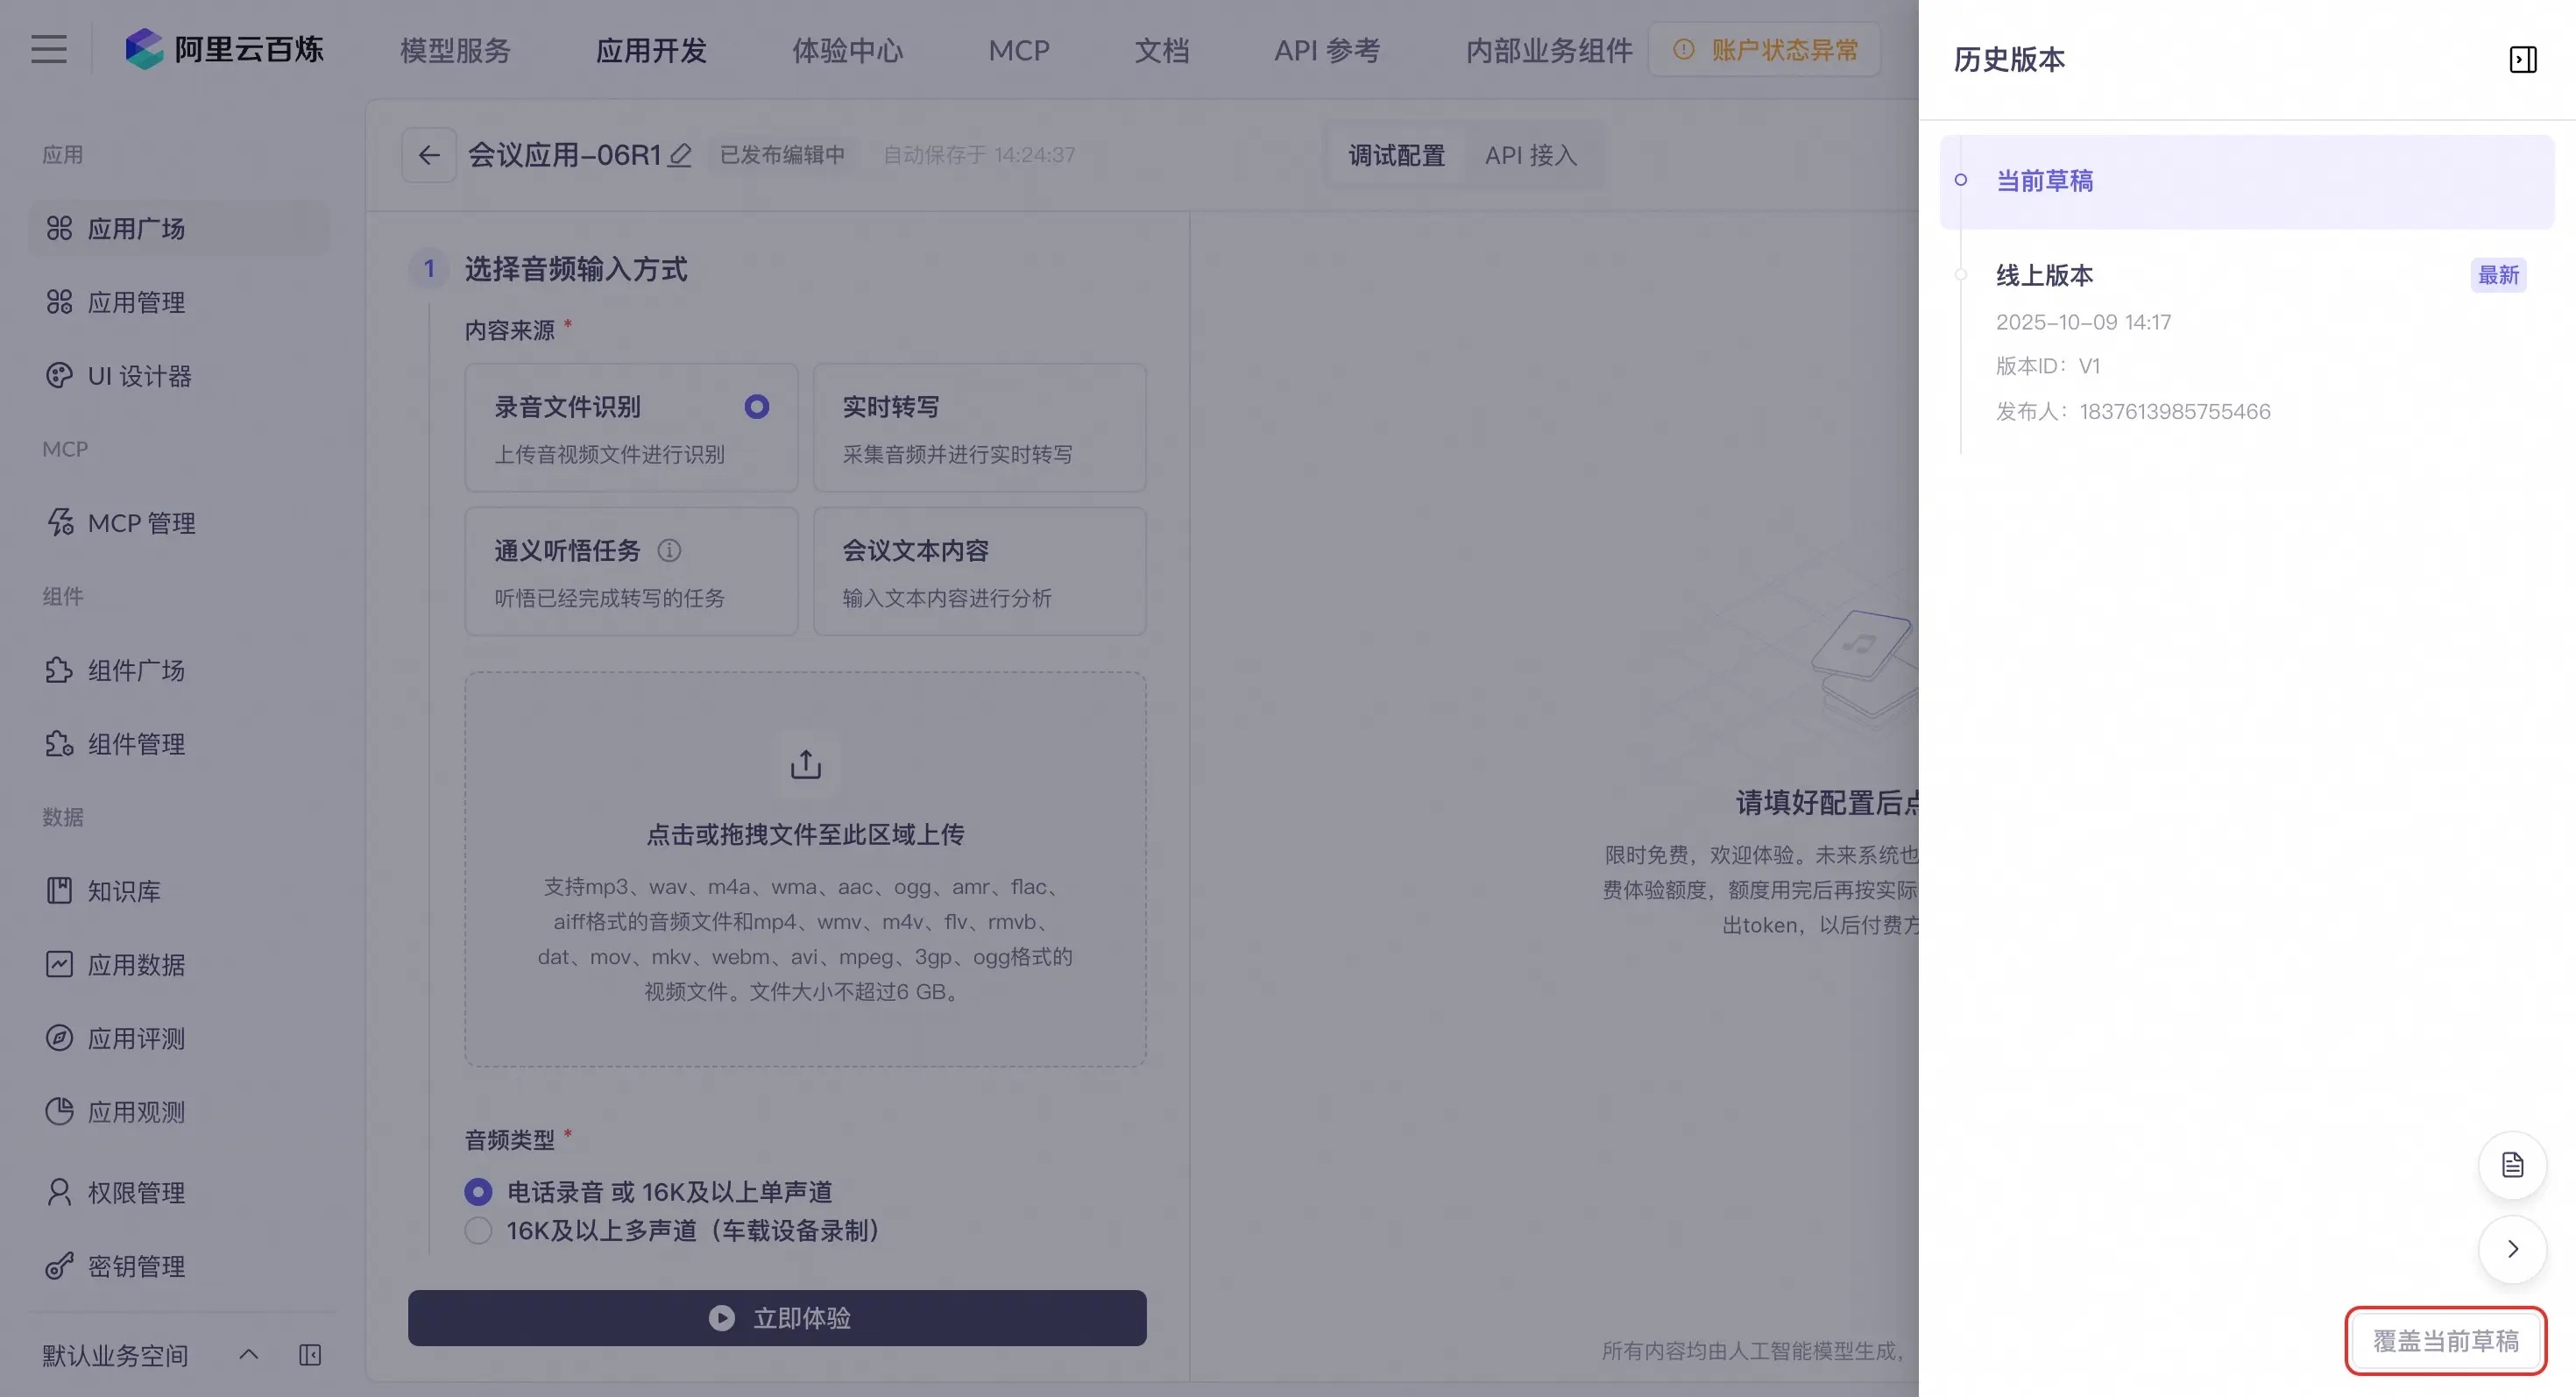
Version control
After the application is published, you can view its historical versions in Version Control in the upper-right corner of the console. Select a historical version and click the Overwrite Current Draft button in the lower-right corner. This applies the configuration of the selected version to the current draft.
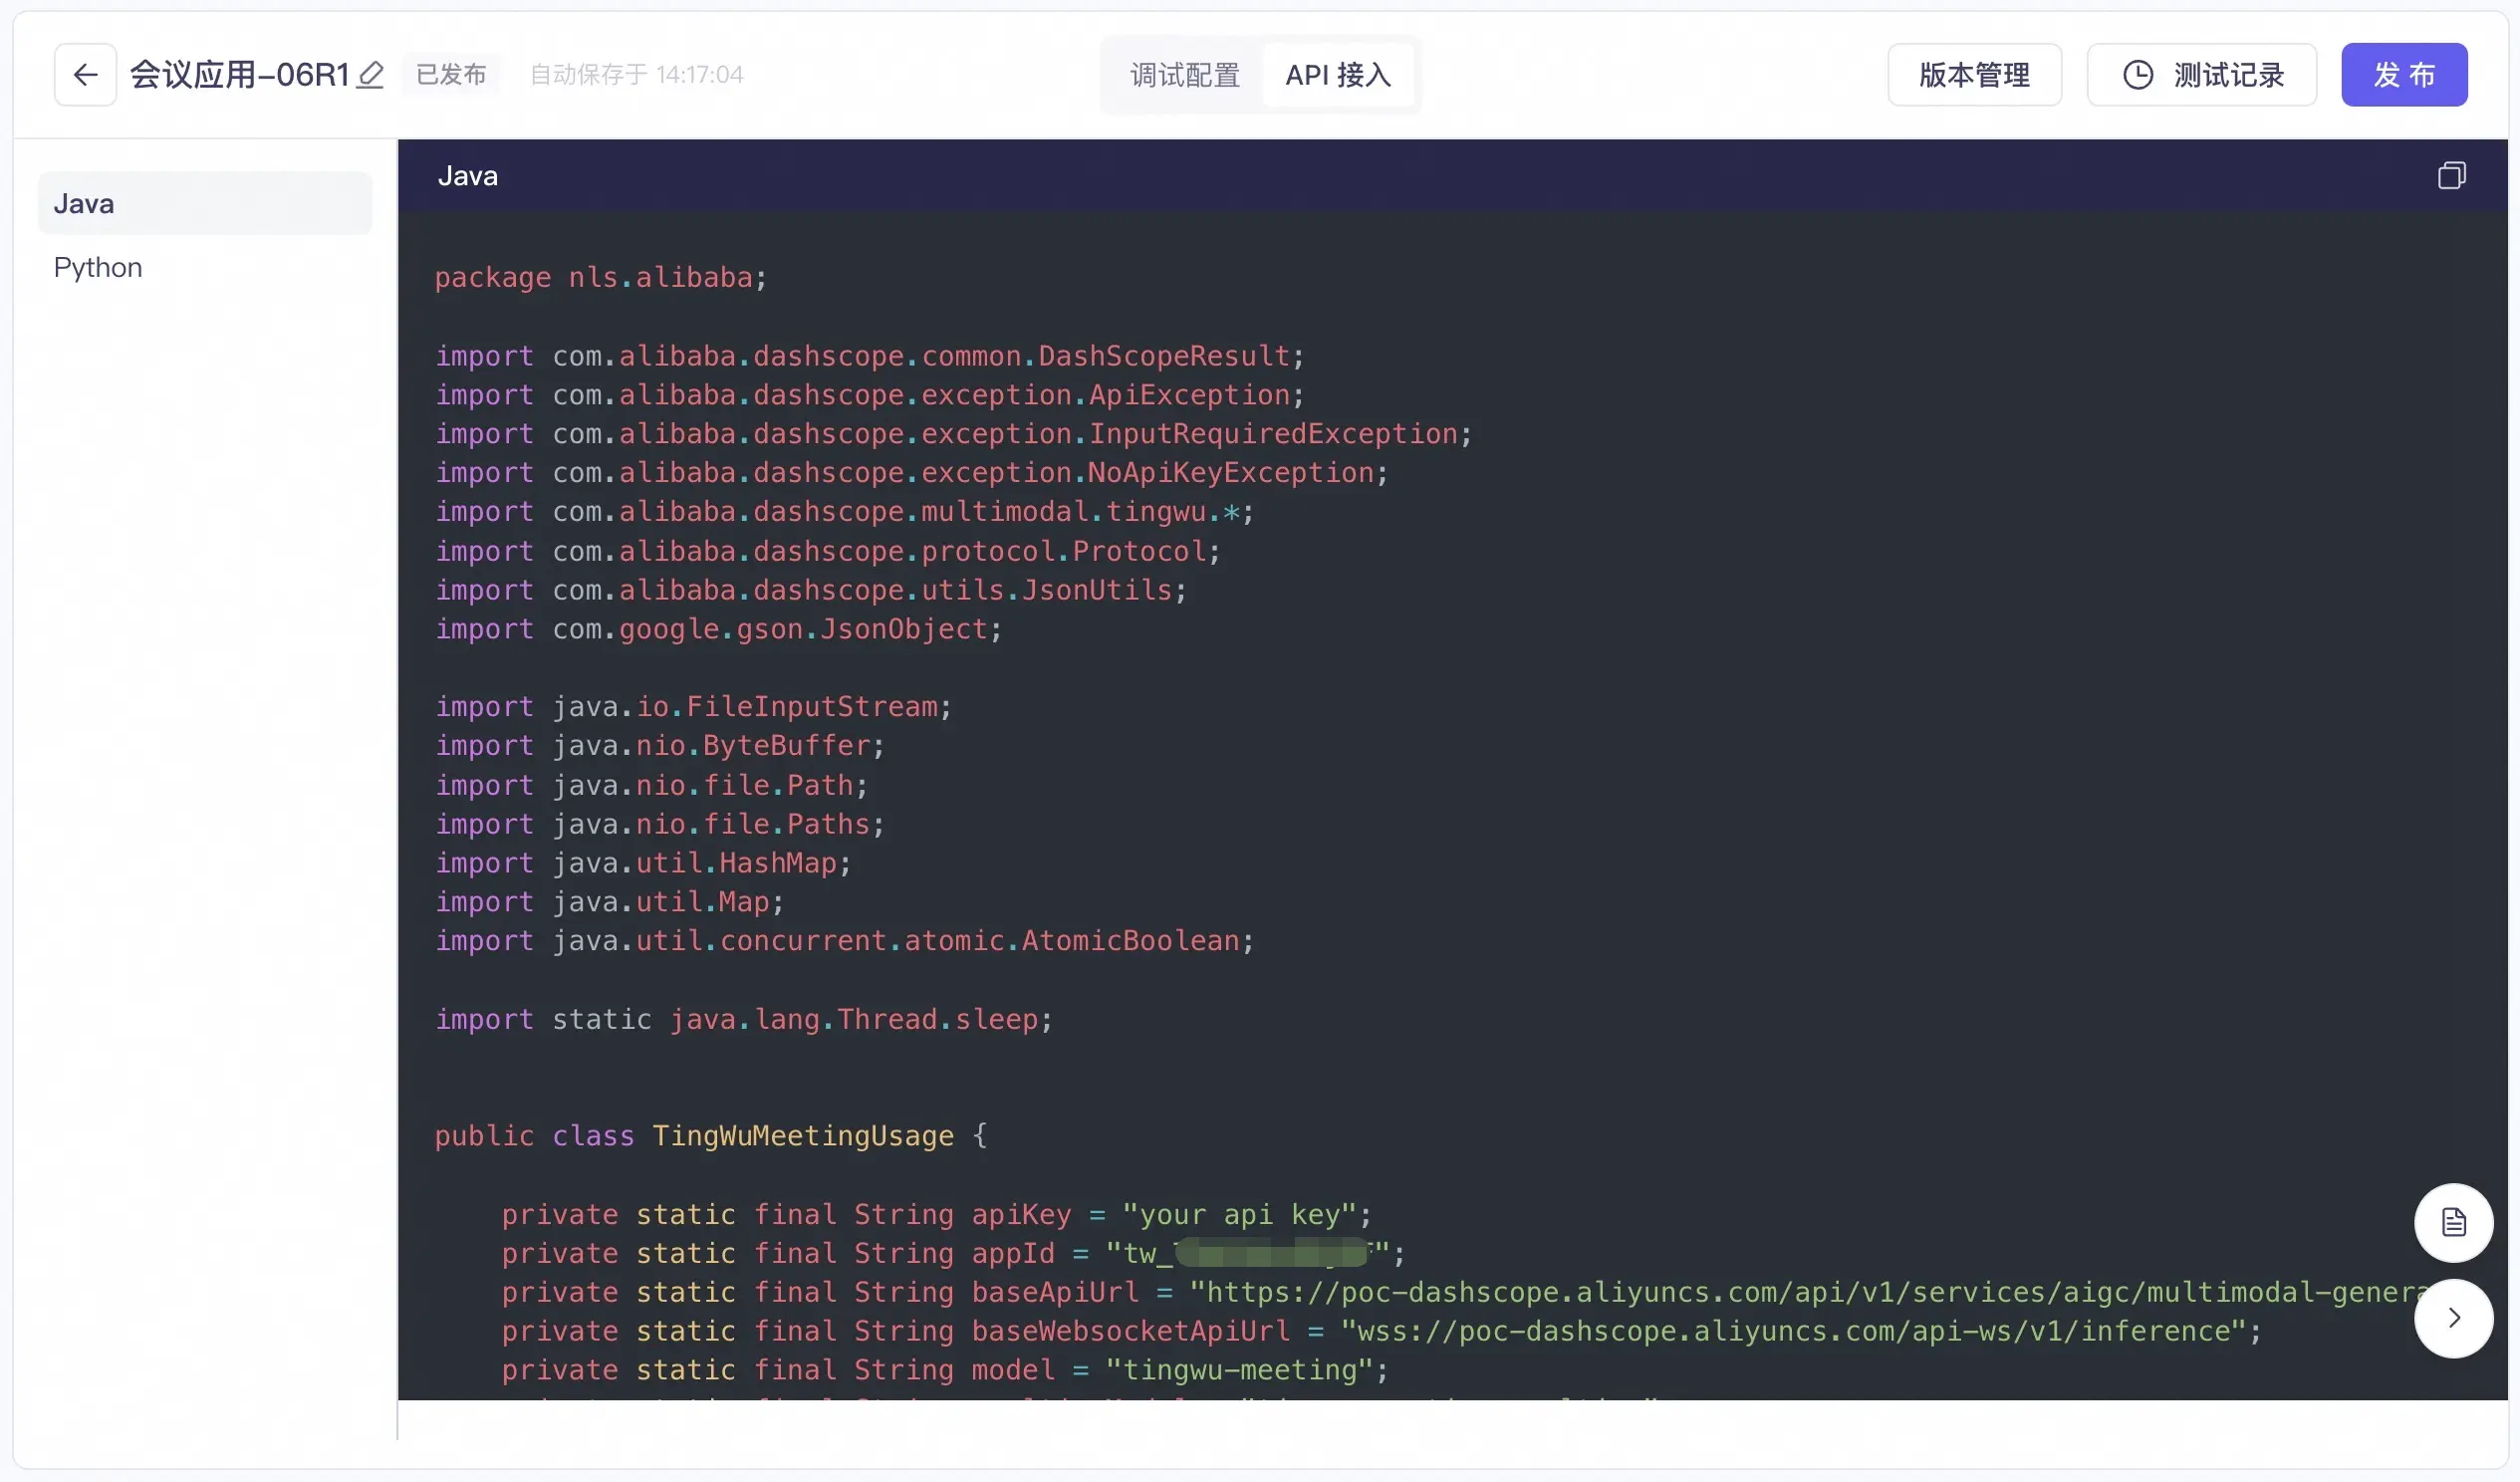
5. API integration
After the application is published, wait a moment for it to take effect. Then, click the API Integration button at the top of the console to view reference code for Java and Python. You can use this code to integrate the service into your business system.
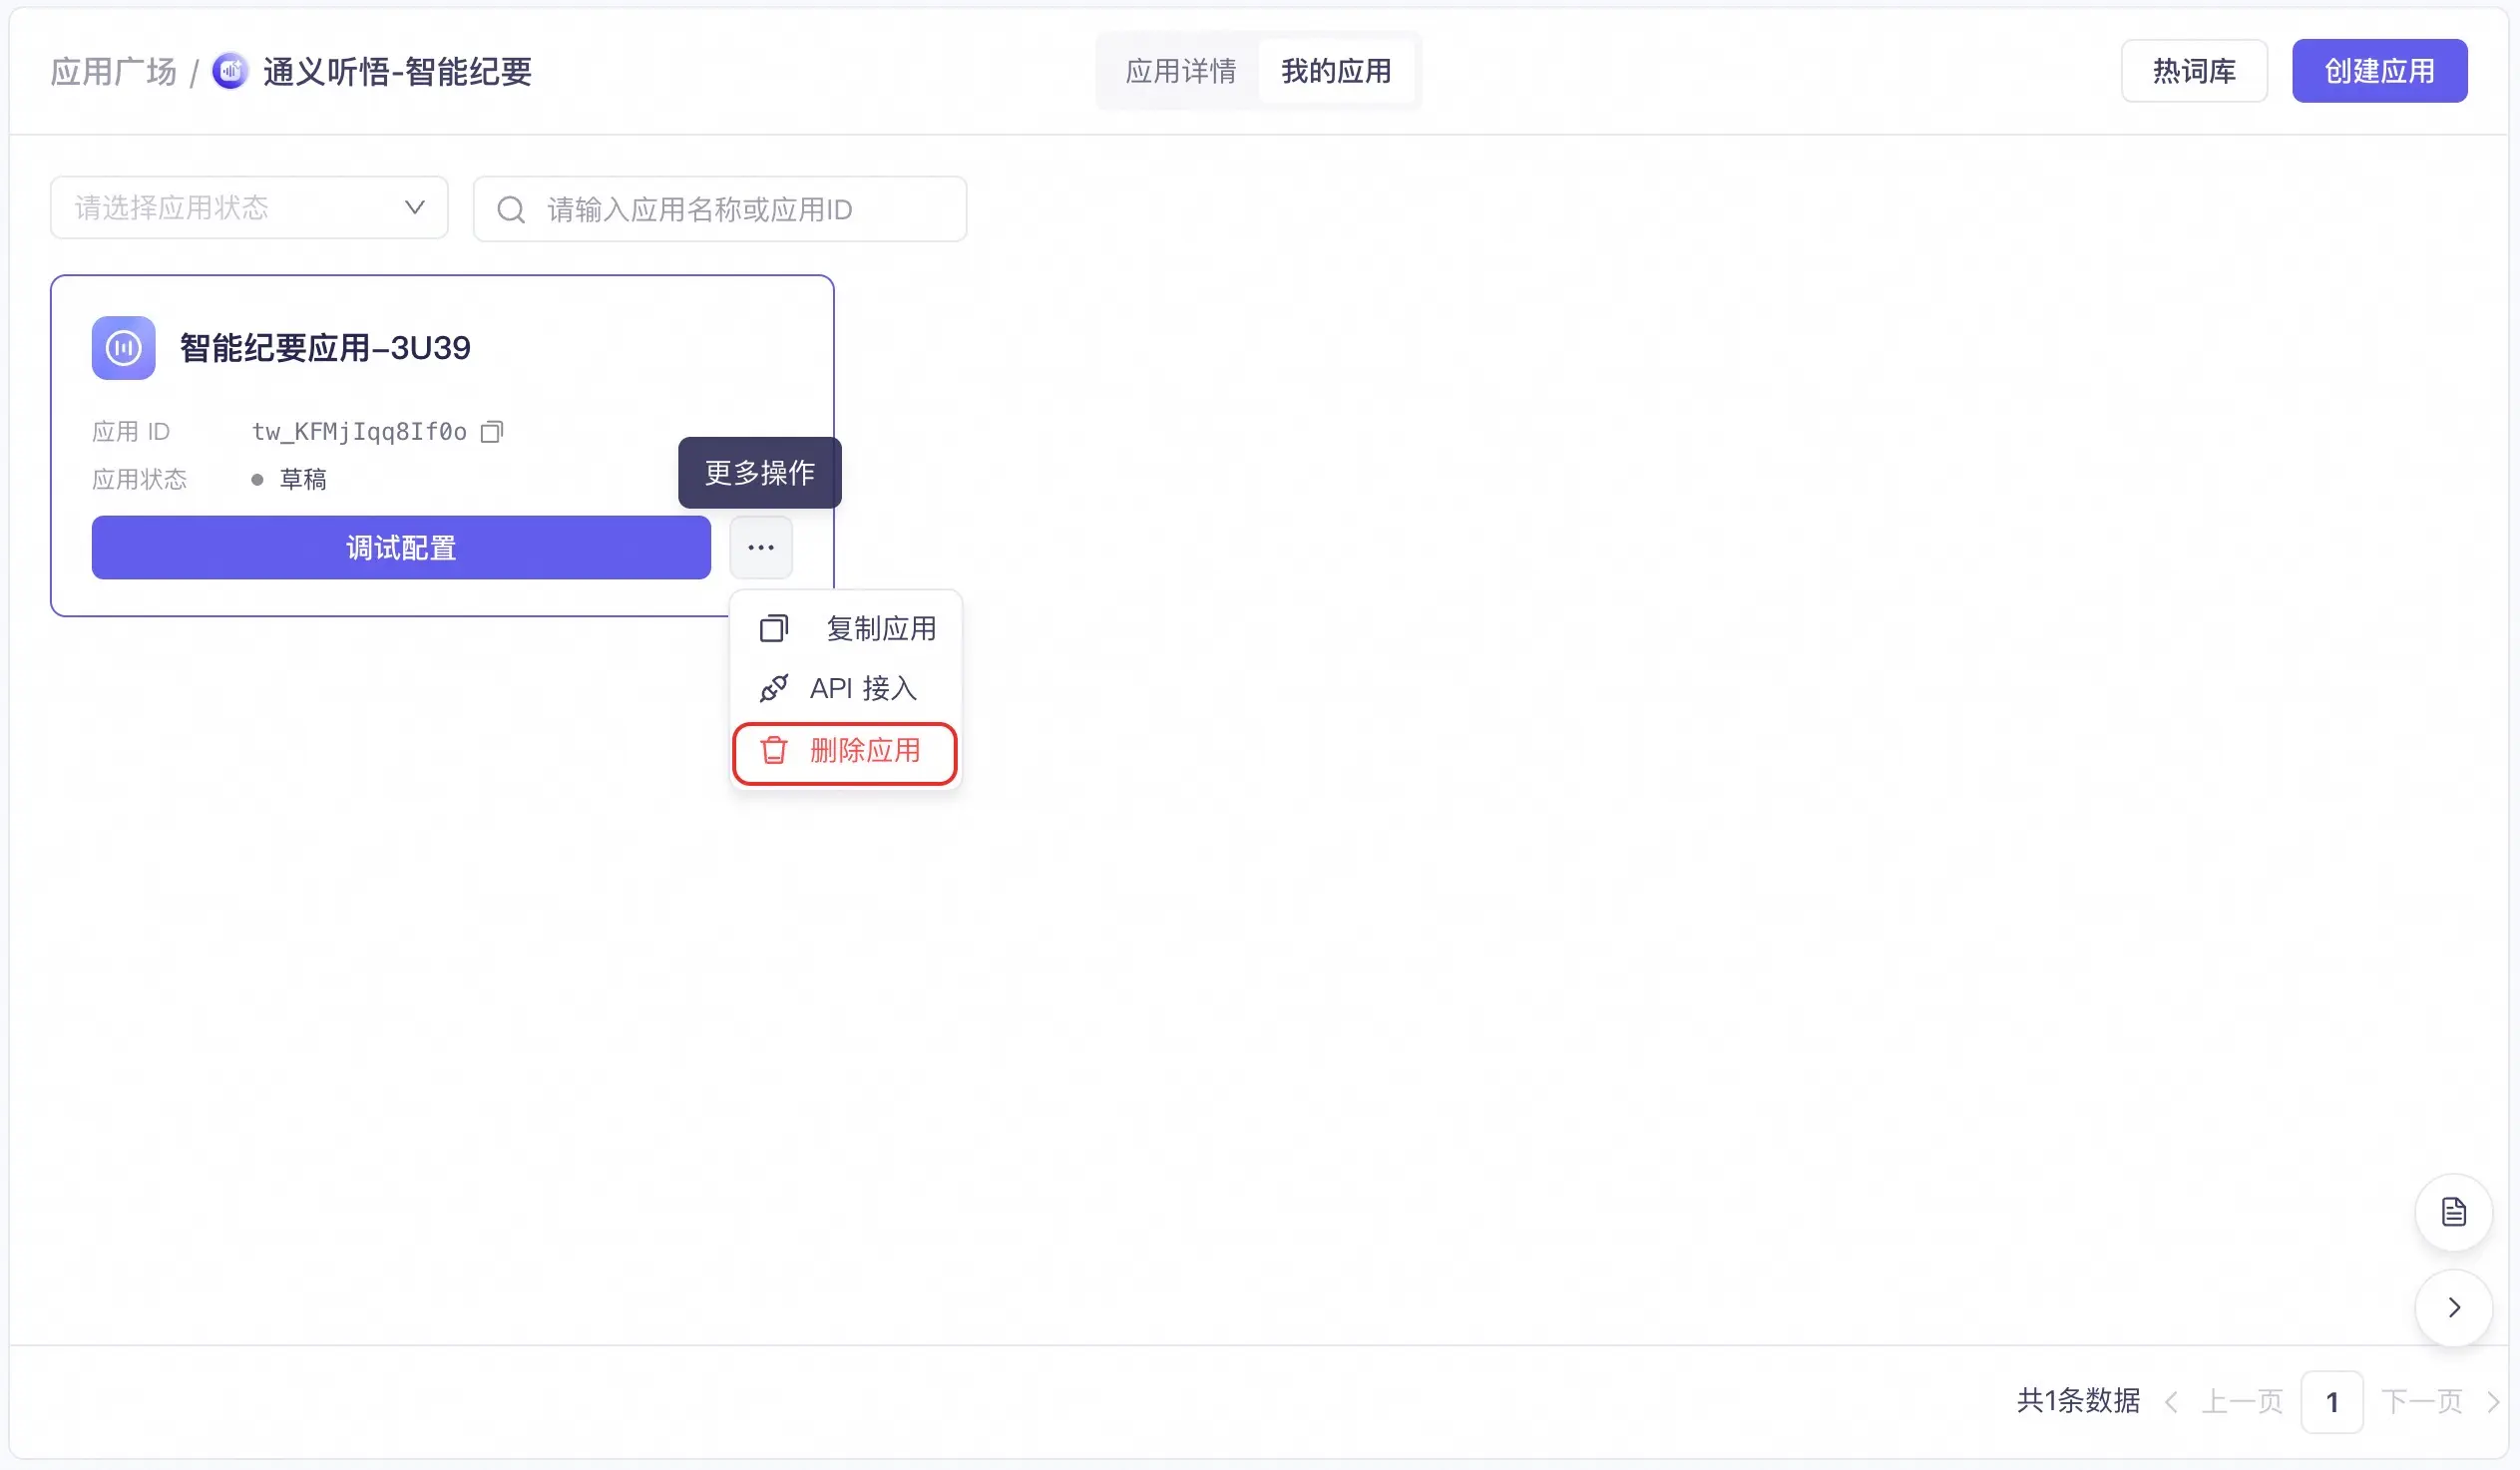
6. Delete the application
In the My Applications list, you can delete an application.
Deletion is irreversible. Proceed with caution to avoid affecting your online business.