
Implement hardware device control capabilities

This document explains how developers can load and use the Skill-Command module within the multimodal interaction suite to control devices.

1. Development preparation

Note: First, follow the SDK installation guide to create your application and integrate the SDK.

1.1. Create and configure a multimodal application

Follow the application configuration guide to configure your application. Details for configuring the command module are provided below.
  • Command module application configuration
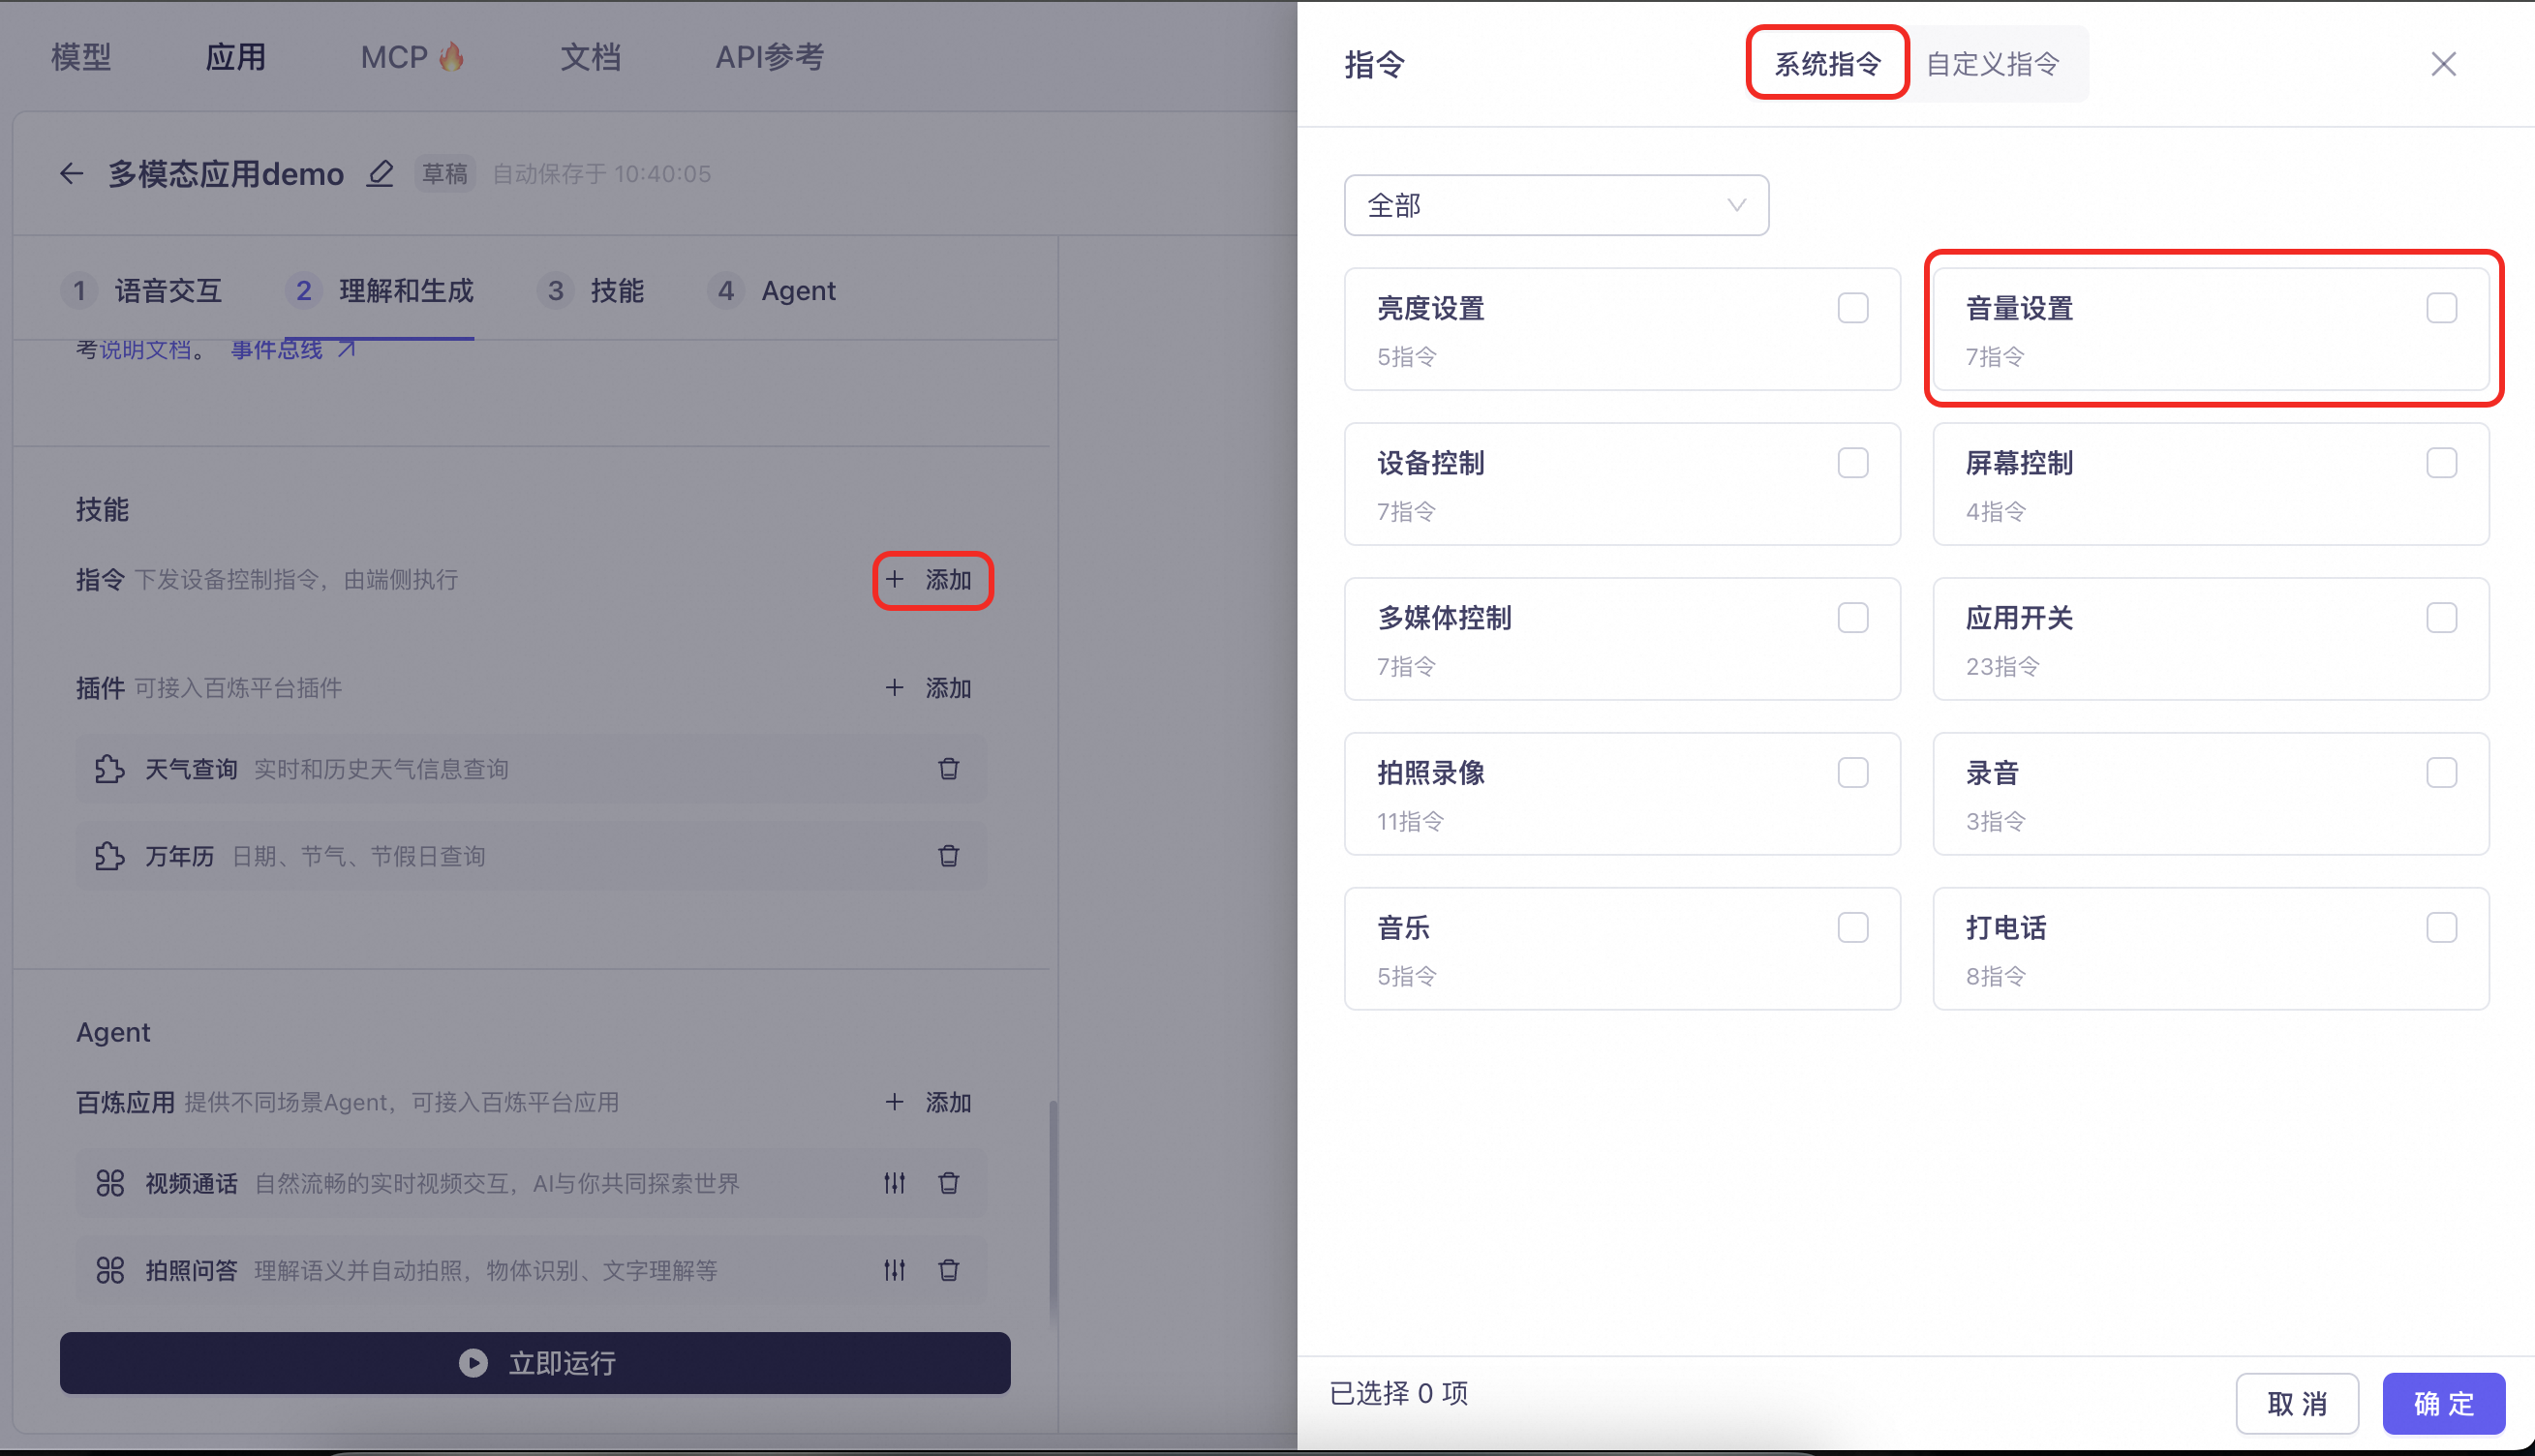
In the application configuration interface, click Add. You can then select your desired system commands, such as volume control.
image.png
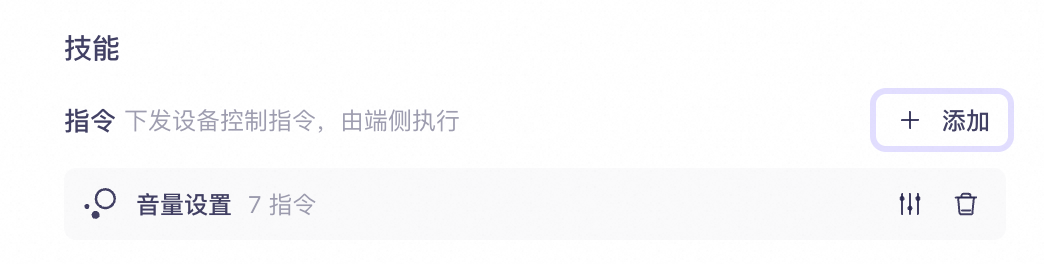
After adding, the configured command modules appear in your application, as shown in the following image.
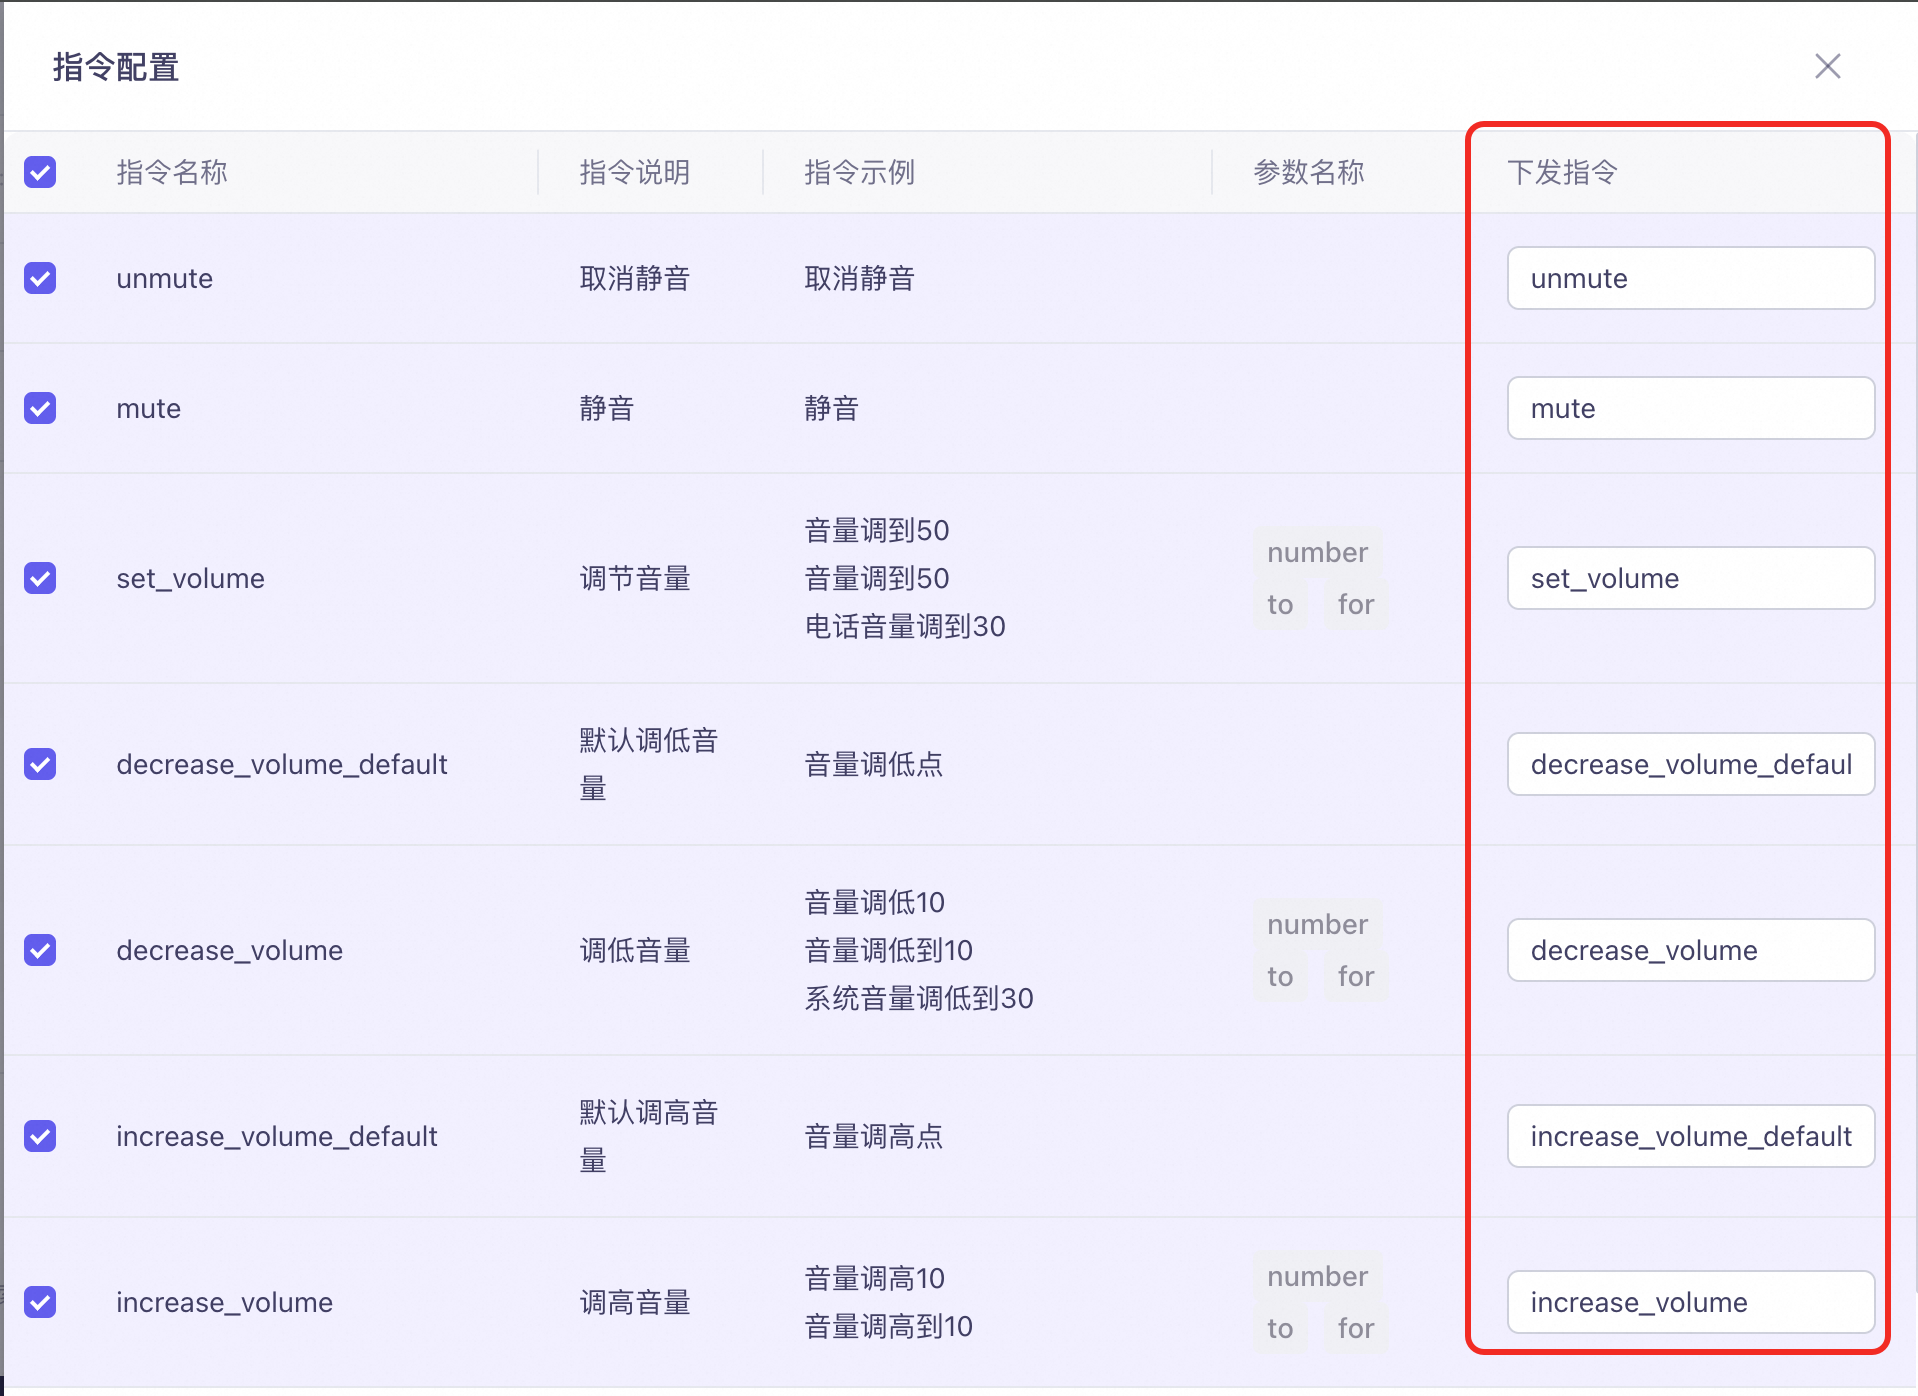
image.png
Note: Do not change the section highlighted in red. Changing this section prevents the module from parsing correctly.
image.png

1.2. Device-side SDK development and integration

Before enabling the command module, you must complete SDK integration on your device. Different hardware models require different SDK integration methods.

2. Implement device control using the official Device-side C SDK (supports RTOS/Linux)

See the Device-side C SDK.

2.1. Load the module

To enable the command module, you must first add its component library to your build configuration. The component library is located in the SDK package at qwen_sdk/libs/. Its name starts with libc_mmi_cmd_, such as libc_mmi_cmd_volume.a for volume control. The following example loads the precompiled library for the ESP32 platform:
// Load the precompiled library
add_prebuilt_library(volume_command ${LIBS_DIR}/libc_mmi_cmd_volume.a)

target_link_libraries(${COMPONENT_TARGET} INTERFACE
    volume_command
)

2.2. Include header files

After loading the component library, you must include the corresponding command module header in your source code, located in the SDK package at qwen_sdk/include/c_mmi_cmd/. For example, include c_mmi_cmd_volume.h for volume control; the callback type c_mmi_cmd_event_callback is defined in c_mmi_cmd.h.

2.3. Register event callbacks

Each command module provides its own registration function c_mmi_cmd_<module>_register. The callback type is uniformly c_mmi_cmd_event_callback, defined in c_mmi_cmd.h:
/**
 * @brief Command event callback function type
 *
 * @details This callback triggers when the command module receives a matching instruction from the cloud.
 *
 * @param event  Event type, taken from the enumeration of the corresponding command module
 * @param req_id Request ID string
 * @param params Event parameter, pointing to the corresponding parameter structure based on the event type. NULL if no parameter exists.
 * @return int32_t Returns 0 on success, non-zero on failure
 */
typedef int32_t(*c_mmi_cmd_event_callback)(uint32_t event, char *req_id, void *params);

/**
 * @brief Register the volume command module callback (other modules work the same way; replace with the corresponding module name)
 *
 * @param cb Callback function implemented by the user to handle command events
 * @return int32_t Returns 0 on success, non-zero on failure
 */
int32_t c_mmi_cmd_volume_register(c_mmi_cmd_event_callback cb);
Available command module registration functions include: c_mmi_cmd_volume_register, c_mmi_cmd_brightness_register, c_mmi_cmd_device_register, c_mmi_cmd_screen_register, c_mmi_cmd_multimedia_register, c_mmi_cmd_application_register, c_mmi_cmd_camera_register, c_mmi_cmd_recording_register, c_mmi_cmd_music_register, c_mmi_cmd_telephone_register, and more. The following is the sample code for the volume settings component:
#include "c_mmi_cmd_volume.h"

static int32_t _cmd_vol_callback(uint32_t event, char *req_id, void *p)
{
    ... // See the next section for event enumerations and parameter details
}

int main(void)
{
    ...	// Other business logic

    c_mmi_cmd_volume_register(_cmd_vol_callback);

    ... // Other business logic
}

2.4. Implement command response functions

Event types and parameters for command responses are documented in the corresponding module header (for example, c_mmi_cmd_volume.h). The following describes the volume control component:
#define C_MMI_CMD_VALUE_UNDEFINED       0x7FFFFFFF

// type: enumeration for volume type
enum {
    C_MM_CMD_TYPE_UNKNOWN = 0,
    C_MM_CMD_TYPE_SYSTEM,
    C_MM_CMD_TYPE_MEDIA,
    C_MM_CMD_TYPE_CALL
};

/*************************** Volume control component start ***************************/
// event: enumeration for volume-related commands
enum {
    C_MMI_CMD_VOLUME_UNKNOWN = 0,
    C_MMI_CMD_VOLUME_INCREASE,
    C_MMI_CMD_VOLUME_DECREASE,
    C_MMI_CMD_VOLUME_SET,
    C_MMI_CMD_VOLUME_MUTE,
    C_MMI_CMD_VOLUME_UNMUTE
};

// params: parameter structure for volume-related commands
typedef struct {
    uint32_t value;		// C_MMI_CMD_VALUE_UNDEFINED means default value (user-defined)
    uint32_t type;		// Type from the C_MM_CMD_TYPE_* enumeration above
} c_mm_volume_param_t;
/*************************** Volume control component end ***************************/
Example code:
#include "c_mmi_cmd_volume.h"

static int32_t _cmd_vol_callback(uint32_t event, char *req_id, void *p)
{
    c_mm_volume_param_t *param = (c_mm_volume_param_t *)p;
    (void)req_id;

   // Handle the event and parameters. Implementation is up to you.
   // For example, perform different volume actions based on the event type.
    switch (event) {
        case C_MMI_CMD_VOLUME_SET:			// Set volume
            UTIL_LOG_I("set volume to [%u] for [%u]", param->value, param->type);
            break;
        case C_MMI_CMD_VOLUME_INCREASE:		// Increase volume
            UTIL_LOG_I("increase volume by [%u] for [%u]", param->value, param->type);
            break;
        case C_MMI_CMD_VOLUME_DECREASE:		// Decrease volume
            UTIL_LOG_I("decrease volume by [%u] for [%u]", param->value, param->type);
            break;
        case C_MMI_CMD_VOLUME_MUTE:			// Mute
            UTIL_LOG_I("mute");
            break;
        case C_MMI_CMD_VOLUME_UNMUTE:		// Unmute
            UTIL_LOG_I("unmute");
            break;
        default:
            UTIL_LOG_W("invalid volume command");
            return UTIL_ERR_FAIL;
            break;
    }
    return UTIL_SUCCESS;
}
Parameter examples:
  • Scenario 1: Increase volume slightly
uint32_t event = C_MMI_CMD_VOLUME_INCREASE;

c_mm_volume_param_t param =
{
    .value = C_MMI_CMD_VALUE_UNDEFINED,
    .type = C_MM_CMD_TYPE_SYSTEM
};
  • Scenario 2: Decrease call volume by 10
uint32_t event = C_MMI_CMD_VOLUME_DECREASE;

c_mm_volume_param_t param =
{
    .value = 10,
    .type = C_MM_CMD_TYPE_CALL
};
  • Scenario 3: You can decrease, increase, or set the call volume to 10.
uint32_t event = C_MMI_CMD_VOLUME_SET;

c_mm_volume_param_t param =
{
    .value = 10,
    .type = C_MM_CMD_TYPE_CALL
};

3. Implement device control using the official Android or iOS SDK

In the Android and iOS SDKs, the server directly sends instructions to the client. The client parses instruction names from payload.output.extra_info.commands and executes the corresponding actions. For a list of system commands and their descriptions, see application configuration. Example server instruction format:
{
    "commands": [
        {
            "name": "send_sms",
            "params": [
                {
                    "name": "send_to",
                    "value": "Mom",
                    "normValue": "Mom"
                },
                {
                    "name": "sms_content",
                    "value": "It will rain tomorrow. Remember your umbrella.",
                    "normValue": "It will rain tomorrow. Remember your umbrella."
                }
            ]
        }
    ]
}
Implement device control on the client side:
  • Android
private void executeCommand(String command) {
        Log.d(TAG, "Execute command: " + command);

        try {
            String cmdName = new JSONArray(command).getJSONObject(0).getString("name");

            switch (cmdName) {
                case "visual_qa":
                    executeVQACommand();
                    break;
                case "quit_videochat":
                    stopVideoMode();
                    break;
                case "set_volume":
                    setVolume(command); // Parse volume parameters
                    break;
                case "quit":
                    quit();
                    break;
                    // .....
                default:
                    executeDefaultCommand();
                    break;
            }
        } catch (Exception e) {
            Log.e(TAG, "Command execution failed", e);
            isExecutingCommand = false;
        }
    }
  • iOS
// Handle command
private func handleCommand(output: [String: Any]?) -> [[String: Any]]?{
    guard let output = output,
              let extraInfo = output["extra_info"] as? [String: Any],
              let commandsString = extraInfo["commands"] as? String,
          let commandsData = commandsString.data(using: .utf8) else {
        return nil
    }

    do {
            // Parse commands string into JSON array
            if let commands = try JSONSerialization.jsonObject(with: commandsData) as? [[String: Any]] {

                for command in commands {
                    let name = command["name"] as? String
                        if name == "visual_qa" {
                            self.executeVQACommand()
                        }else if name == "quit_videochat"{
                            self.quitVideoMode()
                        }else if name == "set_volume"{
                            self.setVolume(command)
                        }else if name == "quit"{
                            self.quit()
                        }
                    //......
                    }
                return commands
            }
            return nil
        } catch {
            print("Failed to parse commands: \(error)")
            return nil
        }
    }
Agent Development
Agent Context
Agent Governance & Evolution
Store
Application Marketplace