

Traditional methods for converting documents to video, such as recording a video based on the document, are time-consuming and often require professional video editing skills. Large Language Model (LLM) technology offers a more efficient and intelligent solution. This guide demonstrates how to automatically convert documents into videos using LLMs and multimodal application techniques. It includes a complete code package to help you get started quickly.
Demo
By following this guide and using the provided complete code, you can convert documents to videos with large language models. The resulting video includes visuals, narration, and subtitles. An example is shown below. The input document for this example is 'Understanding Large Language Models', the first lesson in Chapter 1 of the Alibaba Cloud Large Language Model Engineer ACA Certification course: Understanding Large Language Models. The resulting video is shown below:
Chapter 1, Lesson 1 of the Alibaba Cloud Large Language Model Engineer ACA Certification course: Understanding Large Language Models.
Solution overview
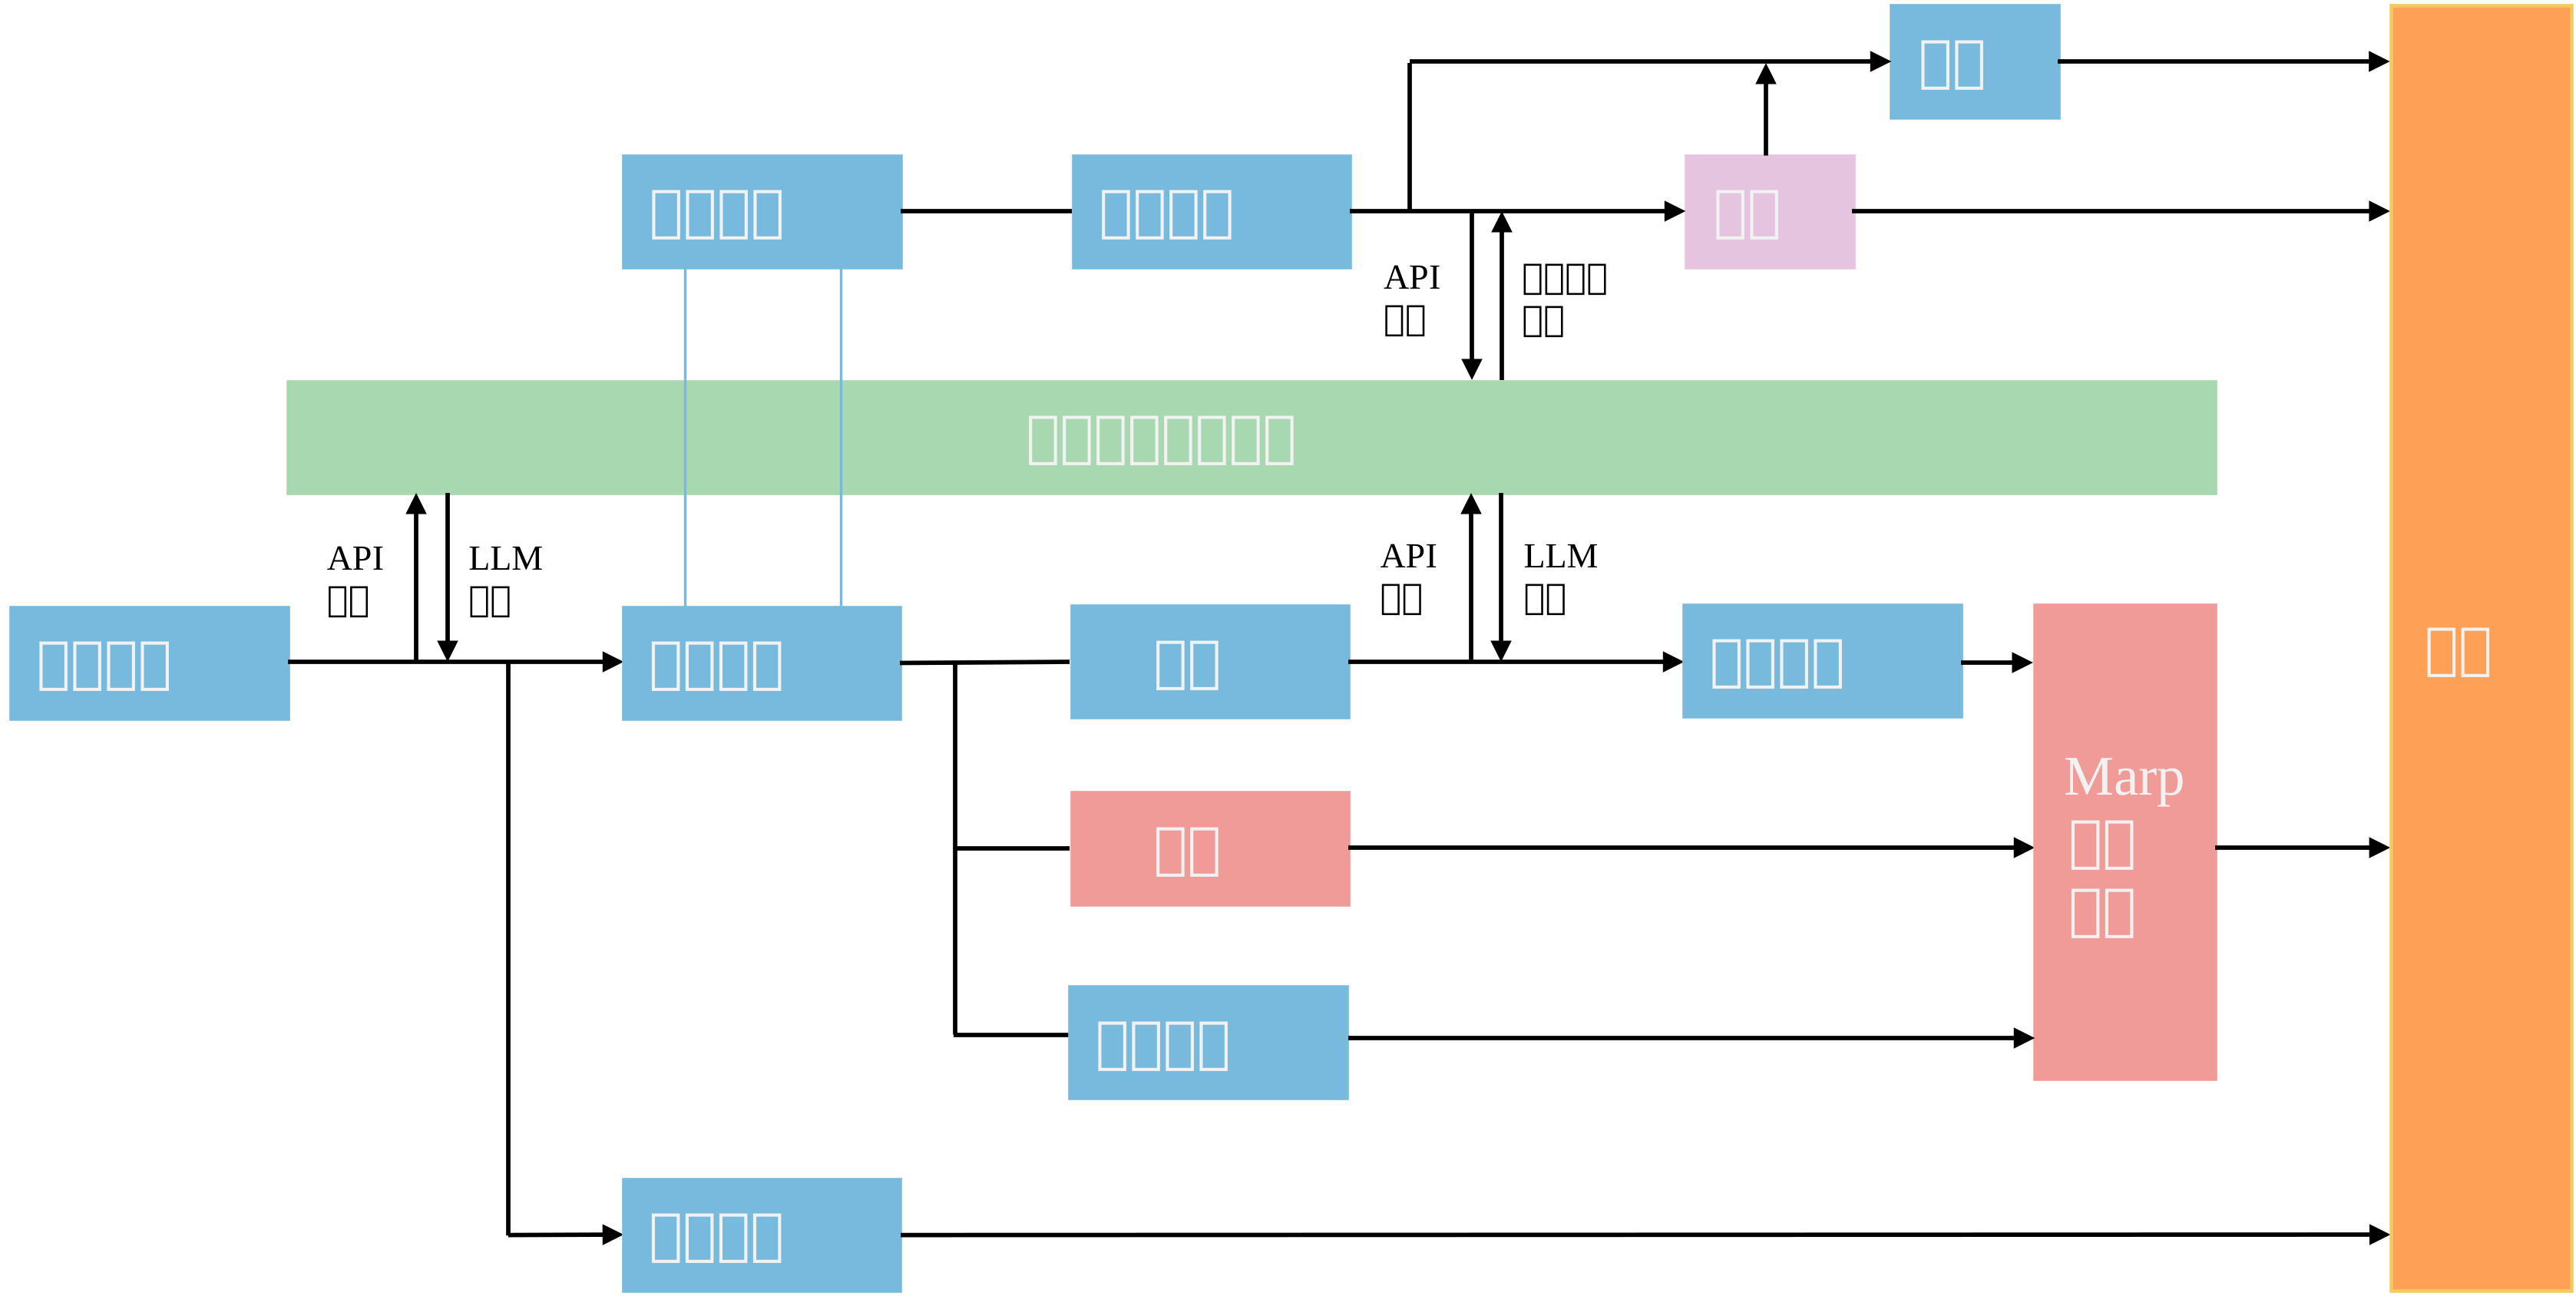
- Document segmentation: Use a large language model to summarize the document title and split the document into sections. Then, generate a concise title for each section.
- Generate presentation slides: Combine the titles, body text, and images to generate presentation slide images.
- Generate narration and subtitles: Use multimodal large language models to convert text into audio files. Then, generate matching subtitle text based on the audio duration.
- Generate final video: Compile all the slide images into a video and embed the audio and subtitle files.
Preparations
-
Obtain your API key and API host to call large language models from Alibaba Cloud Model Studio.
Alibaba Cloud Model Studio provides new users with a free quota. After you use up this quota, you are billed based on the number of tokens. For more information, see Billing Details.
- Set environment variables to reduce the risk of exposing your API key. For more information, see Configure API key as an environment variable (deprecated; merged into Configure API Key) and choose the method that matches your operating system.
-
This guide uses FFmpeg for audio and video processing and Marp for presentation generation. You can install both tools using the sample code below:
- macOS
- Windows
- This guide generates images using a browser rendering engine. Make sure that a browser, such as Chromium, Google Chrome, or Microsoft Edge, is installed in your operating environment.
-
This guide uses Python code. Confirm that Python is installed in your environment. You can also install the required Python libraries using the sample code below:
- macOS
- Windows
Quick start
To quickly try this solution, download the complete code provided in this guide to your local environment. Then, run the following command:
- macOS
- Windows
Step 1: Prepare source material
Write your document's text and Markdown-formatted image links into a Markdown file. Name the file in the section_1.md format and save it in the input folder. The following sample section_1.md file is used as the input.
section_1.md
section_1.md
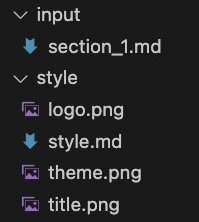 Create a Python file named main.py in your working directory to set parameters and call functions. The following is the sample code:
main.py
main.py
Step 2: Document segmentation
In this step, you can use a large language model to generate a document title and split the input document into sections. Then, you can use the model to summarize each section and generate a title for it.
Split text into sections
Call the Qwen-Plus large language model from Alibaba Cloud Model Studio using an API to generate a document title and split the input document into sections.
Qwen-Plus is an enhanced version of the Qwen ultra-large language model. It supports Chinese, English, and other languages. Its balanced capabilities make it ideal for tasks of medium complexity. Its inference quality and speed are between those of Qwen-Max and Qwen-Flash. You can select the model that best suits your use case. For more information, see the model list.
Qwen-Plus costs CNY 0.004 per 1,000 input tokens and CNY 0.012 per 1,000 output tokens. New users receive a free quota of 1 million tokens for 30 days after they enable Model Studio.Create a Python file named theme_generate.py. The following is the sample code:
theme_generate.py
theme_generate.py
Import and call theme_generate_with_qwen_plus
Import and call theme_generate_with_qwen_plus

Sample document title: Large Language Models: Impact and Applications.Next, create a Python file named doc_split.py. The following is the sample code:
doc_split.py
doc_split.py
Import and call doc_split.py
Import and call doc_split.py
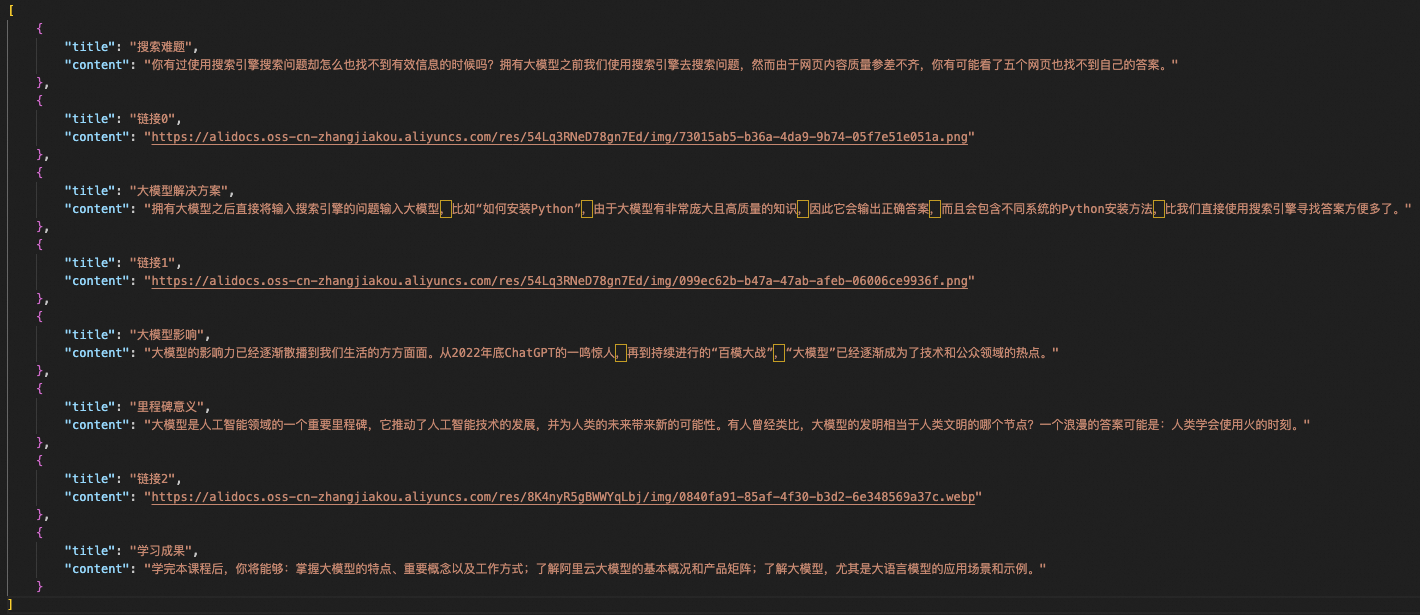
The output section_1.json file. The "title" field contains the section title, and the "content" field contains the section text. Image links are stored separately.
Summarize content
Next, call the Qwen-Plus model from Model Studio using an API to summarize each section.
Create a Python file named qwen_plus_marp.py. The following is the sample code:
qwen_plus_marp.py
qwen_plus_marp.py
- For text, extract key points and output them in Markdown format.
- For image links, output the link directly.
Step 3: Generate presentation slides
In this step, you can combine text and images into Markdown files and generate presentation slide images.
Before you review the detailed workflow and code, this section provides a brief introduction to Marp, the tool that is used in this guide. Marp is an open-source presentation tool that is based on Markdown syntax. You can edit Markdown text to generate polished slides. If you use VS Code, you can install the Marp for VS Code extension for real-time previews. For more information, see the official Marp documentation to build presentations with your own style.
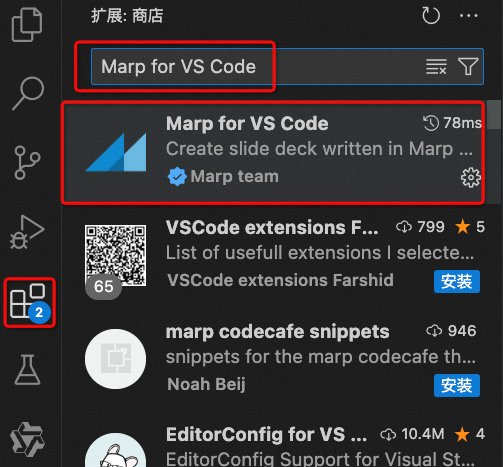
Search for and install Marp for VS Code in the VS Code Extensions marketplace.Marp uses specific formatting rules and extended syntax to convert Markdown to slides. Therefore, a Python script named markdown_gather.py is provided to collect and apply Markdown formatting optimizations. The following is the sample code:
markdown_gather.py
markdown_gather.py
Combine text and images
Call the call_with_stream function from Step 2 to obtain the key points, titles, and image links for each section. Combine them into Markdown format and save them as a Markdown file. Create a Python file named json2md.py. The following is the sample code:
json2md.py
json2md.py
- Combine section titles, text, and image links into a single unit.
- Use '---' to separate sections and generate multiple slide images.
- Set the slide backgrounds.
Import and call functions from json2md.py
Import and call functions from json2md.py
Import and call functions from markdown_gather.py
Import and call functions from markdown_gather.py
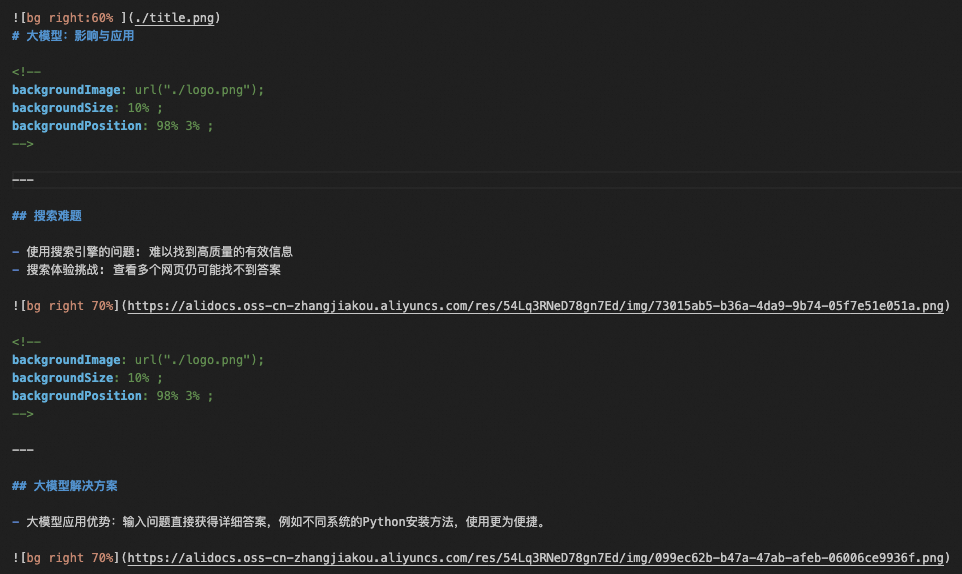
Example of the output section_1.md file after assets are combined.
Generate presentation slides
Next, generate slides using Marp. Before you generate the slides, define the global style and theme for Marp. You can set this at the top of your Markdown file. For example:
- marp: true indicates to Marp that this Markdown file must be treated as a presentation.
- theme: gaia sets the Marp theme to gaia, which is one of Marp's official themes.
Load style file style.md
Load style file style.md
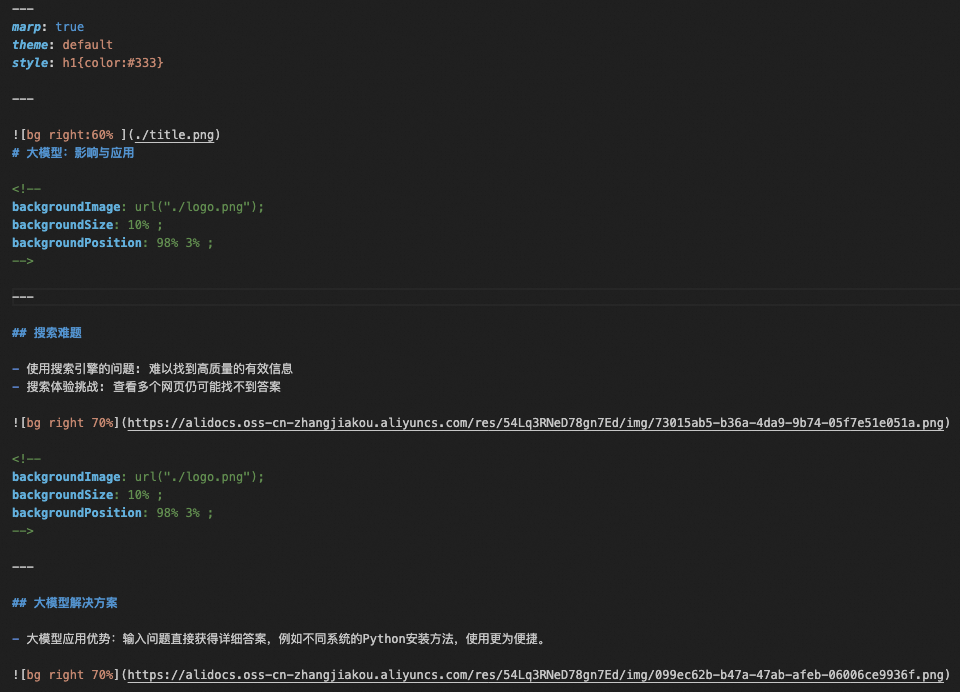
Example of the Markdown output after style.md is loaded.After you obtain this output, if you use VS Code and have the Marp for VS Code extension installed, you can preview the slides in real time. Click the preview icon in the upper-right corner of the interface:

Click the Preview icon in the top-left corner of the VS Code interface.The real-time preview is shown below:
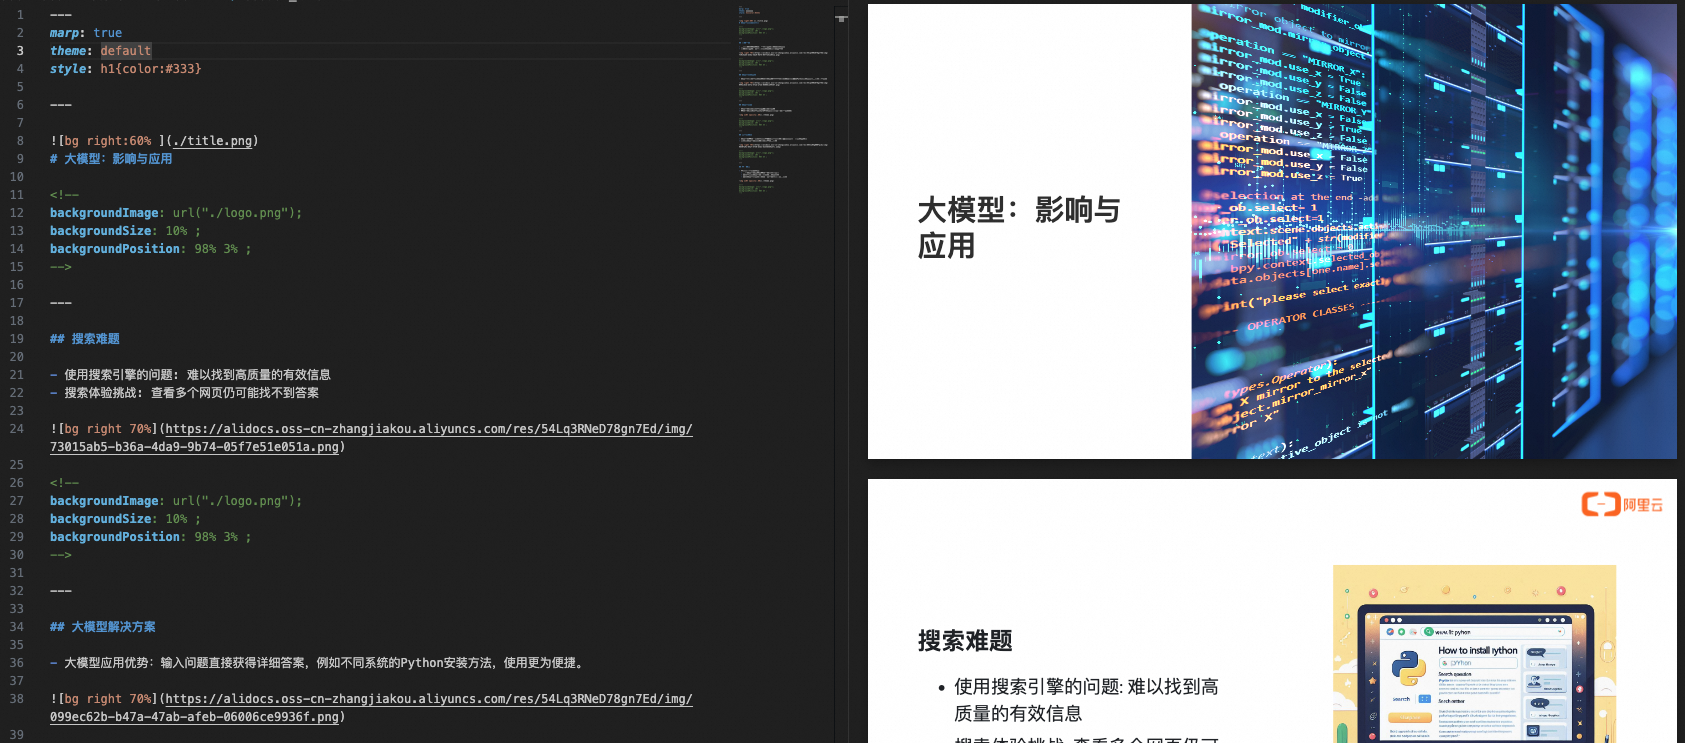
A demo of the Marp real-time preview.After you confirm that the Marp slide output is correct in the preview, you can export it as images. Create a Python file named marp2image.py. The following is the sample code:
marp2image.py
marp2image.py
Import and call convert_md_files_to_png
Import and call convert_md_files_to_png
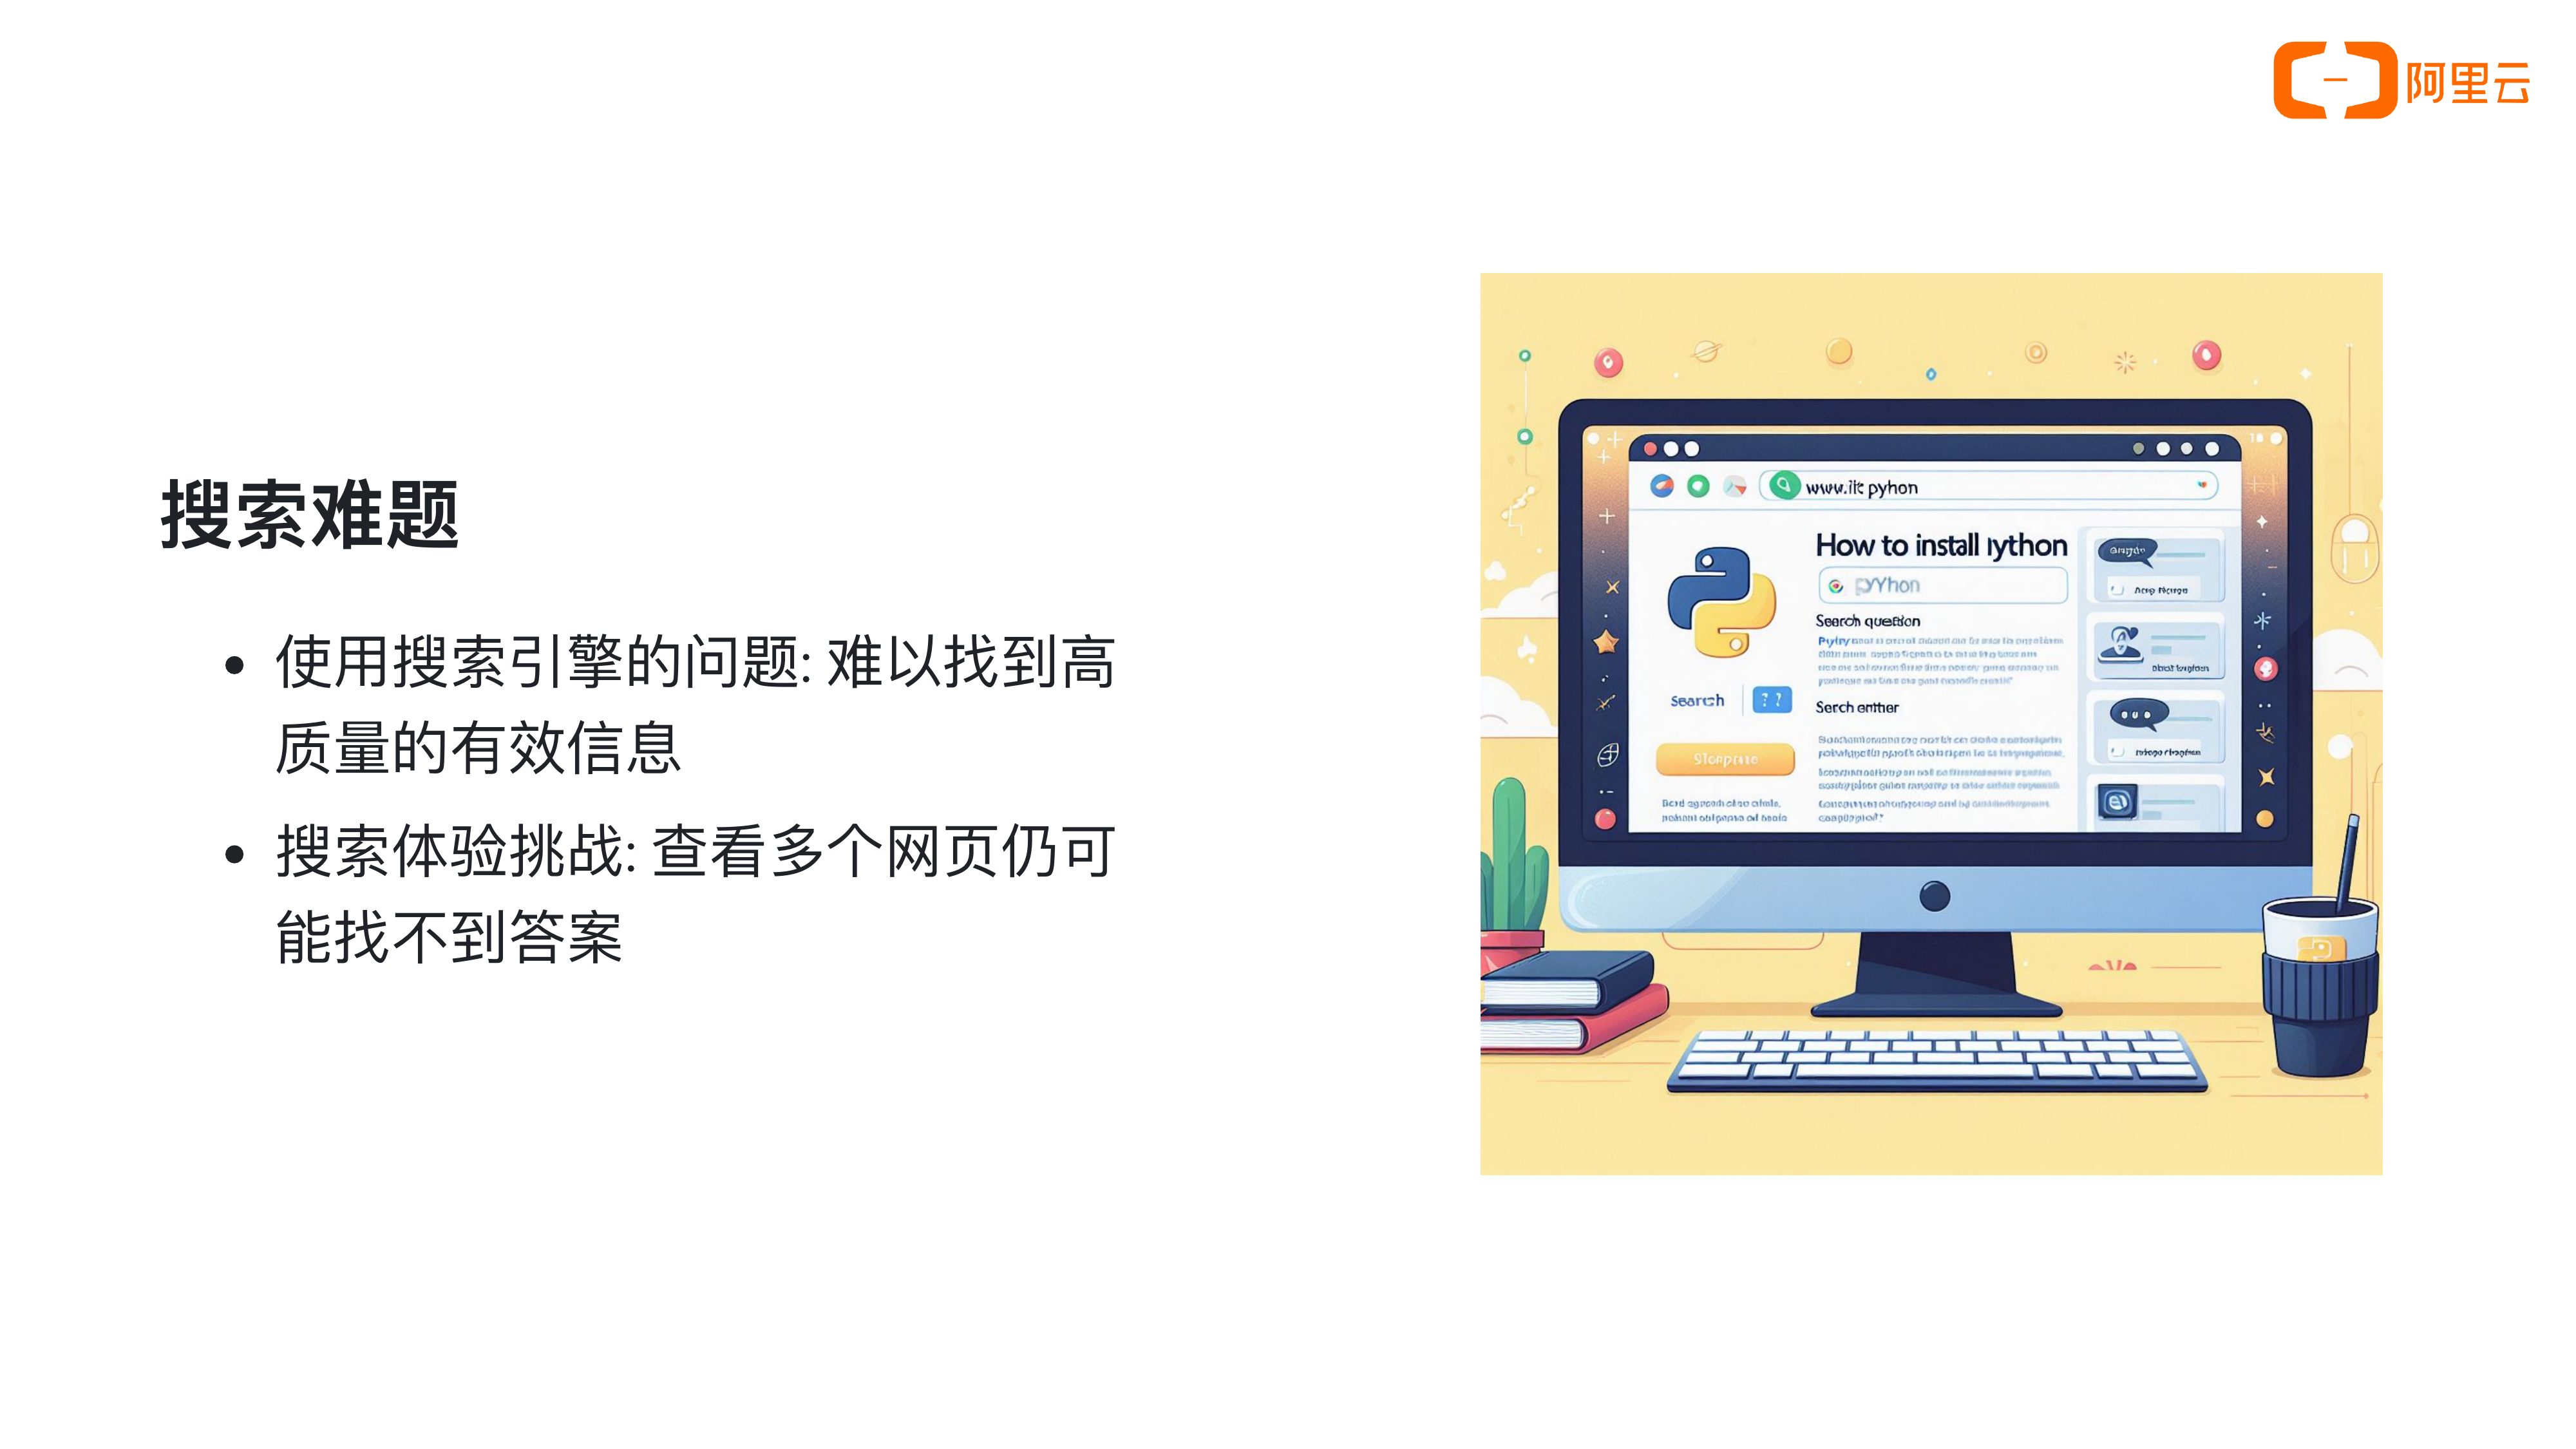
Example.
Step 4: Generate narration and subtitles
In this step, use multimodal speech models to convert text into audio and compute precise audio durations. Then automatically generate timestamped subtitles.
Convert text to audio
Split the document content into sentences. Then call the CosyVoice speech synthesis model from Alibaba Cloud Model Studio via API to synthesize each sentence into an MP3 audio file. Create a Python file named audio_generate_each_sentence.py. Sample code follows:
audio_generate_each_sentence.py
audio_generate_each_sentence.py
- process_json_file: Split the document content into sentences.
- synthesize_md_to_speech: Call the CosyVoice speech synthesis model from Alibaba Cloud Model Studio via API to synthesize all sentences into MP3 audio files.
Import and call process_json_file and synthesize_md_to_speech
Import and call process_json_file and synthesize_md_to_speech
Text: Have you ever searched for something online and failed to find useful information?
Generate subtitles
Next, generate SRT-format subtitle files by reading audio durations and matching them to the corresponding text content. Create a Python file named srt_generate_for_each_sentence.py. Sample code follows:
srt_generate_for_each_sentence.py
srt_generate_for_each_sentence.py
Import and call generate_srt_from_audio
Import and call generate_srt_from_audio
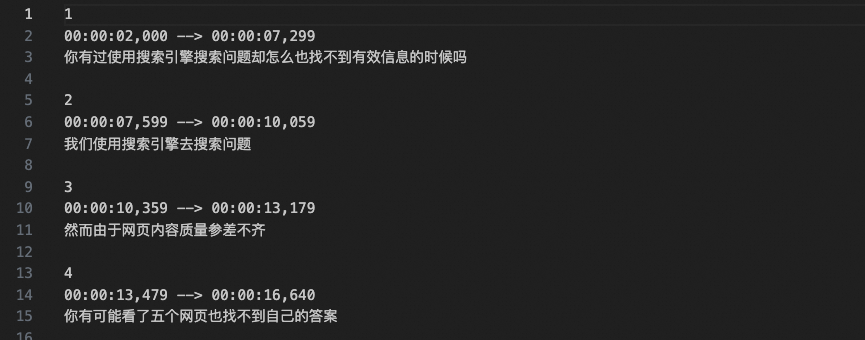
Step 5: Generate final video
In this step, compile the presentation slides into a video and embed the audio and subtitle files.
Video editing
First, calculate how long each slide appears in the video. Create a Python file named calculate_durations_for_each_image.py. Sample code follows:
calculate_durations_for_each_image.py
calculate_durations_for_each_image.py
Import and call calculate_audio_durations
Import and call calculate_audio_durations
movie_editor.py
movie_editor.py
Import and call images_to_video_with_durations
Import and call images_to_video_with_durations
This video has no audio or subtitles.
Embed audio and subtitles
Next, embed audio files into the video. Create a Python file named audio2video.py. Sample code follows:
audio2video.py
audio2video.py
Import and call merge_audio_and_add_to_video
Import and call merge_audio_and_add_to_video
srt2video.py
srt2video.py
Import and call merge_video_and_subtitle
Import and call merge_video_and_subtitle
This is the final output video, with audio and subtitles.
Step 6 (optional): Generate video from long documents
You have now built a complete document-to-video project and converted the sample document section_1.md into a video. In practice, you may need to convert longer documents, such as the first lesson of Chapter 1 of the Alibaba Cloud Large Language Model Engineer ACA Certification course: Understanding Large Language Models. We recommend splitting long documents into shorter ones, generating a video for each part, and then merging them into a single video.
Split the document
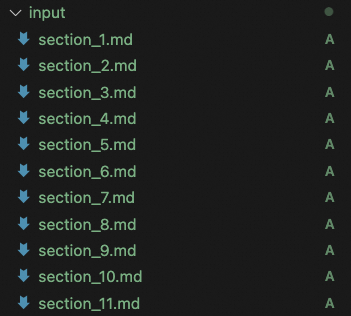
You can split the long document into a sequence of shorter documents and save them in the input folder. The file names must follow the format section_index.md, where index is the sequential number of the document. The following image shows an example:
Generate video from long document
You can create a Python file named merge_all_videos.py. The sample code is as follows:
merge_all_videos.py
merge_all_videos.py
run.sh
run.sh
Summary
With this hands-on guide, you will be able to:
- Use large language models, multimodal applications, and Marp to convert rich-text documents into engaging presentation videos.
- Walk through the end-to-end document-to-video workflow using our complete code package.
- Customize input documents, Marp style files, and render assets to create videos in your unique style.