

- Reinforcement Learning Development Guide
- Reinforcement Learning Training Configuration
- Observability Configuration for Reinforcement Learning
Learn about the basic concepts and use cases of RL training.
Learn about the basic concepts and use cases of RL training.
continued pre-training (CPT) (optional) → supervised fine-tuning (SFT) → direct preference optimization (DPO) (optional) → RL (optional)-
Continued pre-training (CPT) - Fills knowledge gaps. General models have broad but shallow knowledge and often cannot meet the depth and accuracy requirements of specialized domains.
- Financial model:
Learns financial terminology - Medical model:
Memorizes drugs and pathologies - Legal model:
Understands legal articles and case law
- Financial model:
-
Supervised fine-tuning (SFT) - Learns to perform tasks
- Customer service bot:
Learns customer service procedures - Code assistant:
Learns programming paradigms - tool calling (agent):
Learns to use Model Context Protocol (MCP)
- Customer service bot:
-
Direct preference optimization (DPO) - Improves performance
- Safety and responsibility:
Rejects harmful suggestions - Conciseness and effectiveness:
Provides crisp and clear answers - Objectivity and neutrality:
Gives fair and unbiased evaluations
- Safety and responsibility:
-
Reinforcement learning (RL) - Learns to reason. The model autonomously explores optimal strategies guided by a reward signal, without needing a standard answer.
- Mathematical reasoning:
Solves problems more accurately - tool calling (agent):
Makes more reliable calls - Code generation:
Writes executable code
- Mathematical reasoning:
RL training workflow
The RL training process consists of five steps, from environment setup to model deployment:
- Set up the environment — Install the offline SDK, get an API key, and complete RL service authorization.
- Prepare data and code — Download the demo package to understand the data format and project structure.
- Submit the training job — Run the demo to deploy functions, upload data, and submit the job in one step.
- Monitor training status — View the training status, logs, and reward trends.
- Publish and deploy the model — Publish a checkpoint to "My Models" and deploy it for API access.
How RL training works
RL training continuously improves the model's capabilities through a "generate-score-optimize" loop. The data flow for each training round is as follows:
Supported models
Model name | Model code | MoE | Recommended MTUs |
|---|---|---|---|
Qwen3.5-9B | qwen3.5-9b | No | Type IV model training unit * 24 |
Qwen3.6-flash-2026-04-16 | qwen3.6-flash-2026-04-16 | Yes | Type IV model training unit * 72 |
Qwen3.5-flash-2026-02-23 | qwen3.5-flash-2026-02-23 | Yes | Type IV model training unit * 72 |
Training unit pricing
Billing method | Description | Billing formula |
|---|---|---|
Model training unit · subscription | Purchase dedicated model training units on a monthly subscription for faster, queue-free training. The minimum billing unit is one hour. If you cancel your subscription early, you are charged at 1.2 times the hourly rate. To purchase or manage subscription training units, go to the Model Fine-tuning console and click Manage Training Resources. |
|
Model training unit · pay-as-you-go | Use dedicated training resources for faster, queue-free training. You are billed for the actual duration of use. This option is enabled automatically when you create a job and does not require a pre-purchase. |
|
Training unit type | Billing method | Unit price | Minimum billing unit |
|---|---|---|---|
Type IV (MTU4) | subscription (monthly) | CNY 19,914.00/month/instance | 1 hour |
pay-as-you-go (per minute) | CNY 41.00/hour/instance | 1 minute |
Environment setup
Follow these steps to configure your environment:
- Get an API key: Obtain a DashScope API key from the Model Studio console.
- Authorize the RL service: On the Model Fine-tuning page in the Model Studio console, complete the one-click authorization. The first time you use RL training, the console prompts you to authorize Alibaba Cloud OpenTelemetry, Function Compute (FC), and Log Service (SLS).
-
Set environment variables: The local SDK reads the following variables to control packaging, uploading, and deployment:
- DASHSCOPE_API_KEY (Required): Your API key.
- FC_PYPI_LIB (Required): Specifies the offline dashscope package to be installed when the FC container starts. The SDK automatically injects this variable as
FC_SDK_PACKAGEduring deployment, so you do not need to install it manually in FC. The .whl filename must exactly match this variable and be placed in the project's root directory. - LOG_LEVEL (Optional, default:
info): Set todebugto output complete request/response information, which is useful for troubleshooting submission failures.
Data and code preparation
- Download the demo package agentic-rl-example.zip. (This demo requires a minimum of 24 Type IV model training units to run.)
- After downloading the demo package, install the DashScope SDK (requires Python >= 3.10). Follow the instructions in the demo package to install the required dependencies:
Demo
This demo implements a calculation agent:
- Rollout function: Calls the model being trained, using a calculator tool to answer math problems.
- Reward function: Compares the model's output with the reference answer to determine if the response is correct and assigns a score.
Data format
The training data is in JSONL format, with each line being a JSON object containing messages and rollout_extra fields:
messages: The user's question, in a format consistent with ChatML.rollout_extra: Contains the reference answer or other business data, which is passed to the reward function for scoring. You can customize the fields in this object.
rollout_extra passes through to RolloutInput.rollout_extra in the rollout function and RewardInput.agent_output.rollout_extra in the reward function, making it available for your scoring logic. This field supports custom keys and is not limited to the solution key used in the example.
Recommended dataset size
- Getting started: A few dozen to a few hundred entries are enough to validate your approach (the data volume must be greater than the
batch_size). - Production training: A larger dataset generally yields better results. Large datasets also support a larger batch size, which helps improve training stability.
Job submission
The demo already includes the rollout and reward functions. Run the following command to deploy the functions, upload data, and submit the training job in a single step:
Full code and parameter descriptions
Full code and parameter descriptions
dashscope rl run). For detailed explanations of all three submission methods and their fields, see Training Configuration — Submission and Configuration.Getting started tips
After your first successful run, follow these four practices:
- Start with a minimal dataset: The demo defaults to using
calc_train_min.jsonlandn_epochs=1. Run this once to confirm the entire pipeline works before switching to the full dataset. This helps you avoid wasting 24 MTUs on a large dataset only to discover a configuration error. - Do not change the hyperparameters initially: The 11 hyperparameters listed above are the recommended starting point for qwen3.5-9b. Do not adjust them for your first training run. When you do make adjustments, change only one variable at a time (like the learning rate or batch size) and run for at least
eval_steps × 3steps before evaluating the trend. - Focus on one core metric: On the Metrics tab, watch
critic/rewards/mean. A steady increase indicates the model is learning. If it stagnates or decreases, stop the job and investigate instead of letting it run idly. - If the job fails, check the logs first: If a job status is FAILED, go to the Logs tab and check the error messages at the end, or use the SDK to pull the logs:
AgenticRL.logs(job_id="ft-xxx", lines=100). Configuration or dependency errors are usually easy to spot.
Training monitoring and analysis
After you submit the job, the job_id returned by run() is the unique identifier for querying the training status. Training typically takes from tens of minutes to several hours, depending on the dataset size and model.
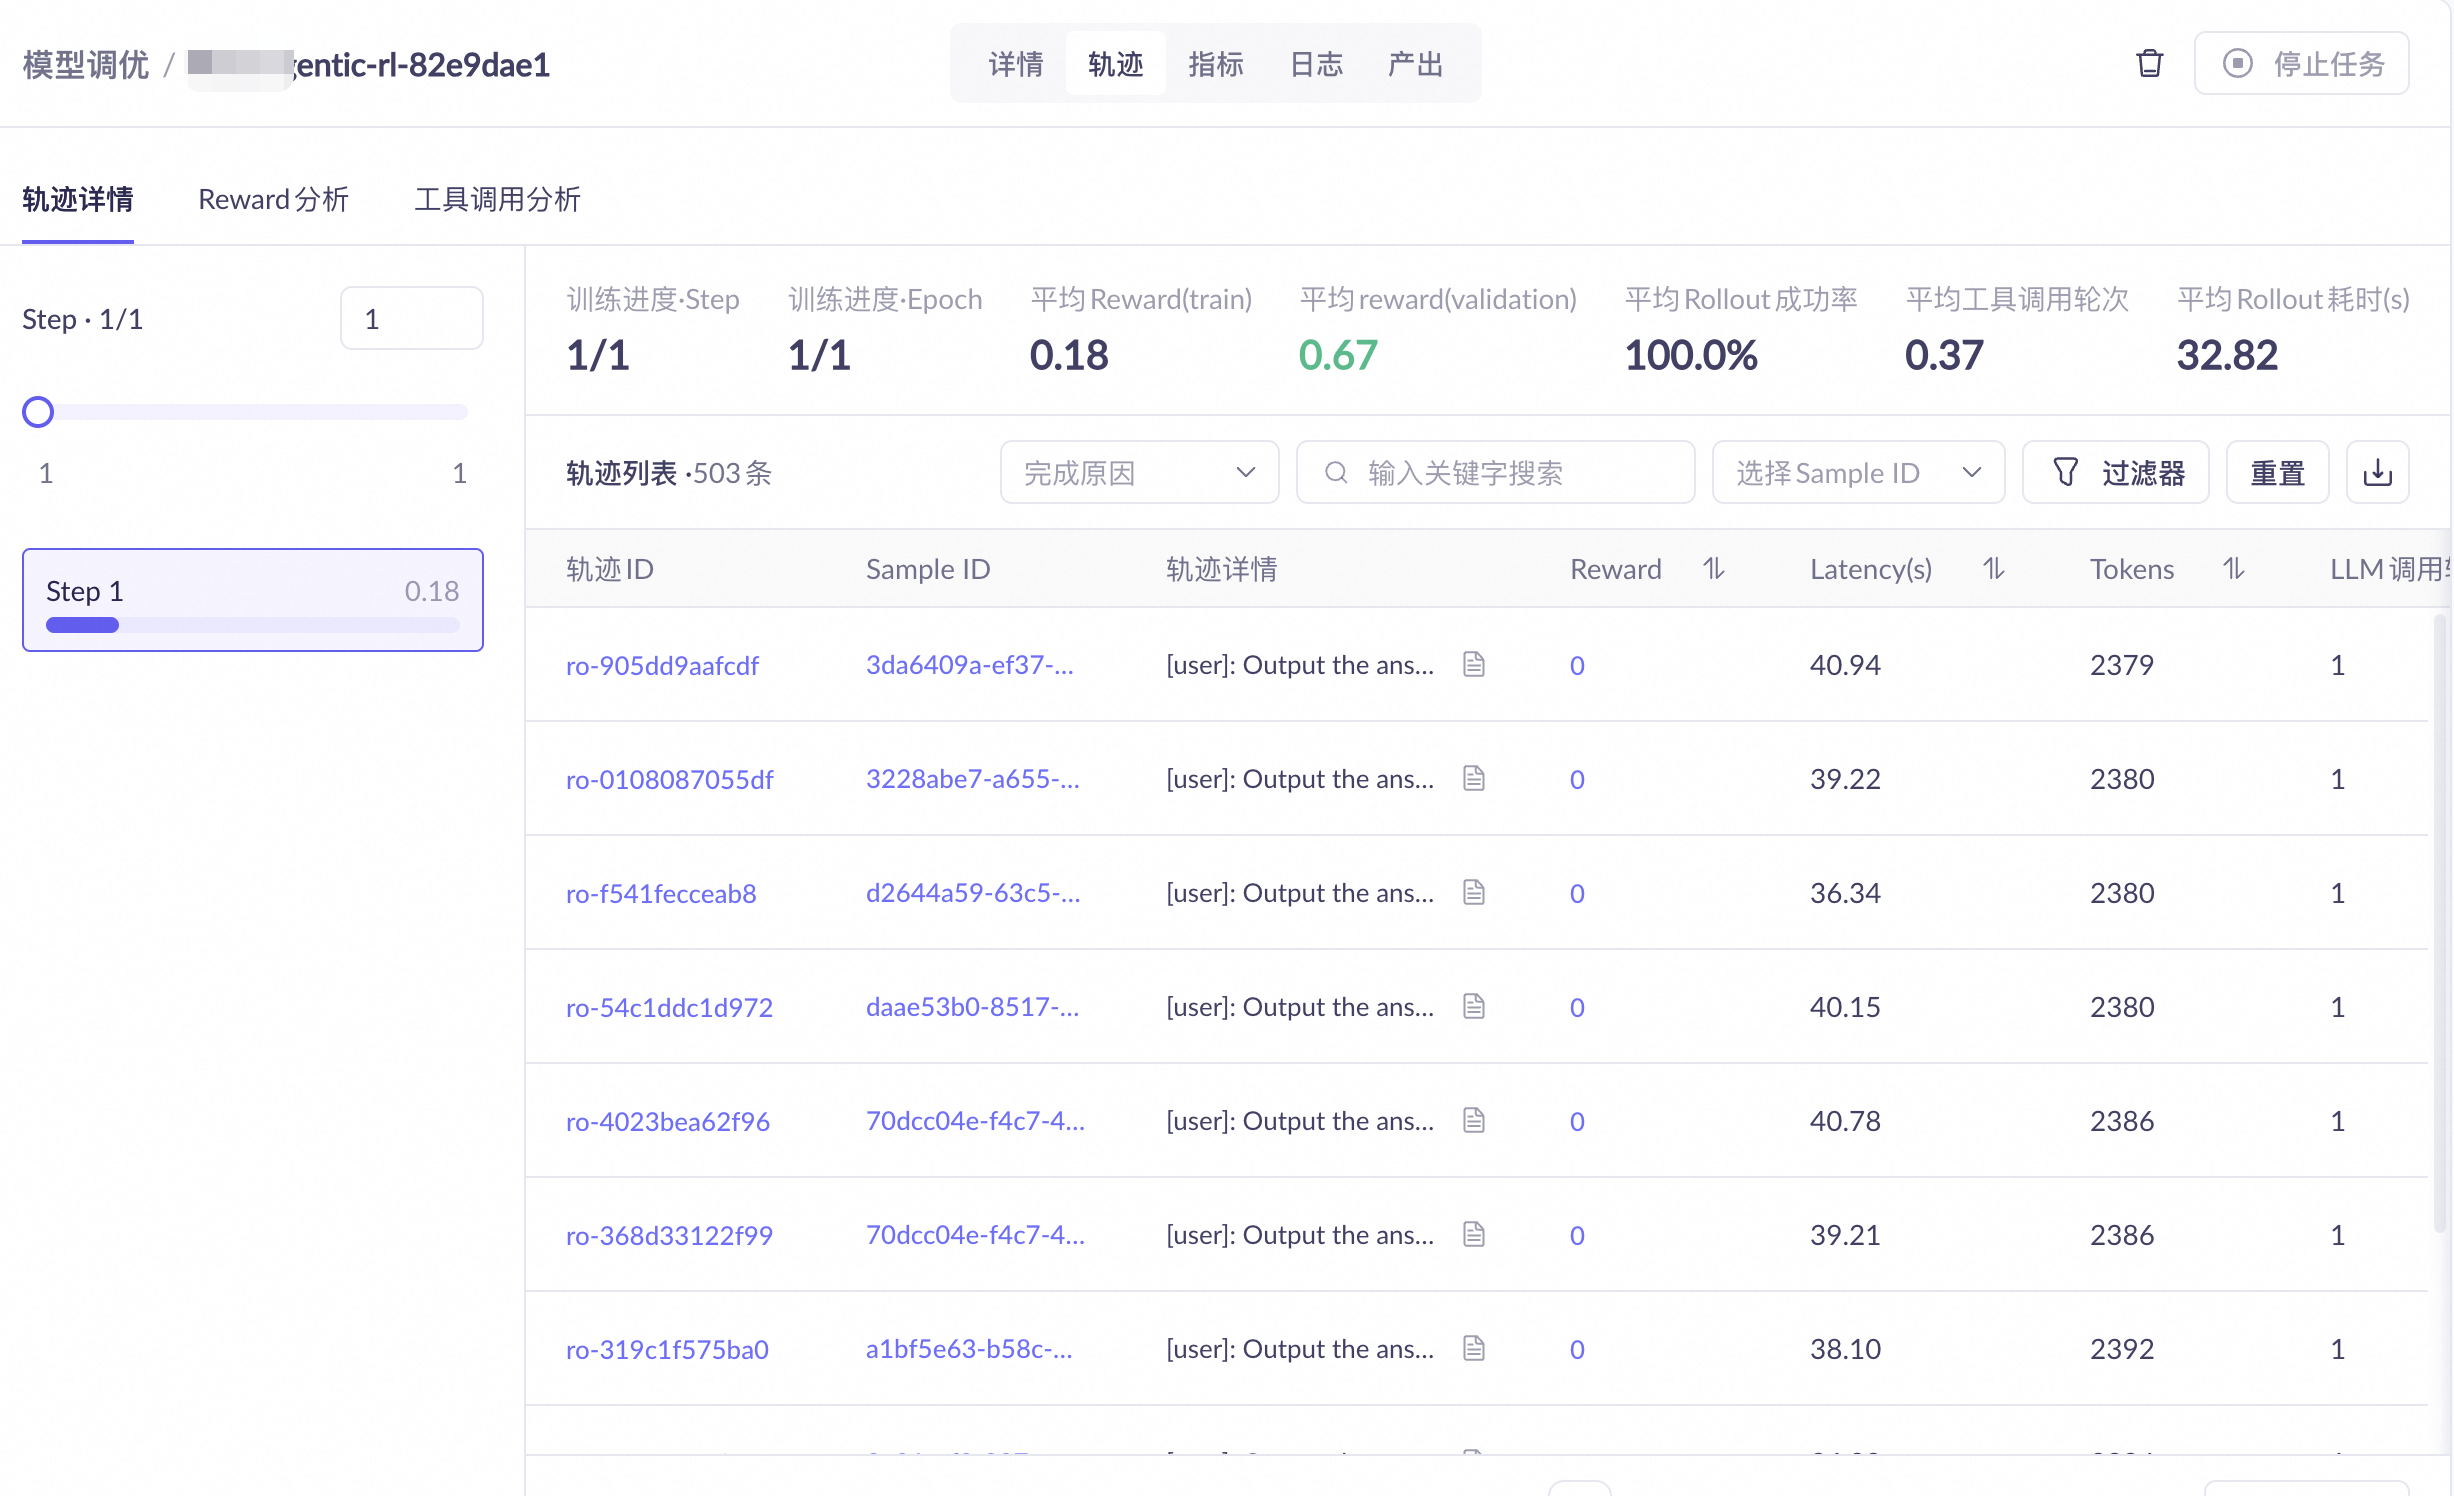
In the Model Studio console, go to the Model Fine-tuning page and click a job to open its details page, which contains the following five tabs:
Tab | Purpose | Main content |
|---|---|---|
Details | Job metadata | Job ID, status, base model, training method, start/end times, data configuration |
Trajectory | Agent behavior replay | Complete dialogue process, reward analysis (across step, sample, and trajectory dimensions), and tool calling details |
Metrics | Training health | 13 groups of metric charts (actor, critic, trajectory, trace, timing, perf, fully_async, etc.), including user-defined metrics |
Logs | Runtime troubleshooting | stdout/stderr from the training process, used to locate the cause of errors when a job fails |
Output | Model assets | List of checkpoints and their publishing status. You can publish a checkpoint to "My Models" for deployment and use. |
Model publishing and deployment
When training is complete, the final checkpoint is automatically published to My Models. To publish an intermediate checkpoint, go to the Model Fine-tuning > Output page in the Model Studio console and do so manually. For details, see Model Fine-tuning Console (Model Studio documentation, online only).
After a model is published, you can deploy it from the My Models page. Once deployed, you can call the model via an API. For details, see Model deployment.
Next steps
- Learn the full details of function development → Reinforcement Learning Development Guide
- Learn about training configuration and monitoring → Reinforcement Learning Training Configuration — Submission and Configuration
- Learn about observability configuration, trajectory viewing, and training metrics → Observability Configuration and Metric Reference for Reinforcement Learning